DO NOT MISS
>>Follow our Facebook page for updates! >>Join our Craftwell Design Team: Apply Now!
Showing posts with label Sharpie. Show all posts

June 9, 2023

Airbrush Pattern Planter

Happy Friday!!

Katie here with another fun airbrushed planter project. Great project on your own or with kids.

Also could make for a nice gift with a plant.


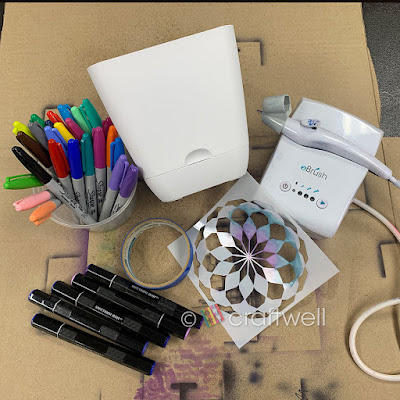
Materials

Craftwell eBrush Airbrush System

Sharpie markers

Spectrum Noir markers

Medium size plastic planter from Target

Pattern stencils from Amazon

Painter's tape

Disposable gloves (optional)


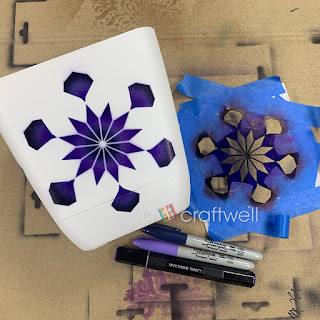
I kept it simple by just using one stencil and keeping the colors in shades of blue and purple.

Very important: always test your colors before using to make sure it's what you want.

Since I didn't want to use the whole pattern design, I use the painter's tape to cover up the parts I didn't want and position however I want. That's the fun part, you can create however you want and wherever on the planter.

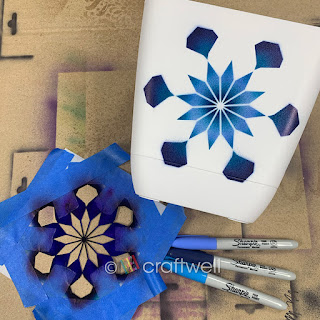
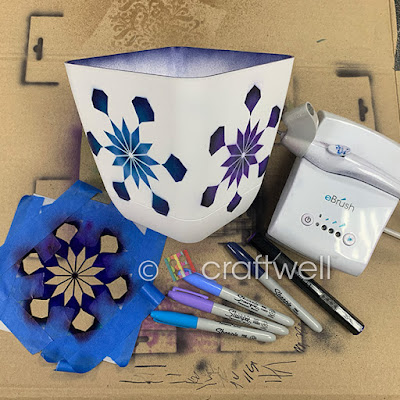
Went with the idea of positioning the pattern differently and making gradients with the colors I chose as well. Below you can see how they came out.


To add a little something, I airbrushed the inside of the planter and you could do the same or even make a pattern there as well.


I hope everyone liked my planter project and got inspired.

Until next time!

- Katie

April 7, 2023

3D Flower Bouquet

Hi All!! 

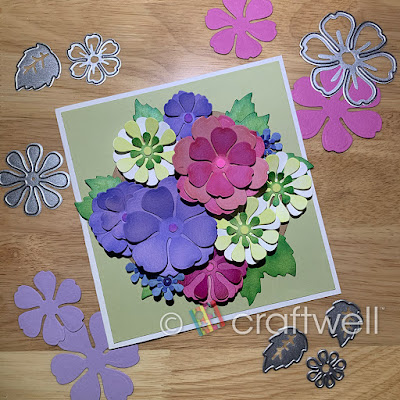
Katie here with my 3D flower bouquet card and can be used for any occasion.


Materials

Craftwell eBosser

Craftwell eBrush Airbrush System

Sharpie markers

Flower die set from Amazon

Nail Art pieces (used the circles)

Cardstocks

Glue gun

Elmer's glue stick


The flowers and colors got inspired by spring flowers I had found on a google search when I needed some ideas. You can do the same.

First, I used the eBosser to cut out all the different flower shapes with different cardstocks that I picked out.

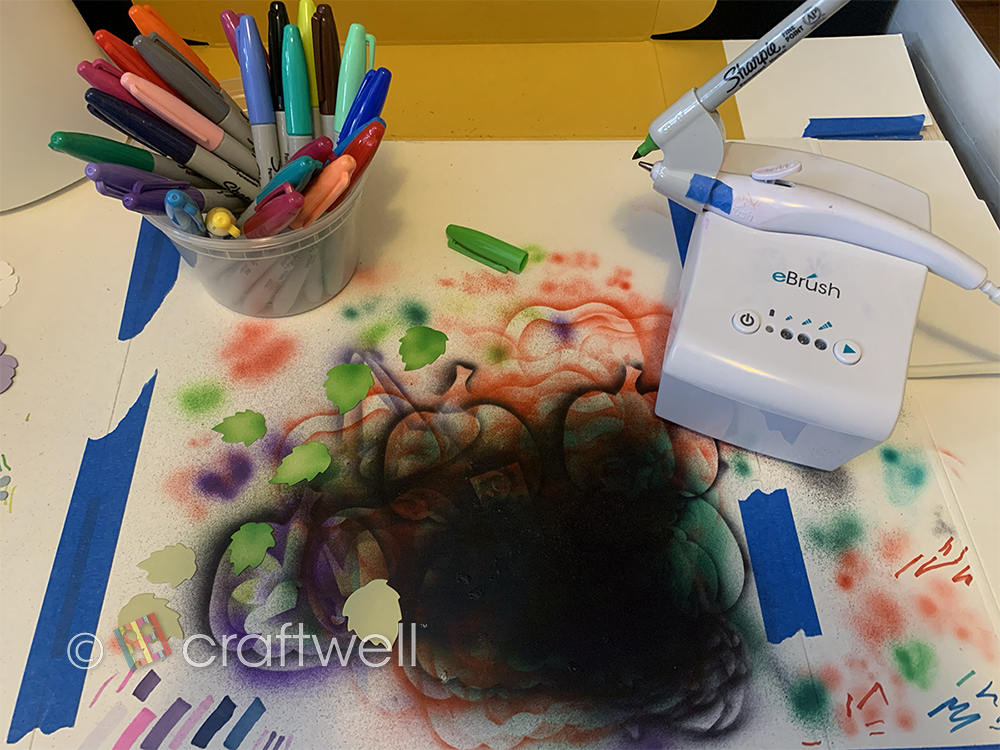
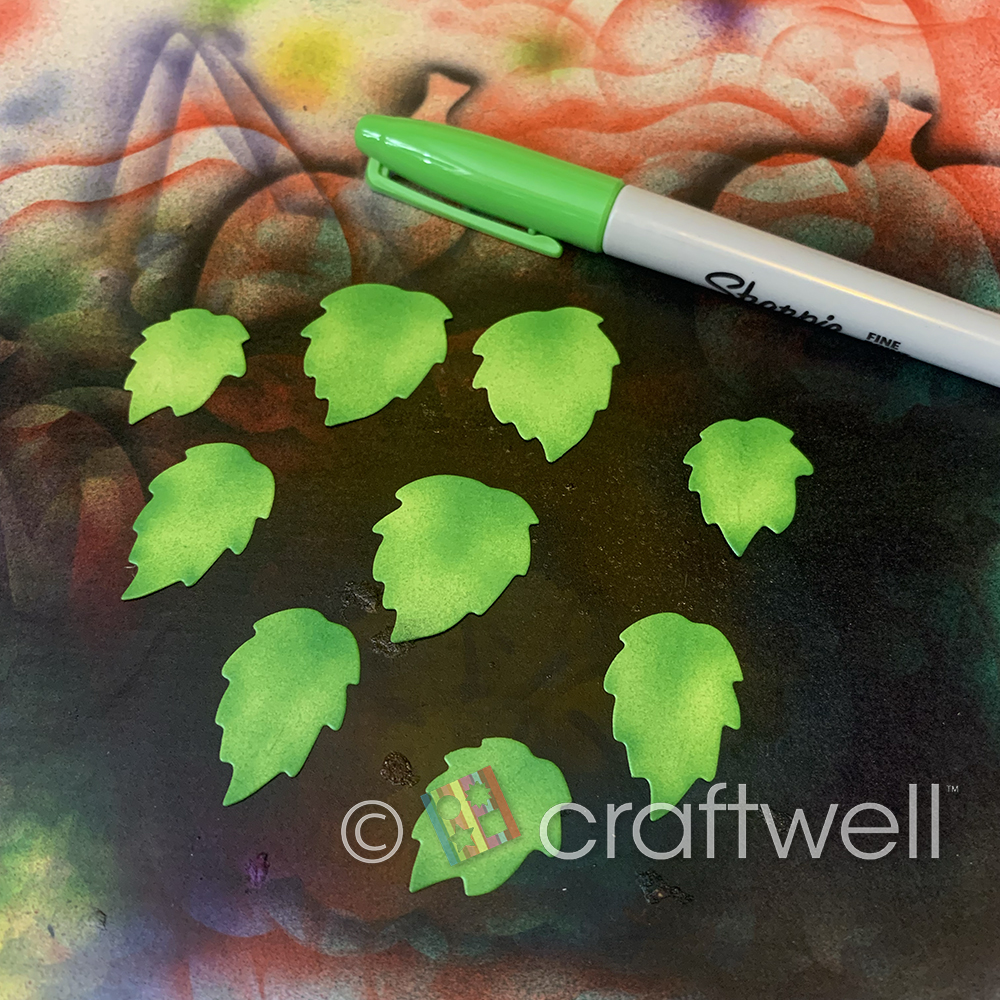
Used the eBrush and Sharpies to color the flowers and leafs.


I had fun playing with the position of the flowers and placing them as desired. 
When placing the flowers near each other, I wanted to have them overlapping each other and made little cardstock cylinder pieces to give some flowers different heights. 
You'll be able to see what I mean in the photos below:


What do you think? 
This card can be used for Birthdays, Anniversary and even Mother's Day.
I hope you all liked my project and got inspired. Until next time!

- Katie


May 4, 2022

Airbrush Sneaker

 Hi everyone! 

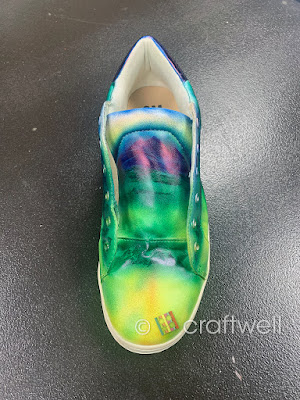
It's Katie with another project and I finally got a chance to airbrush the other sneaker.

I got to brainstorming on what could compliment the other airbrushed sneaker, so I decided on a landscape around the sneaker. 


Materials:

Craftwell eBrush Airbrush System

One used sneaker

Sharpie marker adapter

Sharpie markers (used about 7 colors)

Painters tape

Gloves


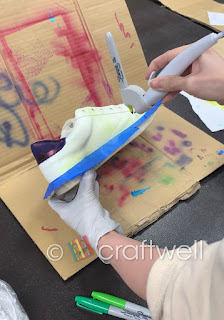
First thing, I lined the bottom of the sneaker that I don't want to airbrush with the painters tape.

I airbrushed free-hand and only had a photo as a reference. But if need assistance, you can always take a pencil or pen and do a rough drawing onto the sneaker. If you never used the eBrush, I would suggest you test it out on paper and get familiar with it before airbrushing anything.

How I started off with airbrushing was starting with light to dark colors, and free-handed all the smaller details such as the mountains and trees. 

*When airbrushing, it's best to work on top of a piece of cardboard or something so you don't stain your workplace.


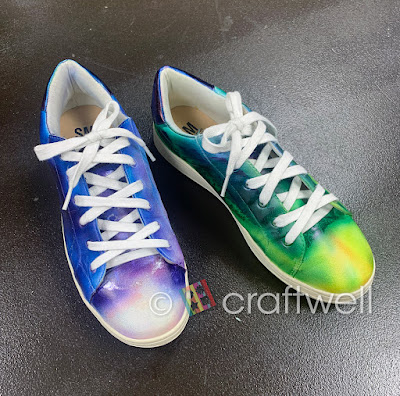
Here is the finished product:


Here's both finished sneakers:


In case you missed my post for the other sneaker: 


Hope you all enjoyed my project and was inspired. Until next!!

- Katie

April 15, 2022

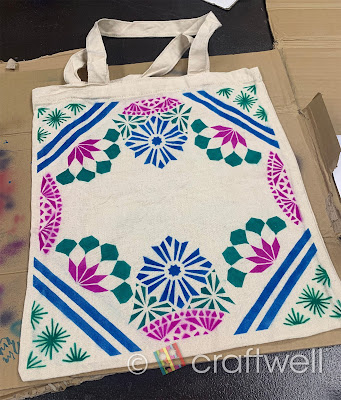
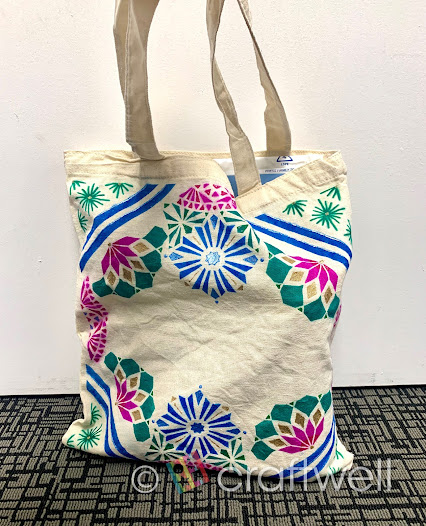
Airbrush Tote Bag

 Hi everyone!

Katie here with another project using the eBrush Airbrush System and anyone can do.

I'm those type of people who brings a reusable tote bag with me everywhere and I thought it would be find to customize my own. This is a fun project for all ages.


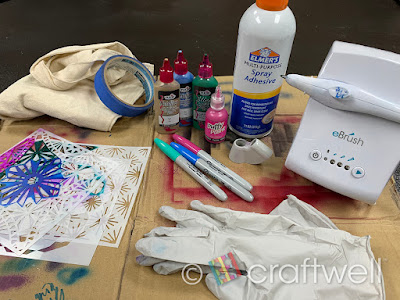
Materials:

Craftwell eBrush Airbrush System

Sharpie Markers

Blank Canvas Tote Bag (I got mine from a 99 cent store)

Variety of stencils from Amazon

Tulip Dimensional Fabric Paint - Metallic Blue, Metallic Gold & Slick Leaf Green

Puffy Paint - Red Violet

Scotch 3M Painters Tape

Elmer's Multi-Purpose Spray Adhesive

Gloves

Cardboard pieces


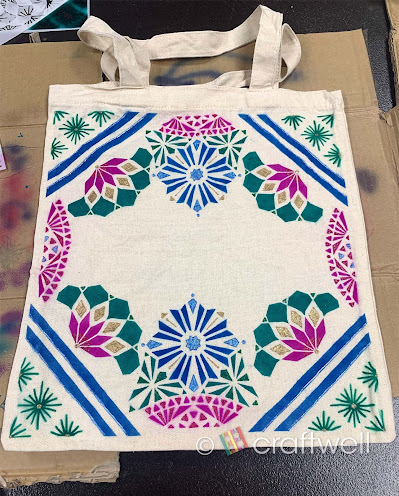
First thing, I chose 3 different stencil designs I can play around with and work well together. Also chose 3 different marker colors and 4 fabric paints that compliment each other.

Take a piece of cardboard, placed it inside the tote bag so the colors don't bleed through and gives me a somewhat flat surface to work on. Taking the scotch painters tape, I line a border and other places I don't want to get airbrushed. *Make sure tape is close to the tote because any open gaps will not give you clean lines. 

Taking my first stencil, I used the painters tape to hide some of the details I don't want to airbrush onto the bag. I used the spray adhesive to help keep the stencil in place which worked better than taping it to the bag because when I taped down the stencil, it wasn't able to hold down the intricate details and you won't get clean lines. I only realized this after it happened to me and you might be able to see it on the tote bag. Trial and errors. *Make sure to read the instructions on the spray adhesive can before using.


With each stencil, I alternated with each marker and had fun with each placement. When that was done, I did the same with the fabric paint. Make sure to let it dry or it will smudge and again I did learn the hard way 😅


Hope you all enjoyed my project. Until next time!!

Katie


March 4, 2020

Make Your Own Luck

Hi Everyone!!

Katie here and it's been a while since my last post.
For St. Patrick's Day slowly approaching, I wanted to try something
different and I hope you all like it :)

So who doesn't want a bit of luck or look like you're having some?
Well I've made my own four leaf clove and you can too with the materials I used. ☘


Below is the items I used and some of it are some leftovers from other projects.


Left to right: Ashland clay pot 4",  Flora Craft's foam half ball, floral tape, green wire, two green shades of Sharpie markers, light green crepe paper from Lia Griffith, Ashland moss variety and Craftwell's eBrush airbrush system


1. I started off by cutting out 4 pieces of 1.75" x 0.75" from the crepe paper and 
shape them as hearts.  With the cut-outs, gently stretch the crepe paper and should look like a full shape heart. Then airbrush them a little with the light green shade.


2. The fun part is attaching the leaf together, but it can get a bit difficult if you have 
never made paper flowers. You want to do is it take the ends of the leaves and twist them together. 

3. Then fold the wire on the end where you made the twist, continue twisting and trim as desired. Wrap floral tape around exposed wire.

4. I noticed the half foam ball kind of stuck out a little, so I shaved off some of it at the flat side then placed it into the clay pot. Now you can place your finished four leaf cover into the foam ball.

5. So I didn't use all the different moss the bag came with, but just used some of it and I think it looked pretty good for someone who has never used it haha.

6. I decided to airbrush my four leaf clover one more time with a dark shade of green in the center and a little on the edges.


Here's I have my very own four leaf clover and placed it by my window.  
The best part about this project is you can make adjustments, add extras or even little flowers.

Hope you all enjoyed my post and got inspired 😀

March 29, 2017

Springtime Butterfly Ornament by Mitsyana Wright another blast from the past!

 Mitsyana Wright 


Hello, Crafty Friends!! It the holiday season and it's time to get those crafty gifts going. Today I have a beautiful butterfly ornament to share. It doesn't only serve as tree decor but as a gorgeous keepsake too.

Supplies Used
Cut'.n'boss (Craftwell)
Teresa Collins Pocket Dies- TodayThankful (Craftwell)
eBrush (Craftwell)
Sharpie Markers- Green & Lime Greem
Spectrum Noir Markers- CG3, GB1, GB2, TN3
Acrylic Ornament
Hemp Twine
Cardstock- White & Green
PITT Artist Pen B (Faber-Castell)
Gesso (Liquitex)
3D Lacquer 
Iridescent Shreds (Optional)


I started off by using my stem and small leaf die from the Teresa Collins Thankful Pocket Die set to cut out white and green cardstock. I usually try to cut out more die cuts than I need... just in case I have an accident or two (or three). LOL

To cut wafer dies I used the following sandwich combination in my Cut'n'boss machine:

From Bottom to Top
D PLATE
A PLATE
B PLATE
DIE
PAPER
A PLATE


Then I added some shading with the help of my ebrush machine and markers. With tiny pieces like these shading and coloring can be difficult. sponging and inking can run the risk of damaging your die cuts. With the ebrush the color sprays on and virtually eliminates the need for vigorous rubbing.

I ebrushed my green leaves with a lime green and regular green sharpie. And my stems in a lime green sharpie then Spectrum Noir markers in CG3 and TN3.


Then I ran my leaves and stem through my 3" Xyron Sticker Maker... turning my pieces into stickers.


Then arranged them onto my ornament... concentrating on the bottom and top of the ornament. I used 6 leaves for the entire top and 8 leaves for the entire bottom. And used 4 stems on the top and 4 stems on the bottom.


I cut out two butterflies for the Teresa Collins Today Pocket Dies set. ebrushed them in Spectrum Noir GB1 and GB2 and hand drew the details with a PITT Artist Pen (B) and used gesso and a toothpick to add the small white dots.


After they were done drying, I ran them through my 3" Xyron Sticker Maker and applied the onto each other. These butterflies are symmetrical and if flipped mirror itself perfectly. Now my butterfly is double-sided. 

I gently curl my butterfly's wing in and pass it through the hole of the ornament. Once the butterfly is inside you can open/ widen the wings by gently pushing on them with a chopstick or paintbrush. Add shreds if desired.

I wrapped twine around neck of the ornament and glued on a bow I made with even more hemp twine.

And here is my finished ornament...


I hope you enjoyed today's project.

And Happy Holiday Crafting!!

~Mitsy


For more inspirational projects please visit my personal blog at:

March 14, 2017

eBrush, ceramics, stencils & Sharpies® by Guest Designer Andrea Webster


Andrea here and I'm excited to make a second appearance as a guest blogger again.  If you read my last post, you'll know that I enjoy seeing what I can find at a local thrift store. I found some lovely ceramic pieces I knew I could have some fun with. So let's get started

You'll need:
index cards
Sharpies®
punches
glue stick
masking tape
ceramic dishes
alcohol/paper towel
eBrush and adapter
2017-02-21 10.52.34 copy
Create the stencils by gluing 2 index cards together.  Using the desired punches, create your stencil

Using the alcohol and paper towel, clean the surface of the dishes to remove any oils or dirt.  Let dry. 
Adhere the stencil to the dishes -- using masking tape. 
Seat the marker in the eBrush and spray your design. 
Carefully remove the stencil.  Your marker may be a little wet/sticky.  Set aside and let dry overnight. 
To heat set the color, bake on a cookie sheet at 275 degrees for about 60 minutes.  Let the dishes come to room temperature before using. Dishes painted with Sharpies should not come into direct contact with food. 
2017-02-21 10.52.54 copy


Enjoy!  Hoping you'll have some creative fun very soon.

January 16, 2017

Welcome Guest Designer, Sonja Bakonyi!

Every year, I make a special Mickey or Minnie card for a relatives birthday. She collects Mickey everything. When I say collect, I mean they have houses full of Mickey collectibles! One of my childhood memories is touring the houses and being in awe.

This year is a little bit more special to get her out a card as some recent health concerns have come alight.

Which brought me to the inspiration to do a sunburst as the card base. I wanted it to be multi colored though, but smooth and no seems. Out my Craftwell eBrush came.

 After selecting my paper pallet, I was able to select my eBrush pallet as well.

To create the sunburst, I cut the pattern I wanted out on contact paper to make a template. I used contact paper for two reasons.

  1. It provides a more secure coverage and cleaner lines than just using a paper template or often even a plastic template
  2. It peels off of the paper smoothly and leaves no tack or torn paper


This is what it looks like before peeling off the  contact paper

The fun part is getting to airbrush any pattern onto my project. Since this is a starburst, I decided to go with the dark color in the middle and work my way out.


The final product is just what I wanted so I didn't have to redo it!

Now on to my favorite reason to have an eBrush. Detailing. You can take an ordinary cut of paper and amp it up with highlights, low-lights, or just a dab of extra va-va-voom. 

Take Mickey's pants for instance. Above is the before eBrush and below is the after eBrush. It looks like a mess at first, but take away the extra paper and it leaves a nice highlight around the edges.

Shoes, pants, face, eyes, really any object can be enhanced with this magical little machine!  

I also use my eBrush to dust off the final product to get rid of any extra little fuzzies, glitter, or particles that I don't want on my project. Just leave the marker out and blow away. 

Once the pieces are all airbrushed and ready for assembly, the final product pops on the page.

 This card is an easel card just for a little extra fun. 

 The balloons float off the page on purpose. The eBrush actually makes this project pop and look as if it was a printed object. Other than the sentiments, everything is hand pieced though!


A few pop up tabs under the inside sentiment helps keep the easel portion in place.

Materials Used:
Cardstock
  • Red 
  • Yellow
  • Black
  • White
  • Tan
Craftwell eBrush
Sharpie Markers
Cutting Machine with software
Aleene's Original Tacky Glue
Teresa Collins Mega Runner

'
 
Copyright © 2014 Craftwell Blog. Designed by OddThemes - Published By Gooyaabi Templates