Hi,
This is Veronica from vicky's scrapping passion, sharing with you my next post for Craftwell.
Happy Cinco
Vicky Tovar
Pink & Main
Watch UsHi,
This is Veronica from vicky's scrapping passion, sharing with you my next post for Craftwell.
Hello everyone! This is Berina here today with a elegant floral card.
I love these Calla Lilies from Heartfelt Creations. I have had them for quite some time now. I stamped and die cut the flowers and leaves and colored them with inks. Then I used my flower shaping tools to give them some definition. I colored few Q tips with yellow ink for the center part of the calla lilies. To assemble them, I used hot glue gun. I also stamped and die cut some fillers from Heartfelt Creations - Tulip Vase & Fillers. For the card base, I used a 5x7 Ivory card base. I die cut few frames from the Heartfelt Creations - Royal Elegance Frames on gold card stock. The sentiment is from Just Rite stamps. This is one of my favorite sets for sentiments, mainly because of the font. I also die cut a design from Heartfelt Creations - Swirly Accent Spray and added them to the card.
How do you like my card today? Please do let me know. Thank you for stopping by. Have a great day!
- Berina
Hi everyone!
It's Katie with another project and I finally got a chance to airbrush the other sneaker.
I got to brainstorming on what could compliment the other airbrushed sneaker, so I decided on a landscape around the sneaker.
Materials:
Craftwell eBrush Airbrush System
One used sneaker
Sharpie marker adapter
Sharpie markers (used about 7 colors)
Painters tape
Gloves
I airbrushed free-hand and only had a photo as a reference. But if need assistance, you can always take a pencil or pen and do a rough drawing onto the sneaker. If you never used the eBrush, I would suggest you test it out on paper and get familiar with it before airbrushing anything.
How I started off with airbrushing was starting with light to dark colors, and free-handed all the smaller details such as the mountains and trees.
*When airbrushing, it's best to work on top of a piece of cardboard or something so you don't stain your workplace.
Here is the finished product:
Hi,
This is Veronica from vicky's scrapping passion, sharing with you my next post for Craftwell.
![]() |
From the Grapic 45 blog |
Hi everyone!
Katie here with another project using the eBrush Airbrush System and anyone can do.
I'm those type of people who brings a reusable tote bag with me everywhere and I thought it would be find to customize my own. This is a fun project for all ages.
Materials:
Craftwell eBrush Airbrush System
Sharpie Markers
Blank Canvas Tote Bag (I got mine from a 99 cent store)
Variety of stencils from Amazon
Tulip Dimensional Fabric Paint - Metallic Blue, Metallic Gold & Slick Leaf Green
Puffy Paint - Red Violet
Scotch 3M Painters Tape
Elmer's Multi-Purpose Spray Adhesive
Gloves
Cardboard pieces
First thing, I chose 3 different stencil designs I can play around with and work well together. Also chose 3 different marker colors and 4 fabric paints that compliment each other.
Take a piece of cardboard, placed it inside the tote bag so the colors don't bleed through and gives me a somewhat flat surface to work on. Taking the scotch painters tape, I line a border and other places I don't want to get airbrushed. *Make sure tape is close to the tote because any open gaps will not give you clean lines.
Taking my first stencil, I used the painters tape to hide some of the details I don't want to airbrush onto the bag. I used the spray adhesive to help keep the stencil in place which worked better than taping it to the bag because when I taped down the stencil, it wasn't able to hold down the intricate details and you won't get clean lines. I only realized this after it happened to me and you might be able to see it on the tote bag. Trial and errors. *Make sure to read the instructions on the spray adhesive can before using.
With each stencil, I alternated with each marker and had fun with each placement. When that was done, I did the same with the fabric paint. Make sure to let it dry or it will smudge and again I did learn the hard way 😅
Hope you all enjoyed my project. Until next time!!
Katie
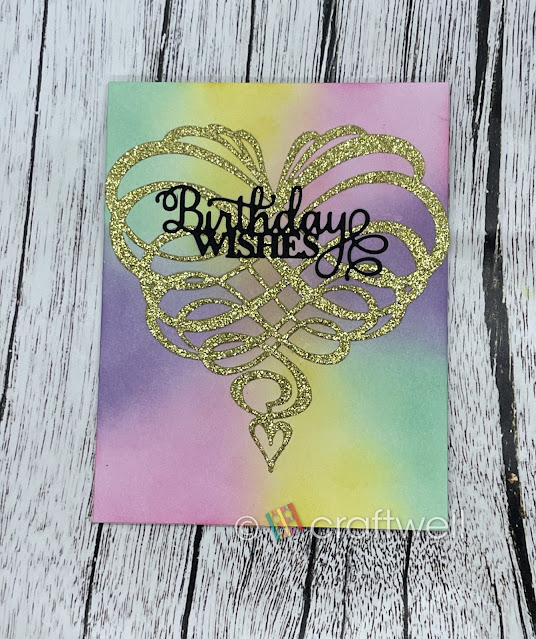
Hello everyone!! This is Berina here today with a simple card that can be made in batches.
It's nearing the end of school year and I've been experimenting with quick and elegant cards to give to the teachers as sets. This is on of the designs. I used the Crafters Companion Victoriana die for this card. For the sentiment, I chose the Altenew Fancy Hello, which pairs so elegantly with the Victoriana die. I used my SNAP to die cut them. It's pretty simple to die cut and assemble the card. I could die cut all at once and then assemble them. That would be pretty quick and easy I think.
What do you think about this card? Do let me know. Thanks for stopping by. Have a great day!
- Berina
Hi,
This is Veronica from vicky's scrapping passion, sharing with you my next post for Craftwell.