DO NOT MISS
>>Follow our Facebook page for updates! >>Join our Craftwell Design Team: Apply Now!
Showing posts with label design team. Show all posts

January 20, 2023

Hot Air Balloon Plant Accents

Plants looking a little lonely by themselves?

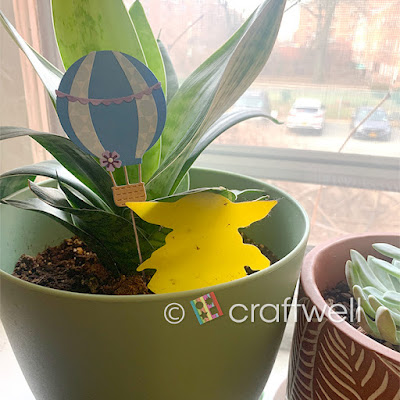
I have just the thing! Made these cute little hot air balloons for my indoor plants.

A nice and simple project anyone can do, and also great for kids.


Materials

Craftwell eBosser

Sizzix ThinLit - Hot Air Balloon Die Set

Leftover cardstock paper

Hot glue gun

Wooden skewers


I'm the type that likes to use what leftover cardstock paper or scraps for my projects. So I figured I do that for this project since the pieces were going to be pretty small. 

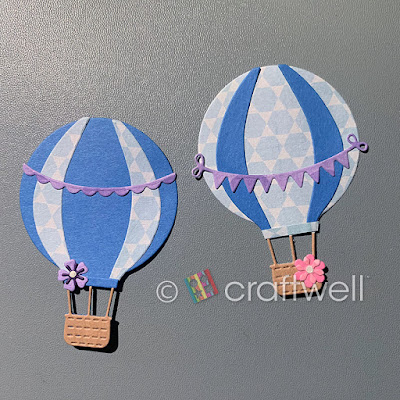
I started off using both patterned and solid color paper of a blue shade for the balloon part. The other pieces I chose purple, craft paper and pink. Some pieces were also leftover from other project (like to keep them just in case).

Fun part! Assemble all pieces together and below you can see a photo of the hot air balloons before attaching the wooden skewers.
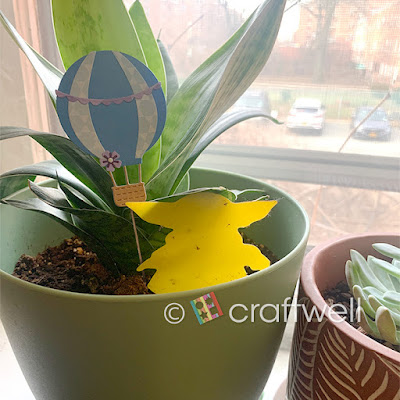


Finished project!


Hope you all liked my project and got inspired!

Till next time.

- Katie


August 26, 2022

Happy Women's Day!

Hi everyone! 

Katie here with another post and wanted to make something for "Women's Equality Day".


Materials

Craftwell eBosser

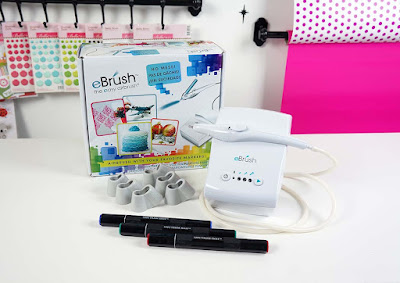
Craftwell eBrush Airbrush System

Spectrum Noir markers

Flower cutting dies from Amazon

Alphabet cutting dies from Michaels

Cardstock (whatever I had leftover)

Small color foam circles from Amazon


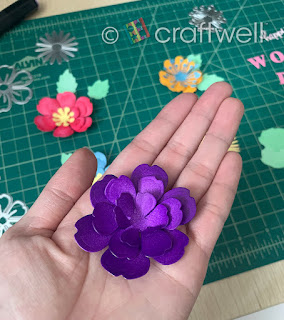
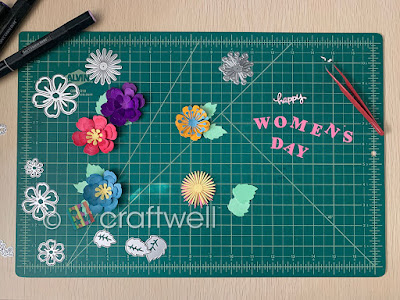
Some colors I didn't have so I used my handy eBrush with Spectrum Noir markers to airbrush the colors on plain white cardstock and die-cut the flowers out. Below you can see what they look like and came out pretty well.


Start assembling all the flower pieces together, which you can see below:


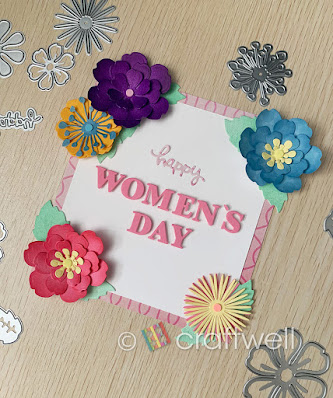
Here's the finished product! 


I hope everyone enjoyed my project and celebrates Women's Equality Day your way.
Until next time!

Katie

August 1, 2022

Airbrushed galaxy cake

Hello,

Today I'm here with a galaxy theme cake decorated using Craftwell eBrush

I began with baking cake and frosted completely using colors blue, pink, purple, black to bring the galaxy effect. I also made planets using fondant.  

To bring more galaxy effect, I have used Craftwell eBrush and siphon kit with silver luster dust mixed with lemon extract. Then airbrushed then and there on the cake to bring sparkly effect. 

Attaching my work for reference. 


Thank you,

Lavanya Ravindran 

July 8, 2022

Airbrush Photo Frames

 Hi everyone!

Katie here with a fun project of making custom airbrushed photo frames to which can be great gifts. 

They can be made custom to whoever you give it to or maybe just for yourself 😉


Materials:

Craftwell eBrush and eBosser

Sharpie markers

Rectangle square frame cutting dies from Amazon

Sizzix Thinlit Hot Air Balloon (used the flower dies)

Bristol board paper

Double-sided square foam tape

A variety of cardstock


Chose 2 sets of Sharpie markers and used Craftwell eBrush to airbrush on Bristol board paper. 
Took the airbrushed papers and die cut into them with the rectangle square frames.


Used the eBosser to die cut into my cardstock papers of flowers and stars, slowly started to assemble everything. 
I'll just say I would sometimes misplace the flowers since their so small 😂


Below are the finish project:


What's great about these is you can place them into actual photo frames and then gift it.


Get your very own eBrush Airbrush System from our shopping website!


I hope everyone enjoyed my project and put your own touch on it.
Until next time.

From Katie


June 16, 2022

Shimmering Pearl Cake

Hello everyone! This month I'm with a simple pearl shimmering cake.  I baked an 8 inch moist cake and covered it with cream shade fondant. The client asked for shimmering effect on cake. Hence I have used silver luster dust mixed with lemon extract and airbrushed using Craftwell eBrush & siphon kit.

Attaching the picture for reference. 


Thank you,

Lavanya Ravindran 


June 7, 2022

National Chocolate Ice Cream Day

 Hi everyone!

Today is National Chocolate Ice Cream Day!! 

Who doesn't love them some ice cream especially when it's chocolate?

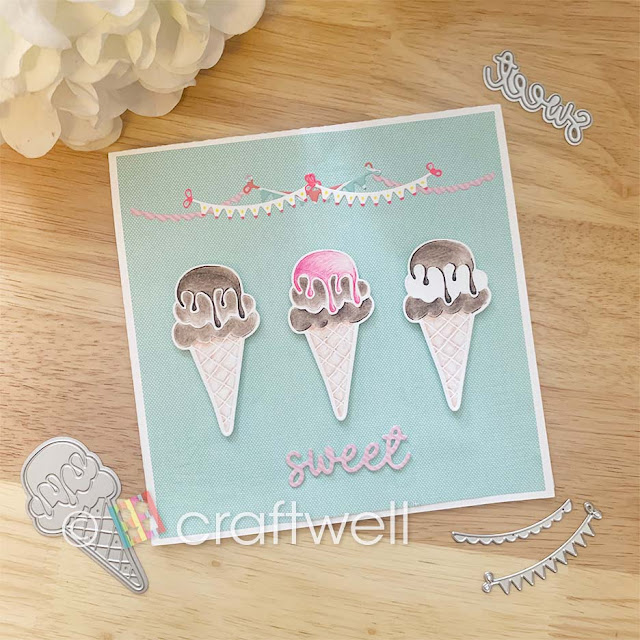
I know I do! I just couldn't pass on the opportunity to make a card for today.


Materials:

Craftwell eBosser
Ice cream from a Summer Treats Die Set (don't remember the brand)
Sizzix Thinlits Die Set (used the banners)
Sweet word die from KSCRAFT
Prismacolor Colored Pencils
Staedtler Fineliner Markers
Small pad of pattern paper (from Michaels)
Double-sided foam stickers

Used the ice cream dies and cut into some white cardstock and hand colored each ice cream. Took some of the pattern paper and used the banners to cut into them. Did the same with the sweet word and assembled everything together. What great about this card is that it can be used birthdays or even as a thank you card. 


Hope you enjoyed my project! Until next time.

From
Katie

April 15, 2022

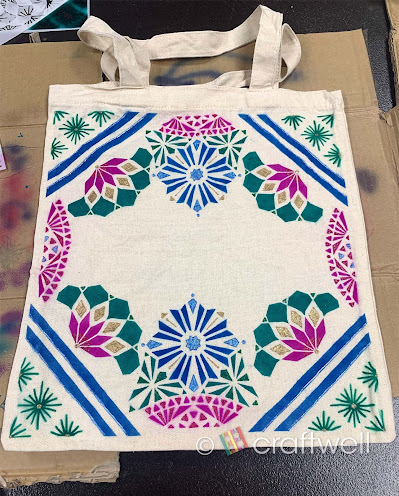
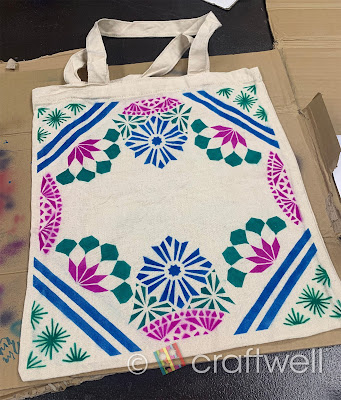
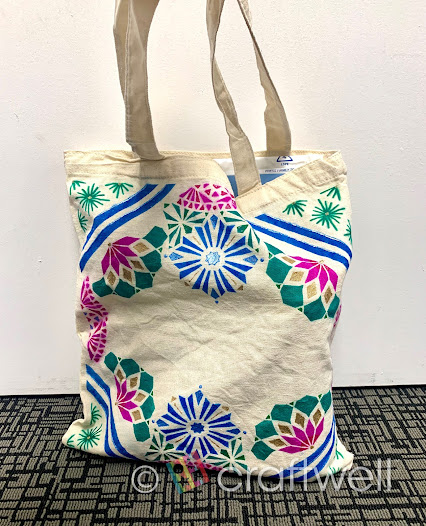
Airbrush Tote Bag

 Hi everyone!

Katie here with another project using the eBrush Airbrush System and anyone can do.

I'm those type of people who brings a reusable tote bag with me everywhere and I thought it would be find to customize my own. This is a fun project for all ages.


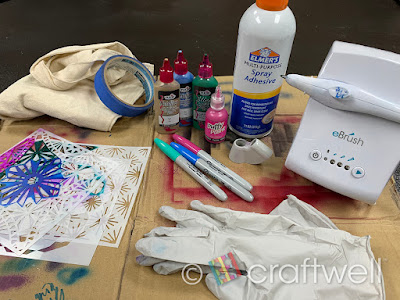
Materials:

Craftwell eBrush Airbrush System

Sharpie Markers

Blank Canvas Tote Bag (I got mine from a 99 cent store)

Variety of stencils from Amazon

Tulip Dimensional Fabric Paint - Metallic Blue, Metallic Gold & Slick Leaf Green

Puffy Paint - Red Violet

Scotch 3M Painters Tape

Elmer's Multi-Purpose Spray Adhesive

Gloves

Cardboard pieces


First thing, I chose 3 different stencil designs I can play around with and work well together. Also chose 3 different marker colors and 4 fabric paints that compliment each other.

Take a piece of cardboard, placed it inside the tote bag so the colors don't bleed through and gives me a somewhat flat surface to work on. Taking the scotch painters tape, I line a border and other places I don't want to get airbrushed. *Make sure tape is close to the tote because any open gaps will not give you clean lines. 

Taking my first stencil, I used the painters tape to hide some of the details I don't want to airbrush onto the bag. I used the spray adhesive to help keep the stencil in place which worked better than taping it to the bag because when I taped down the stencil, it wasn't able to hold down the intricate details and you won't get clean lines. I only realized this after it happened to me and you might be able to see it on the tote bag. Trial and errors. *Make sure to read the instructions on the spray adhesive can before using.


With each stencil, I alternated with each marker and had fun with each placement. When that was done, I did the same with the fabric paint. Make sure to let it dry or it will smudge and again I did learn the hard way 😅


Hope you all enjoyed my project. Until next time!!

Katie


March 16, 2022

eBrush Fun

 Hi everyone!

Katie here with a fun project using Craftwell's eBrush and markers. I'm not an advanced eBrush user, but I can still utilize the marker adapters and create something pretty. 


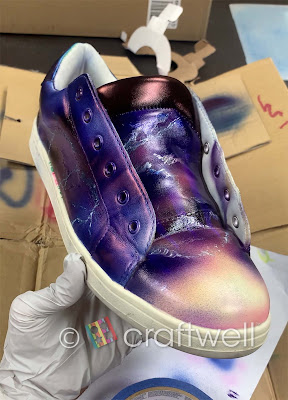
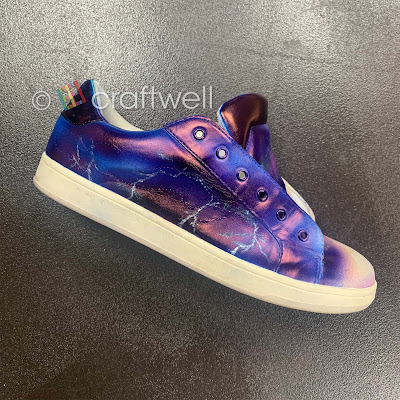
I took used pair of sneakers, which had some stitched on patches and doodles on it. I only airbrushed one sneaker and decided to save the other side for another time.


First, took off the patch with seam ripper which you can find at a Michaels or something. I used was rubber alcohol with a paper towel to clean the sneaker the best I can.


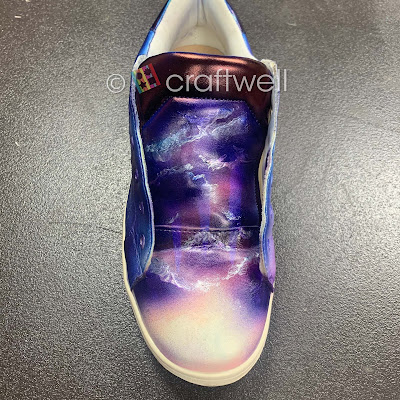
For the design, I was inspired by sunsets and storms. I thought some darker shades will help hide the doodles made on the sneaker. One side of the sneaker and tongue will have a sunset, and the last side will have a thunderstorm. To help, I went onto google for some image ideas and gathered my materials.


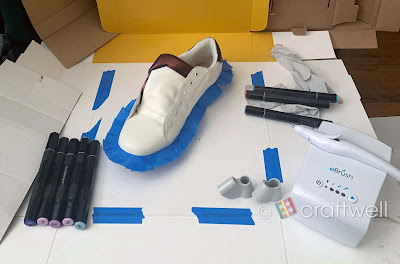
Materials

Craftwell eBrush

Spectrum Noir marker adapter

Spectrum Noir markers

Tulip Metallics - White fabric paint

Painter's tape

Gloves

Cardboard


Next step, taped the top edge of the sole to which I want to keep white untouched. Took some cardboard I had lying around to line my area and placed a small piece in the shoe so I don't any color on the inside. From there, I started off with lighter shades then worked myself up to the darker ones. 

I used the white fabric paint to create lightning bolts and clouds.


Here I have my finished project:


Hope you all enjoyed my project and it inspired you.

Till next time!

- Katie

March 7, 2022

Bumble Bee Birthday

 Hello everyone! This is Berina here today, with a shaped birthday card.

I made a hexagon shaped card for my son's 1st birthday. We decided to do a bumble bee theme for his first birthday. I love making the banner and decor for my kids birthdays, this one was no exception. I made this birthday card and tag to go with his gift. I used the Create and Craft Hexagon dies to cut the shaped card. The bumble bee and the other a hexagonal lace piece are dies from Spellbinders. I die cut all of these on my SNAP. The sentiment is from Inspired By Stamping. I added a few drops of Nuvo in black. Here's a close up of the card:


The tag uses similar elements, it's just smaller in size.


Here are a few pics of the decor and the cake that I made, from the day.


How do you like my creation today? Do let me know. Thanks for stopping by today. Have a great day!

- Berina

February 7, 2022

Hyacinth

Hello everyone!! This is Berina here today, with this floral card. I'm ready for Spring, after this past week of snowstorm and cold weather!!

I used the dies Fern, Stained Glass Window and Hydrangea dies from Spellbinders, cut on my Craftwell SNAP. I cut multiples of the flower in 2 different shades and added some color to the center of the flowers with Copics. I shaped the individual flowers with flower shaping tools.

I took a sheet of same colored card stock and arranged the flowers on it like a hyacinth.

I cut around the outline after adhering the flowers down. 

I made 2 of these and adhered it near the Stained Glass Window die cut. The sentiment is from a old Just Rite stamp set - one of my favorites!

How do you like this card today? Please do let me know. Have a great week and stay warm!

- Berina

January 14, 2022

Air brushed Gold cake

Hello everyone!

I'm excited to share my new cake of this year which is decorated using Craftwell eBrush and siphon kit

It's simple to frost the cake in gold if you have airbrush handy. I began with baking a 6 inch tall cake and frosted with white buttercream. Then airbrushed with edible gold color using both the eBrush and siphon kit.

Here is the complete glittery look of the cake: 


Thank you

Lavanya Ravindran 

December 31, 2021

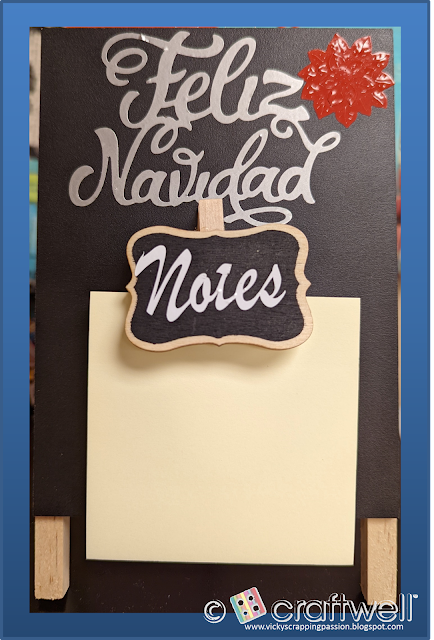
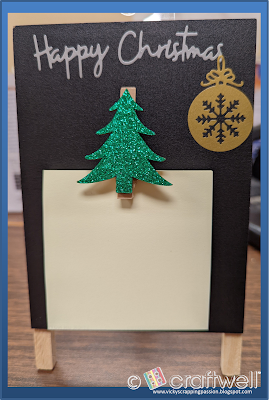
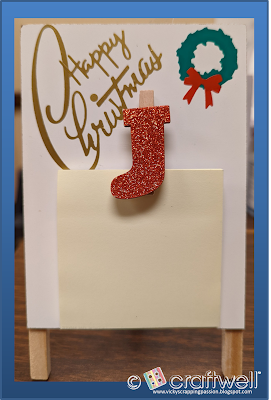
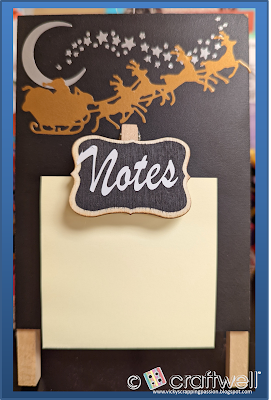
DT: Christmas Notepad Holders Using Vinyl Die Cuts


Hi,

This is Veronica from vicky's scrapping passion, sharing with you my next post for Craftwell. 
For this post, I made some little, easy to sell gifts for the Christmas Bazzar at our parish for the AHG Booth:


I found some cute mini chalk (white) board easels at the Dollar store and decided to decorate them with vinyl to make some cute Christmas themed notepads holders. As friend of mine told me how easy it was to use die to cut on vinyl, thus I decided to try this method instead of using my Cricut.

My friend was right, it was super easy, but it has a learning curve. Like using transfer tape to apply the shapes, and intricate designs might be more challenging. No heat setting needed for this project.

In general, it was a fun experience and I totally recommend it.


Craftwell Tools

SNAP die cut machine


Other Companies:


Dies: TH Sizzix, Crafter Companion (Ornament and Happy Christmas sentiment), Cherry Lynn Designs.
Chalk board Cloth Pins, Dollar Tree
Glitter Christmas shapes Cloth Pins, Dollar Tree
Various colors vinyl
Cricut cut "Notes" words
Note Pads, Dollar Tree


 I hope you enjoy it this fun project and please follow my blog as well: vicky's scrapping passion.


Happy New Year

Vicky Tovar


December 17, 2021

Christmas Ornament

 Hi Everyone!

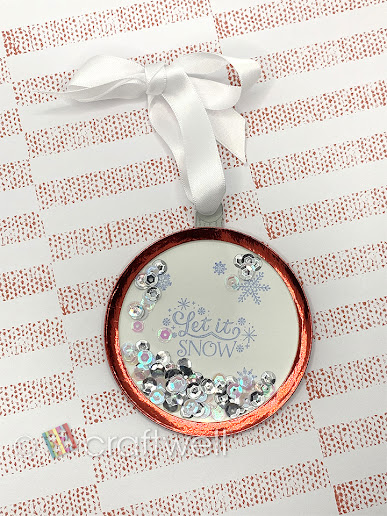
Christmas is closing in and I thought it would be fun to make a shaker ornament to place on your tree.

Or it can be used as a gift tag as well.


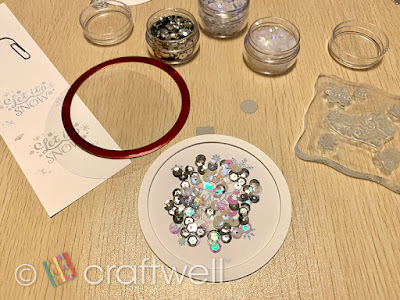
MATERIALS:

Craftwell's eBosser

Metallic Red, White and Grey Cardstock from Michaels

Hygloss Overhead Projector Sheets Acetate Transparency Film

Waffle Flower Nesting Basics Dies Bundle from Amazon

Christmas Themed Stamps from Michaels

Sequins from Amazon

ColorBox Assorted Colors Ink Pad

Single Hole Punch

White Ribbon

Clear Glue


First, I chose one of the large round dies and cut-out a base layer. 
Then took both the previous large die and another round die that was 2 size smaller to cut about 6 layers with the white cardstock, and one layer with the metallic red cardstock. I die-cut a small square and circle with the grey cardstock.

Taking the base layer, I stamped Christmas words and additional decorations together. 

When gluing the layers on the base, on the 3rd layer glue the grey square at the top and then glue circle near the edge of the square. Then continue gluing the remaining layers except the red one.

I added the silver, clear and white sequins and kept them in the center.

Cut and glue a round circle from the acetate film then take the red cut-out layer and also glue on.

While the layers are drying, punch a hole at the small circle then place ribbon through hole and tie a bow.

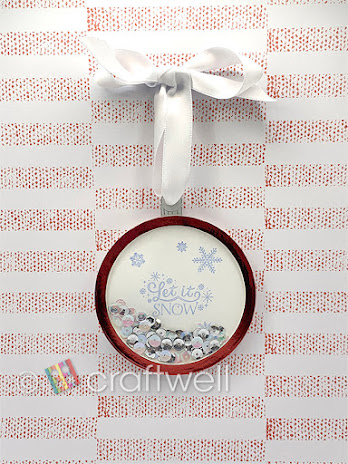
And there you have a Christmas Ornament thats also a shaker.


Hope you enjoyed my project! 

From Katie


December 10, 2021

Edible jewels

Hello everyone! This month I have come up with edible jewelry using Craftwell eBrush and siphon kit.

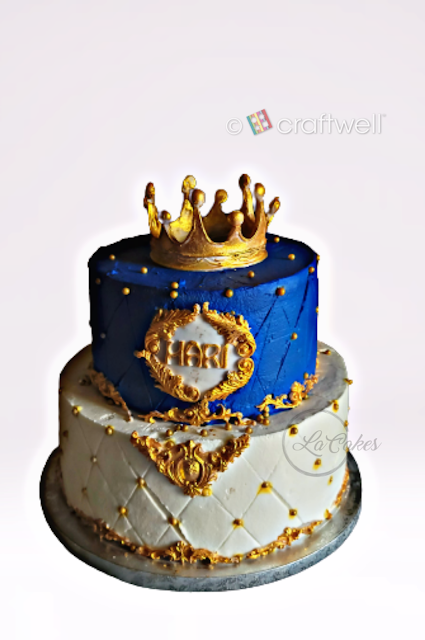
I baked a cake for prince theme birthday party and the theme requires edible gold crown and edible gold jewels to decorate the cake. I made fondant crown and jewels in fondant using silicon mold and then airbrushed using gold luster dust mixed with lemon extract with the help of Craftwell eBrush and siphon kit. Arranged the jewels after frosting the cake. 

Attaching the cake picture for reference. 


Thank you

Lavanya Ravindran 

'
 
Copyright © 2014 Craftwell Blog. Designed by OddThemes - Published By Gooyaabi Templates