DO NOT MISS
>>Follow our Facebook page for updates! >>Join our Craftwell Design Team: Apply Now!
Showing posts with label recycle. Show all posts

May 4, 2022

Airbrush Sneaker

 Hi everyone! 

It's Katie with another project and I finally got a chance to airbrush the other sneaker.

I got to brainstorming on what could compliment the other airbrushed sneaker, so I decided on a landscape around the sneaker. 


Materials:

Craftwell eBrush Airbrush System

One used sneaker

Sharpie marker adapter

Sharpie markers (used about 7 colors)

Painters tape

Gloves


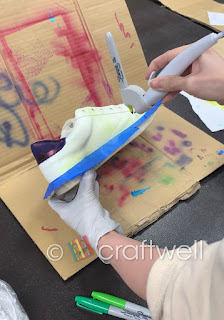
First thing, I lined the bottom of the sneaker that I don't want to airbrush with the painters tape.

I airbrushed free-hand and only had a photo as a reference. But if need assistance, you can always take a pencil or pen and do a rough drawing onto the sneaker. If you never used the eBrush, I would suggest you test it out on paper and get familiar with it before airbrushing anything.

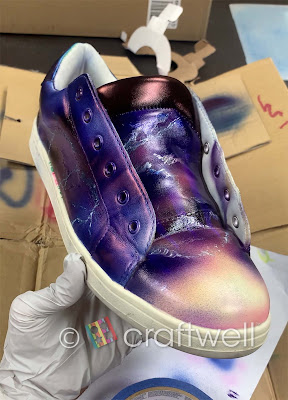
How I started off with airbrushing was starting with light to dark colors, and free-handed all the smaller details such as the mountains and trees. 

*When airbrushing, it's best to work on top of a piece of cardboard or something so you don't stain your workplace.


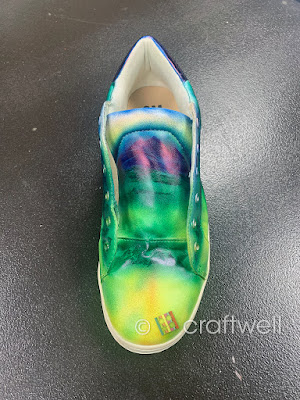
Here is the finished product:


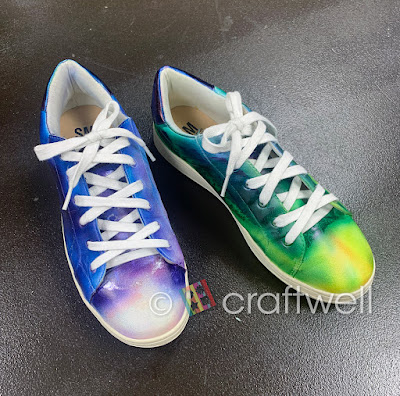
Here's both finished sneakers:


In case you missed my post for the other sneaker: 


Hope you all enjoyed my project and was inspired. Until next!!

- Katie

April 15, 2022

Airbrush Tote Bag

 Hi everyone!

Katie here with another project using the eBrush Airbrush System and anyone can do.

I'm those type of people who brings a reusable tote bag with me everywhere and I thought it would be find to customize my own. This is a fun project for all ages.


Materials:

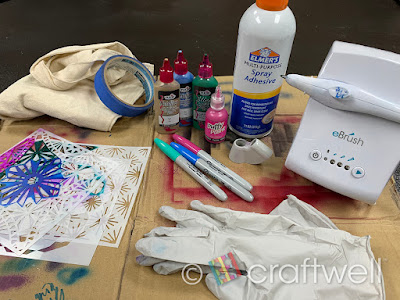
Craftwell eBrush Airbrush System

Sharpie Markers

Blank Canvas Tote Bag (I got mine from a 99 cent store)

Variety of stencils from Amazon

Tulip Dimensional Fabric Paint - Metallic Blue, Metallic Gold & Slick Leaf Green

Puffy Paint - Red Violet

Scotch 3M Painters Tape

Elmer's Multi-Purpose Spray Adhesive

Gloves

Cardboard pieces


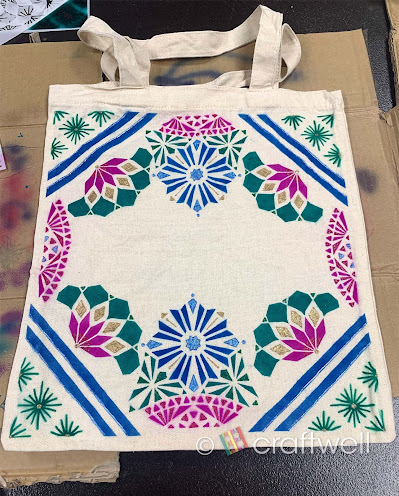
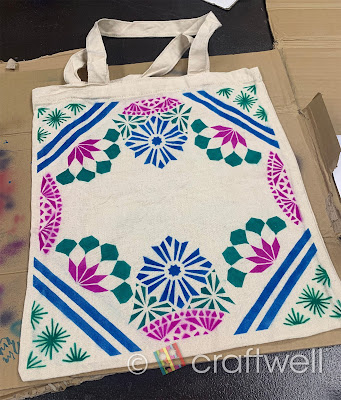
First thing, I chose 3 different stencil designs I can play around with and work well together. Also chose 3 different marker colors and 4 fabric paints that compliment each other.

Take a piece of cardboard, placed it inside the tote bag so the colors don't bleed through and gives me a somewhat flat surface to work on. Taking the scotch painters tape, I line a border and other places I don't want to get airbrushed. *Make sure tape is close to the tote because any open gaps will not give you clean lines. 

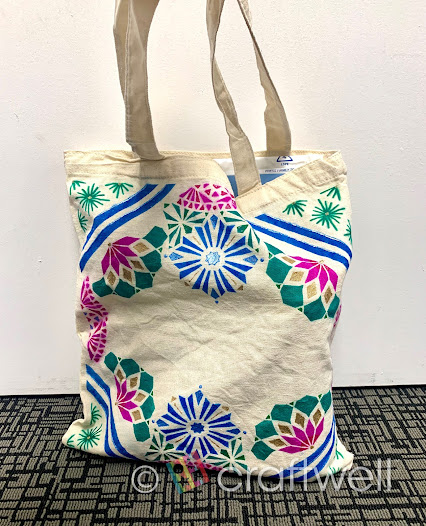
Taking my first stencil, I used the painters tape to hide some of the details I don't want to airbrush onto the bag. I used the spray adhesive to help keep the stencil in place which worked better than taping it to the bag because when I taped down the stencil, it wasn't able to hold down the intricate details and you won't get clean lines. I only realized this after it happened to me and you might be able to see it on the tote bag. Trial and errors. *Make sure to read the instructions on the spray adhesive can before using.


With each stencil, I alternated with each marker and had fun with each placement. When that was done, I did the same with the fabric paint. Make sure to let it dry or it will smudge and again I did learn the hard way 😅


Hope you all enjoyed my project. Until next time!!

Katie


March 16, 2022

eBrush Fun

 Hi everyone!

Katie here with a fun project using Craftwell's eBrush and markers. I'm not an advanced eBrush user, but I can still utilize the marker adapters and create something pretty. 


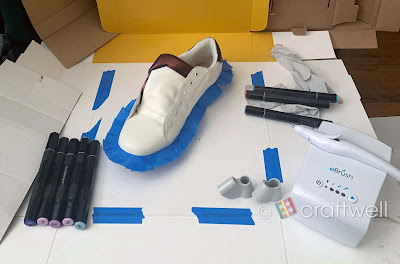
I took used pair of sneakers, which had some stitched on patches and doodles on it. I only airbrushed one sneaker and decided to save the other side for another time.


First, took off the patch with seam ripper which you can find at a Michaels or something. I used was rubber alcohol with a paper towel to clean the sneaker the best I can.


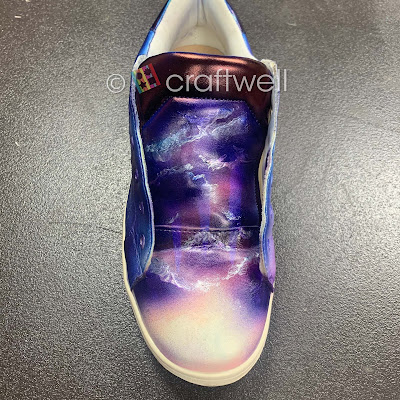
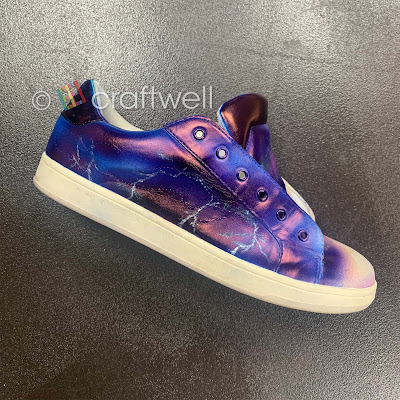
For the design, I was inspired by sunsets and storms. I thought some darker shades will help hide the doodles made on the sneaker. One side of the sneaker and tongue will have a sunset, and the last side will have a thunderstorm. To help, I went onto google for some image ideas and gathered my materials.


Materials

Craftwell eBrush

Spectrum Noir marker adapter

Spectrum Noir markers

Tulip Metallics - White fabric paint

Painter's tape

Gloves

Cardboard


Next step, taped the top edge of the sole to which I want to keep white untouched. Took some cardboard I had lying around to line my area and placed a small piece in the shoe so I don't any color on the inside. From there, I started off with lighter shades then worked myself up to the darker ones. 

I used the white fabric paint to create lightning bolts and clouds.


Here I have my finished project:


Hope you all enjoyed my project and it inspired you.

Till next time!

- Katie

March 30, 2017

Pam Bray's Blast from the PAST! Upcycle Brilliance by Pam Bray

 Hi!!! Happy Thursday!!
It is Pam here today on the Craftwell Blog sharing with you my upcycled project!! 
I decided to give my cat "Gracie" an upcycled treat jar. 
He is so spoiled. 
YES... 
Gracie is a "boy", lol!!!
AND...
He has a story to tell about his name!!! 
 I began of course with his treat jar....
 Run strips of pattern paper through the Xyron Creative Station or use your favorite adhesive. 
 Wrap pattern paper that has adhesive applied to it along with borders around jar. 
 Stamp a Crazy Cat image on to water color paper. 
Color with distress markers. 
 Sandwich prepared colored image along with die and label dies between two "A" plates, "B" plate, metal shim and  platform using the Craftwell Cut N' Boss. 
 Add labels and prepared crazy cat to front of jar. 
Die cut borders and rosettes using two "A" plates and platform using Craftwell Cut N' Boss.
 Form rosettes; add large one to top of jar lid along with a metal knob. 
 Add smaller ones to front of snack jar.
Adhere small circles and brads to centers. 
 Wrap twine around jar lid ring with twine. 
Die cut label using watercolor paper using Craftwell Cut N' Boss, two "A"plates, "B"plate, metal shim and platform. 
Water color paper with distress markers, dry completely. 
Do stitch line work and pets name with the word "snack" with black pen. 
Tie to twine. 
Add twine bow.  
 I hope you have enjoyed my snack cat treat jar and try making a fun treat jar for your pet. 
Remember this is a month of Upcycle Projects here on the Craftwell Blog so if you missed anything make sure to go back to the beginning of the month to get lots of inspiration from the Craftwell Cut N' Boss Design Team. 
Next week begins the Upcyle Projects from the EBrush Team, you won't to miss out any of the projects. Hugs Pam

Supplies:
Craftwell Cut N' Boss
Sizzix Crazy Cats
Sizzix Labels
Sizzix Mini Rossettes
Sizzix Rossette
Sizzix Vintage Border
Graphic 45 Fashionista Pattern Paper
Graphic 45 Times Nouveau Pattern Paper
Graphic 45 Domestic Goddess Pattern Paper
Stampers Anonymous Crazy Cats
Ranger Distress Markers: Spiced Marmalade, Tea Dye, Salty Ocean
Metal Knob and Brads
Brown Tine 
Xyron Creative Station
Pop Dots 
Glossy Accent

                                         

August 18, 2016

A Crafty Little Organizer by Babara Rankin

Hi everyone!  Barbara here on the Craftwell Blog today with an upcycled project using my Craftwell eBrush.  Did you know that August 17th is National Thrift Shop Day?  To honor this quirky holiday, the Craftwell design team has been given a challenge to upcycle a thrift store item or something around the house.  

So, I ask you, what can you do with a few empty prescription bottles and a large plastic jar lid?


I know!  How about a crafty little organizer for your craft desk?  In this organizer, I keep my smaller, but oh-so-necessary everyday supplies, like Q-tips, glue sticks, wooden skewers for stirring, decoupage scissors for fussy cutting, and my most needed writing tools (pencil, black pens, and a white gel pen).  


Step 1:  To begin, I eBrushed color onto an 8-1/2" x 11" piece of white card stock with a light pink marker.  I just wanted to get some color down, but not necessarily going for full coverage.


Step 2:  Next, place a stencil over the paper and eBrush through it with an orange marker.


Step 3:  Repeat Step 2 with the same stencil and a darker pink marker.


Step 4:  Repeat Step 2 again with the same stencil and a yellow marker.


Step 5:  Now that I have some "texture" down, I filled in the background with a bit more of that light pink marker from Step 1.


Step 6:  Using a different stencil, I added some additional design with a blue marker.


Step 7:  To add a vintage feel to the paper, I lightly eBrushed the background with a brown marker.


Step 8:  I used my Cut n' Boss to die cut a couple of honeycomb shapes using my Teresa Collins Honeycomb Project Die.  I love the versatility of this die and use it a lot.


Step 9:  Using the honeycomb die cut as a stencil, I laid it over my background paper and stenciled though it with a green marker, while coloring the die cut at the same time.


Step 10:  Continue coloring the second honeycomb die cut with the same green marker from Step 9.  I left some of the honeycomb bits in the die cut while coloring so I could use them for future projects.  I love saving the bits from my dies for this purpose.  They make great confetti, too!


Step 10:  For a bit of pizazz, I eBrushed the two die cuts with a silver marker.  Set these aside for now.


Step 11:  Use a script stamp with black archival ink to add more depth and texture to the background paper.


Step 12:  Cut two strips 2-3/8" x 8-1/2" from the card stock.


Step 13:  Add adhesive to the two strips, or use your Xyron machine for quick and easy application.  Cut each strip in half and adhere to the four smaller bottles. 


Step 14:  Trace around the large cap, keeping close to the edge of the paper, as shown.  Cut just inside the pencil lines of the circle and adhere the piece inside the cap.


Step 15:  First cut a 2" x 8-1/2" strip from the remaining piece left, and then cut a 2-7/8" x 4-1/4" piece, as shown.  From the 2" x 8-1/2" piece, cut two 1/2" x 8-1/2" strips, leaving a 1" x 8-1/2"strip.   You will use this for Step 18.


Step 16:  Cover the outer edge of the large cap with the two 1/2" x 8-1/2" strips and cut off excess.

Step 17:  Cover the larger bottle with the 2-7/8" x 4-1/4" piece.

Step 18:  Lastly, cut 1/4" strips from the remaining pieces to finish off the top of each bottle.  


I tried to make my paper colors match the amber color of my bottles, since I knew some of it would be showing.  Keep that in mind whenever you cover something that you know will not be covered completely.  

Step 19:  Glue all of the bottles inside the large lid, as shown.  I used a wet glue for this and allowed it to dry before handling it any further.


Step 20:  Cut the honeycomb die cuts in half, but in an uneven fashion.  Adhere the pieces around the bottles, adding glue where the die cut touches the bottle.  Continue adding the pieces until you have gone around the bottles completely.  


Step 21:  Lastly, add some floral embellishments to the organizer.  Use your markers to eBrush any flowers or leaves that you want to have match your project.  Below, I used the four markers shown in the photo, starting with the lightest pink, at the bottom, then the darker pink, following with the orange and then the silver marker.  


Step 22:  For this white flower, I wanted to keep it very pastel, so I only eBrushed it very lightly with the same light pink marker. 


Step 23:  Add the embellishments to the front side of the organizer, as shown.  Below is a view from each side.  


Supplies Used:

Craft well Cut n' Boss
Teresa Collins Project Dies - Honeycomb
Stencils
Markers
Black archival ink
Script stamp

I hope you enjoyed this upcycled project today.  There will be more fun upcycling projects to come, so make sure to check out the Craftwell Blog all month long for more inspiration from the team. 

Thanks for stopping by, and have a crafty day!


Ba
'
 
Copyright © 2014 Craftwell Blog. Designed by OddThemes - Published By Gooyaabi Templates