DO NOT MISS
>>Follow our Facebook page for updates! >>Join our Craftwell Design Team: Apply Now!
Showing posts with label planner. Show all posts

January 22, 2016

DIY Planner Divider Inserts!

Cut 'n' Boss Design Team: Tyra Babington Cycle 12

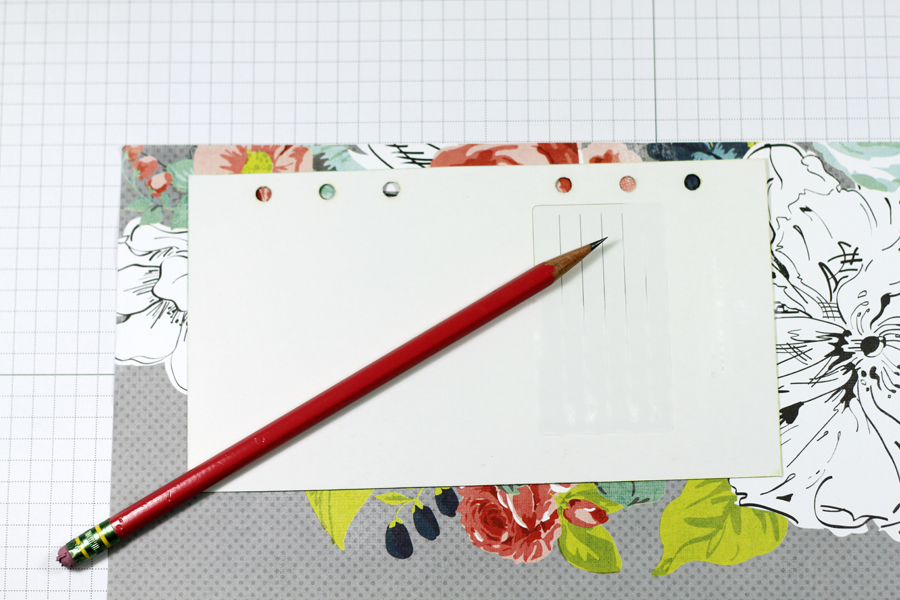
Hi It's Tyra and I'm back share how to create customer dividers for your planner! Supplies: Craftwell Cut 'n' Boss,Teresa Collins A Girl's Best Friend Steel Die Set, Your favorite patterned paper,adhesive, hole punch. Step 1. Trace, trim and cut. Remove an existing binder from your favorite planner and use a pencil to trace an outline of the binder onto your favorite patterned paper. Hold on the the scrap pieces of paper. Trim around the outline using a paper trimmer or scissors. Repeat 1-3 times.

  JustTyra_Craftwell_20150115_Planner Divder Step 1

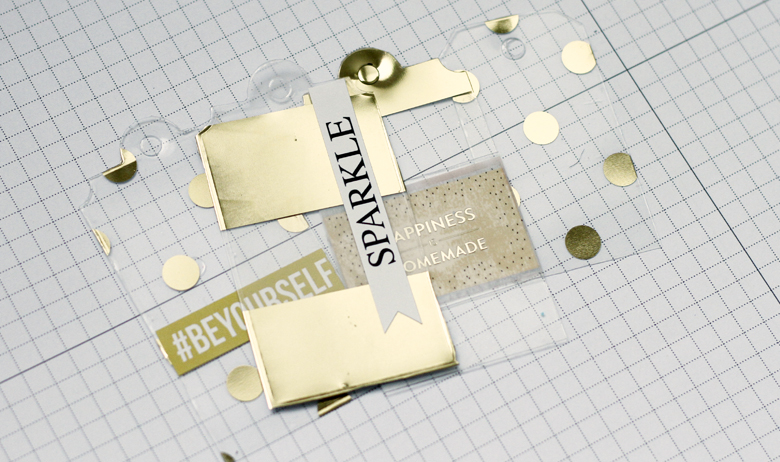
Step 2. Die Cut. Use the Cut 'N' Boss and word steel die (I used 'Sparkle') to die cut each trimmed piece of paper. Die cut several times using the cutting recipe (creating a sandwich from the bottom up):

D + Cutting Die + Material + A + D+ A

JustTyra_Craftwell_20150115_Planner Divder Step 2

Step 3. Assemble and adhere. The die cutting completed above will yield dividers with a negative of the die cut. adhere a similarly sized uncut divider to highlight the negative space created by the die cut. Cut additional dividers and adhere the die-sentiments to the additional dividers. Complete the divider by using a hold punch to match existing binders.

JustTyra_Craftwell_20150115_Planner Divder Step 3
JustTyra_Craftwell_20150115_Planner Divder Final2
JustTyra_Craftwell_20150115_Planner Divder Final
Step 4. Modifications. Use scissors or a paper trimmer to add an optional pocket or a tab!
JustTyra_Craftwell_20150115_Planner Divder Modification Stepv4
I hope I have inspired you today! Thanks so much for stopping by!

 -- Tyra

http://justtyra.com


January 18, 2016

Planner Layout

Cut 'n' Boss Design Team: Mitsyana Wright Cycle 12

Hey, Crafty Friends!! I know there are many of you that have planners! And many of you are CRAZY over planner accessories!! I'll show you quick and easy ways to accessorize and decorate your planners!!

Need something to decorate those blank pages?? Want to turn your drab/ blah pages to cheerful/ upbeat ones... try stenciling!!

Don't have stencils handy or just can;t find one that suits your mood or personality... make your own!! Dies make awesome stencils!! 


Here, I used my Teresa Collins Pocket Die to make a stencil out of vellum... I know what you;re thinking... " Why vellum?", right?! Well, that's easy, 1)Vellum is transparent. I can see exactly where I'm placing my stencil. And 2) Because vellum is a type of paper, it cuts easily and cleanly in my die-cut machine!


To cut vellum with Teresa Collins dies in my Cut'n'boss, I used the following platform combination:

From Bottom to Top
D Plate
B Plate
A plate
Die (with cutting edge faced up)
Paper
A Plate


Look how well it cut!! No vellum... No problem... parchment paper or wax paper will work in a pinch!! And both are transparent enough for precise stencil placement!


Once your stencil is cut out color over your stencil! I airbrushed over my stencil using an eBrush and pink sharpie marker!! Because I only wanted my pattern inside each individual block, I used blue painter's tape to create a border around each section not to get ink on parts I didn't want sprayed. 

Inking with a sponge dauber or ink pad will work also. I just love the way airbrushing looks on paper, it adds a softness to my result without harsh lines.


Since the blue tape is removable, I was able to move it around and use it over and over. 
It's awesome how much more personality my pages have from simple stenciling... but I wanted to kick it up a notch and decorate my pages even more.

I also made my own decorative planner stickers!! And it was easy-peasy!!


I just die cut several of my Teresa Collins Pocket Dies out of gold foil cardstock. And because I used my cut'n'boss machine (that has a ginormous cutting platform), I was able to cut 14 dies at once... and still had tons of room on it to cut more!

I used the exact platform combination above to cut my gold cardstock.

From Bottom to Top
D Plate
B Plate
A plate
Die (with cutting edge faced up)
Paper
A Plate


Look how awesome these came out with that gold foil cardstock!!


Then I ran all my die-cuts through my Xyron 3" Sticker Maker, transforming them into instant stickers!!

Now, just PEEL & STICK!!

Here is a  picture of my finished planner pages..


I accented my pages further by using a little bit of washi tape, some Pink and Main Planner Stamps and some Teresa Collins stickers and die-cut pieces I had in my stash!


At this angle you can really see the shine of the gold foil cardstock! It's is just gorgeous!!

SUPPLIES USED
Gold Foil Cardstock (Grafix)
Baby Pink Sharpie
Teresa Collins stickers
Washi Tape (Tim Holtz, Other)
Vellum


I hope you enjoyed today's project and are inspired to create your own planner accessories!! They are just too fun not to try!!

Until next time...

HAPPY CRAFTING FRIENDS!!
~ Mitsy


For more inspiration and crafty projects done by myself, please visit my personal blog at:

January 15, 2016

Acetate DIY Planner Tags!

Cut 'n' Boss Design Team: Tyra Babignton Cycle 12

I have a quick and easy tutorial for all of you planner nerds out there! Add a little sparkle to your newly purchased planner using your Cut 'N' Boss and fab papers from Teresa Collins! Supplies: Craftwell Cut 'n' Boss, Teresa Collins: Signature Collections transparency/clear paper, stickers. Step 1. Die Cut. Teresa Collins Signature Collection features several clear transparency papers. Use your favorite tag die and the Cut 'N' Boss to die cut several tags using the cutting recipe (creating a sandwich from the bottom up):
D + Cutting Die + Material + A + D+ A
The transparency paper is super think so you may have add scrap paper to the sandwich and run the die and transparency paper through the Cut 'N' Boss more than once.

Planner Trinket Step 1   Step 2. Embellish. Embellish your newly cut tags with stickers and sentiments offering words of encouragement.
  Planner Trinket Step 2 Planner Trinket Step 3b

Step 3. Enjoy! Add these tags to your planner as bookmarks or reminders to take a few steps each day towards accomplishing your goals! Planner Trinket Step 3c Planner Trinket Step 3 I


hope I have inspired you today! Thanks so much for stopping by! 

-- Tyra


January 13, 2016

Custom Daily Planner Cover!

Cut 'n' Boss Design Team: Pam Bray Cycle 12


Happy New Year!!!
I am so excited about the new year...it is going to be fabulous!!!
BUT...
Each year brings a new daily planner for me!!!


This year I selected a Simple Stories Snap Album along with calendar refill package. 
It is a fabulous way for me to place all my design work in but to also add other items in my busy life. 
The best thing though the pages are large enough to do a bit of project life along with adding photo pages. 


I enjoy decorating my daily planner. 
SO....
I began by first cutting a small piece of chipboard along with some red burlap that matched the chevron on the album.


I ran the chipboard through Xyron Creative Station, placed it on the red burlap.
 Remove the threads around all four edges till you get to the edge of the chipboard.
Trim evenly around to make the threads more uniformed.  


Lay the prepared burlap on top of album so you can see where to apply gesso.


Remove burlap.
Apply white gesso using stencil and palette knife.
Allow to dry completely.


Die cut rectangle scallop dies using the Cut N Boss along with a platform, two A plates, B plate and metal shim. 


Adhere burlap to top of album. 
(Lay die cut rectangle scallops on mats and place on top of burlap to see placement.) 


Die cut doily medallion using the Cut N Boss and two A plates.


Adhere doily medallion will be just under the mats. 
Adhere mats to top of burlap.


Die cut numbers using the Cut N Boss along with a platform, two A mats, B mats and shim. 


Adhere on the side of the album. 


Fussy cut sunflowers.
Adhere the sunflowers here and there to the top of the album.
Add a few sunflowers with pop dots. 
Add metal buttons to a few of the sunflowers. 


Wha-La...here is my 2016 Daily Planner!!!
I hope I have inspired you to get your Cut N Boss ready to create one for yourself.  
(HINT: If you can't find a Snap Album...try a chipboard or other type album.)

-Pam Bray 


Supplies:
Craftwell Cut N Boss
Sizzix Scallop Square Dies
Sizzix Lace Medallion
Quickutz Kate Alphabet Dies
Simple Stories Snap Album and Calendar Refill 
Graphic 45 Children's Hour May Paper & Journal Cards
Graphic 45 Place in Time
Graphic 45 Artisian Style
Graphic 45 French Country
Canvas Corp Red Burlap
Tim Holtz Bubble Stencil 
DecoArt Media White Gesso
Emerald Creek Metallique Button Brad
Xyron Creative Station
Xyron Adhesive Dots
                                                      

January 12, 2016

Planner Pages with Craftwell


Cut 'n' Boss Design Team: Suzanna Lee Cycle 12

Yes, you read that correctly, planner pages using Craftwell's Cut'nBoss, embossing folders and dies! I know, right?! Crazy. But very possible and so incredibly easy to do. Planners are all the rage these days and seeing the things that people do/for their planners is so fun. It's not simple anymore. People dress their planners better than themselves sometimes. Today I'm sharing with you some tips and tricks to dressing your planner using Craftwell goodies, yes, indeed!


The planner pocket on the right hand side of that picture was created using cardstock that I ran through my Cut'N Boss with a large TC/Craftwell embossing folder. I thought the words were appropriate for February. The pocket is perfect for storing little love notes, receipts for the month, you name it. Even bits and pieces and memorabilia collected through out the month to add to scrapbook pages. The label die from the Thankful Holiday Pocket die collection made quick work of a place to identify what month this is.


No variation to the sandwich that you will run through your Cut'N Boss, the same old sandwich usual with TC/Craftwell's large embossing folders.


This is what it looks like before you create the pocket from it. Trim a piece of patterned paper to size and create your pocket. I still don't have one of those fancy planner hole punches so just the good ol single hole punch and a template work for my A5 planner.


A closer peek at the embellishments and the label die I mentioned earlier.


You can also use the dies to create fun embellishments to your monthly calendar as I have done above.


Dies make so easy to cut what works for you and add to the planner just as you would your scrapbook pages. A while ago I showed you hto use your label die to create a file folder label that folds over. That would be perfect for your planner pages. My monthly pages are pre-tabbed and I didn't need to do that here. Instead I used hearts, "love this" and circle heart to dress up my month of February.  The circle heart I double backed so that it works like a paperclip of sorts. You get a better view of that above with the detail shot.

Thanks for stopping in today! I hope you are inspired to dress up planner! If you have done so using your Craftwell supplies, do share!!

Supplies
Craftwell/Teresa Collins Cut'N Boss
Craftwell/TC Beautiful Words embossing folder
Cardstock - Core'dinations
Patterned paper - American Crafts
Chipboard Shape and Washi - Freckled Fawn
Letter Stickers - Basic Grey

July 23, 2015

DIY Planner

Cut 'n' Boss Design Team: Alexia Misso Cycle 11

There are many cute planners out there, but sometimes you need to create your very own, perfect for you planner and that's just what Alexia Misso did! 

See her GORGEOUS DIY planner below!

Hello all! Welcome to Craftwell's blog. It's Thursday which means it's my turn to share with you project ideas here today. Although the school only starts in September, I think it would be great to get ahead of time and made this daily planner for myself before the kids start going back to school. 


As we know the gold color is in trend recently so I incorporated this gold foil color on my daily planner's cover! It sure is shiny!


To make this cute daily planner I first prepare two 4 3/4 x 6 chipboard card stocks to be used as the front and back covers for the planner. I then chose a stencil and apply modeling paste over it (only the surrounding). 


While waiting for the modeling paste to dry, I die-cut the frame using My Favorite Things' stitched frame dies with Cut 'n' Boss . Also I emboss a gold foil card stock with embossing folder from Couture Creations. After you completed this step check the modeling paste to see if it's dry, air-brush it with pink distress ink if it is (with the same stencil pattern as the mask).


Here is the embossed gold foil card stock, isn't it beautiful? Prepare few same size card stocks in different colors as the page divider and die-cut the tabs using Teresa Collins' tab die. Glue the tabs to the card stocks and label them. Using double-sided foam tape, adhere the embossed gold card stock behind the stitched frame and glue the two on to the cover with stencil pattern. 


Start embellishing! More fun die-cutting!


Decorating the inside page!


Look at those tabs with the name of each seven days, I love it, can't wait to start using it. :) 


And this SPARKLE page, so yummy looking! 


I love the little trinket string bookmark too. I have to start filling up the page now because I can't wait any longer. hehe. Thank you for visiting my post today, I hope you like the project! Happy Crafty Day!!


Craftwell Products Used:
- Craftwell Teresa Collins' Cut 'n' Boss Machine
- Teresa Collins' Memory Collection Dies
- Teresa Collins' Lifestyle Collection Dies
- Teresa Collins' A Girl's Best Friend Collection Dies
Other Products Used with Cut 'n' Boss:
- My Favorite Things' Stitched Frame Dies
- Couture Creations' Embossing Folder


'
 
Copyright © 2014 Craftwell Blog. Designed by OddThemes - Published By Gooyaabi Templates