DO NOT MISS
>>Follow our Facebook page for updates! >>Join our Craftwell Design Team: Apply Now!
Showing posts with label eggs. Show all posts

April 25, 2017

Dainty Nest Eggs by Heather Wilson


Springtime is finally here guys! And that means it's time to decorate with flowers and bright colors of nature! Here is a little something I made to bring the beauty of spring inside my own apartment...

 Materials
Nest:
Hot glue
Aluminum foil
Floral tape
Artificial Flowers
Found items (moss, grass, sticks, feathers, wool, etc.)

Eggs:
Ebrush
Golden paint
Clear Acrylic varnish
Ebrush siphon adaptors
Polymer Clay 
Part One: Nest

 Start out the nest by shaping a strip of aluminum foil by fitting it into a little bowl. Remove carefully and tidy up the nest rim by folding down the edges of foil. Have your hot glue out to fasten down the ends of foil that want to stick out.
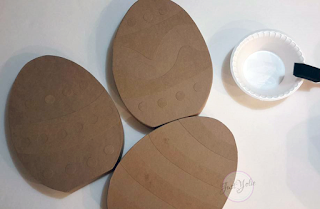
 Next, it's time to cover up the foil with your nesting materials. I just used whatever I happened to have on hand; wool, dried moss, and feathers. I used the softer materials for the inside of the nest (fine moss and feathers), like a real bird would do. Use hot glue to attach these to the nest.
 The fun part is finding things to decorate your nest with to make it look extra pretty! I made vines by twisting floral tape into long ropes, then curling them around my pinkie to make curls. Yellow flowers really made the nest stand out. I embellished it with leaves and a few beads too.

Part Two: Eggs
Start by rolling plain white polymer clay into egg shapes in your hand, then follow the baking instructions on the package. Give them plenty of time to cool off before painting them.


Next, it's time to get your Ebrush and siphon kit out! Thin your gold paint a little with water before starting. Remember to clean your siphon well after using it.
After the paint has dried, put a couple coats of clear acrylic varnish over your painted eggs.

 
Now all you have to do is find a place to tuck in that cute little nest!

March 20, 2017

Home Kool Kitty Basket Surprise!


We are having so much fun getting ready for the Easter Bunny! Reilee and Matthew are really digging their Craftwell equipment.  They really are giving the Cut N Boss and the eBrush a work out!


Materials:

Cardboard egg carton
Hot glue gun
Ebrush and adaptor piece for sharpies
Sharpies
Scissors ***need adult supervison
Cut the egg carton into individual holders, cut and shape so that two will fit together and make an egg shape. Hot glue the two pieces together. Then color your eggs using the ebrush and sharpies. Let dry. Can use tissue paper, fake grass or even real grass to fill baskets (shown in last week's video). Place eggs in baskets.


March 13, 2017

Monday is Home Kool Kitty Day!!

Join our fun times!


We are having fun making little baskets for our Easter celebration! We love playing with our Cut N Boss! Even Mattie can work it! Of course Mommy is always with us. Here is our supply list! Please watch our video!


Materials:
paper
Sizzix basket cutting dye
glue
eyelet fasteners and tool
Cut n Boss machine

Cut your basket out using the paper and basket cutting dye.  
Glue the inside of the basket together.  Use the eyelet fasteners and tool to fasten the basket's top and handle together.

***If you want the handle to move, do not fasten the eyelets too tight.  Just enough to hold them in place.

Next week...stay tune.  We will be making eggs out of egg cartons for our baskets.

~~Home Kool Kitty~~

March 25, 2016

Easter Home Decor

Ebrush Design Team: Yolie Burke Week 11 Cycle 3


Happy Easter! This is Yolie with Team eBrush sharing an Easter Home Decor project.

I took Easter eggs and painted them with acrylic paints; white, purple and yellow.


I then used the eBrush with Sharpies to add some more color.


I decorated with lace ribbon and rhinestones.


The Easter eggs are 18" in height and I purchased them last year after the Easter sale for .15 each.  So be on the look out after season sales.  I decorated 6 of them, this trio sit on my mantel.


Thank you for visiting and Happy Easter!


'
 
Copyright © 2014 Craftwell Blog. Designed by OddThemes - Published By Gooyaabi Templates