DO NOT MISS
>>Follow our Facebook page for updates! >>Join our Craftwell Design Team: Apply Now!
Showing posts with label canvas. Show all posts

June 27, 2023

DT: Hello Sunshine Mixed Media Canvas


Hi, 

This is Veronica from vicky's scrapping passion, sharing with you my next post for Craftwell. Currently, I'm spending some time in Galveston, Tx and decided to make a mixed media canvas as décor for our vacation home.

I used the sassy shell bag kit by Tonic, and since I was limited by what I brought, it was an easy choice for this cute canvas:


Steps:


First, I added some crumbled aqua tissue paper using Clear Tar Gel, Golden to a plain canvas. Usually, I use ModPodge for this step, but the gel worked just fine. Then, I used a Finnabair stencil to add some blue ink, ColorBox/ Graphic45 to the dried tissue. In the mean time, I died cut the shell images I wanted to used using my SNAP and the specialty cardstock included in the kit.


Then, I did the fun part of spraying with gold sparkle spray the wooden mermaid clip, and some punched sand dollar pieces. I also added some Crystal Drops accents to the wooden shells, which I also sprayed when the drops where dried.
Finally, I stamped the sentiment on watercolor paper using archival ink. I distressed the hand-tore edges with the sparkle spray using a brush.
I tore some leftover sand motive printed paper, and added the strips to the bottom of the canvas. When dried, I added some clear Crystal drops accents to represent waves.
I added a net wrapping I had from some fruits, and used glossy accents glue and 3D zots to glue every piece to the canvas. Once assembled, I added randomly Crystal Drops in blue and clear, and once the dried, I sprayed randomly with the gold sparkle spray, and added some sequins, Simon says stamps using clear gloss.

Some close-ups:

Here are some short videos showing more details:


Here is how the Mermaid clip works for adding a picture:


I am very happy with the final mixed media canvas and put it on a wall already.

Craftwell Tools


SNAP die cut machine

Other Companies:


Clear Tar Gel, Golden
Aqua tissue paper
5x7 Dollar Tree Canvas
Black Archival ink, CTMH
Bon Voyage Blue ink, ColorBox/ Graphic45
Sparkle Spray Cream Gold, Nuvo
Crystal Drops Midnight Blue, Nuvo
Crystal Drops Clear, Nuvo
Bindweed Wallpaper stencil, Finnabair 
Sentiment Stamp, Paper Wings Productions
Sand dollar punch, Martha Stewart 
Specialty sticky handmade paper
Sequins, Simon says stamps
Glossy Accents, Rangers
3D Zots


 I hope you enjoy it this fun project and please follow my blog as well: vicky's scrapping passion.


Stay cool this hot June

Vicky Tovar


May 30, 2022

DT: Lovely Canvas Wall Hanging


Hi, 

This is Veronica from vicky's scrapping passion, sharing with you my next post for Craftwell. 

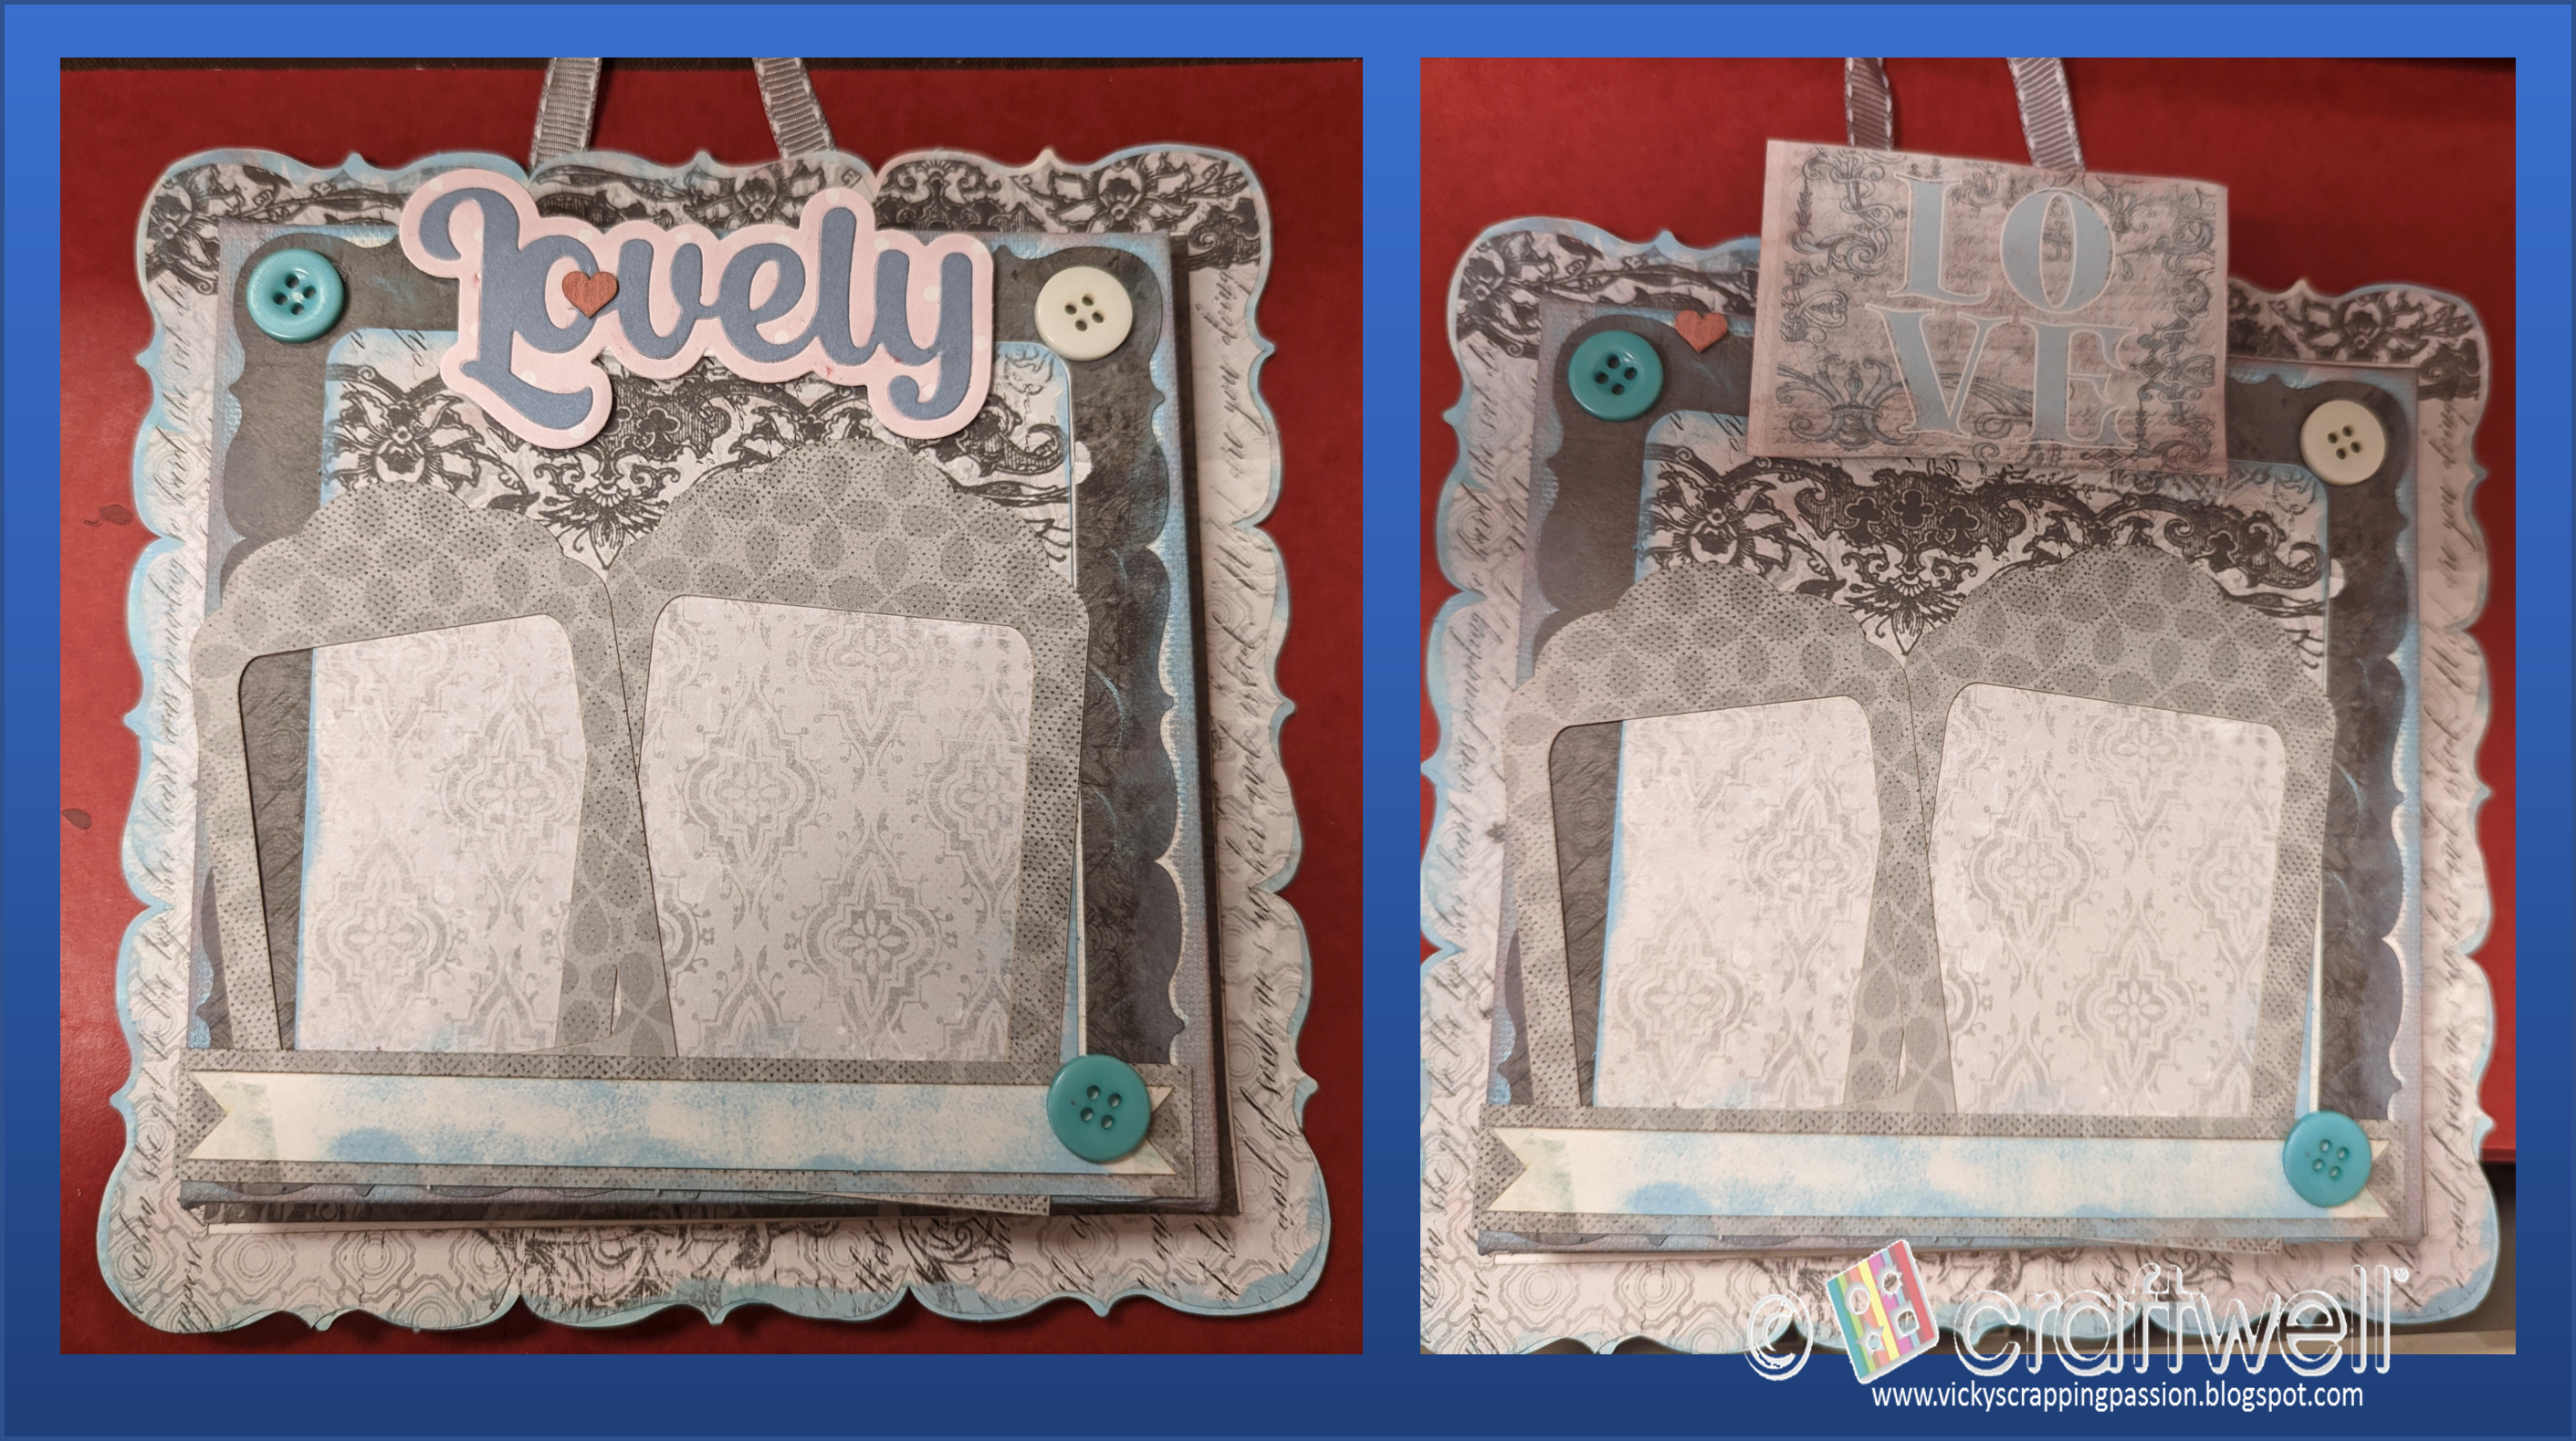
For this project, I used a decorated canvas from Quick Quotes. My daughter went with me to one of their fun whole day workshop and we bought this kit to decorate later on. My daughter did an amazing job. I was about to donate some of my sample albums and found again. I wasn't completely satisfied with the title, so I decided to use the sentiment die from SCT. It had just arrived in April, so I was dying to play with it.

Here you can see side by side the change it made in this lovely canvas. Hahaha, pun intended:


I used some printed pink paper and cardstock from the "Lovely" card kit from CTMH:

I had asked my daughter to glue only the bottom part of the picture frame dies cuts to let people add pictures behind. I added some double side tape on the top without removing the backing:


This kind of sentiment die cuts are wonderful to spice up any project, and super easy to cut using the snap.

Craftwell Tools

SNAP die cut machine

Other Companies:


SCT April Sampler
Dies:  Lovely part of the sampler, SCT
Quick Quotes canvas kit
PowerPuff chalk ink
Double sided tape
Foam tape
CTMH blue and pink printed paper (Lovely kit) what a coincidence...

 I hope you enjoy it this fun project and please follow my blog as well: vicky's scrapping passion.


Vicky Tovar


April 15, 2022

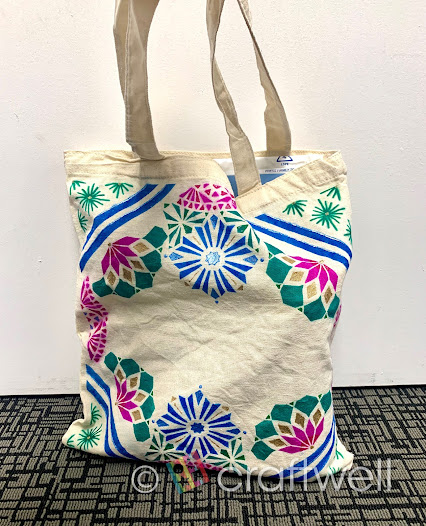
Airbrush Tote Bag

 Hi everyone!

Katie here with another project using the eBrush Airbrush System and anyone can do.

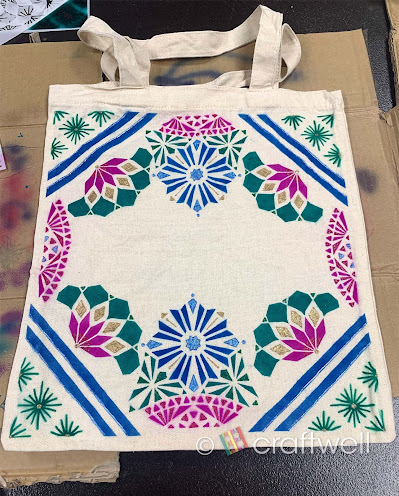
I'm those type of people who brings a reusable tote bag with me everywhere and I thought it would be find to customize my own. This is a fun project for all ages.


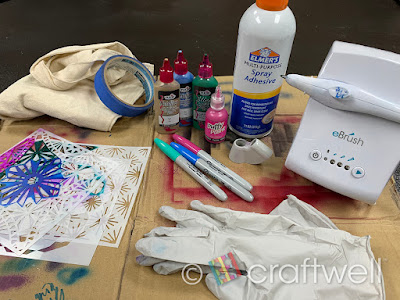
Materials:

Craftwell eBrush Airbrush System

Sharpie Markers

Blank Canvas Tote Bag (I got mine from a 99 cent store)

Variety of stencils from Amazon

Tulip Dimensional Fabric Paint - Metallic Blue, Metallic Gold & Slick Leaf Green

Puffy Paint - Red Violet

Scotch 3M Painters Tape

Elmer's Multi-Purpose Spray Adhesive

Gloves

Cardboard pieces


First thing, I chose 3 different stencil designs I can play around with and work well together. Also chose 3 different marker colors and 4 fabric paints that compliment each other.

Take a piece of cardboard, placed it inside the tote bag so the colors don't bleed through and gives me a somewhat flat surface to work on. Taking the scotch painters tape, I line a border and other places I don't want to get airbrushed. *Make sure tape is close to the tote because any open gaps will not give you clean lines. 

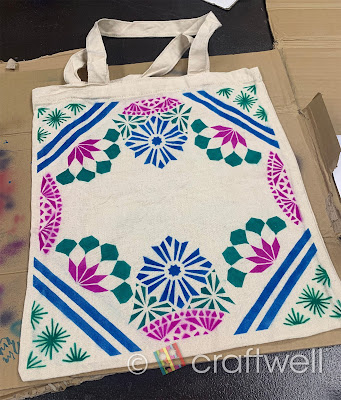
Taking my first stencil, I used the painters tape to hide some of the details I don't want to airbrush onto the bag. I used the spray adhesive to help keep the stencil in place which worked better than taping it to the bag because when I taped down the stencil, it wasn't able to hold down the intricate details and you won't get clean lines. I only realized this after it happened to me and you might be able to see it on the tote bag. Trial and errors. *Make sure to read the instructions on the spray adhesive can before using.


With each stencil, I alternated with each marker and had fun with each placement. When that was done, I did the same with the fabric paint. Make sure to let it dry or it will smudge and again I did learn the hard way 😅


Hope you all enjoyed my project. Until next time!!

Katie


June 14, 2018

Inspirational Flower Garden Canvas

Hi friends! Linsey here today sharing my latest Craftwell project--an inspiring canvas that will be wonderful anywhere it is placed. This wall art makes a lovely home décor piece and would be great for a dorm room or craft space too!
Once again, I used the SNAP Machine, which is fast becoming my new favorite crafting tool. This little guy works just like the original Cut'n'Boss Electric Embosser and Die Cutter, only it's smaller and it packs a whole lotta punch! No manual labor here--just happy, hands-free electronic embossing and die cutting. What could be better?
I first cut all my felt pieces, then arranged them onto a 10x10" stretched canvas covered with a wood grain patterned paper. The large flowers each have a clear sentiment sticker placed in the center. The smaller flowers have button centers with hemp string tied into double bows.
I wanted to experiment with the Teresa Collins Honeycomb Project Die and see if it would work as a chicken wire-type fence for my scene....I think it was a success! I cut thin cardboard (cereal/snack box) material with the Honeycomb Die 3 times, then did the same with a coordinating pattern paper. I then covered each piece of cut cardboard with a piece of cut pattern paper, creating a bit more dimension and interest. Finally, I placed along the bottom portion of the canvas to form my chicken wire fence for my inspirational flower garden!
And that's all for me, folks! Thanks so much for stopping by to visit today! I've enjoyed sharing my project with you and I hope you've been inspired in some way to make a fabulous creation of your own with awesome Craftwell products! Until next time, many blessings and happy crafting!

April 25, 2016

Quick Decor! by Peggy Oliver

Hello everyone! Peggy here and I am so proud to be on the Craftwell USA eBrush design team for another term! A big Welcome to my fellow design team members.

Today I bring you a quick canvas that I placed in a frame at the last minute, but I wanted to show you how I made this canvas.


The first thing I did to the canvas was spray paint it using my eBrush system with attachments. I used a dark blue marker for the bottom and a second lighter marker for the top half. 
Then I took out my siphon system by Craftwell filling my well with parts titanium white, liquid medium and water.  I added highlights as a reflection of light from above. 

Next I picked a coloring book picture that I liked and using some gel medium I pasted the picture right out of my book onto my canvas.  I brushed both the picture and the canvas and left to dry. 

After drying I wet the canvas with water spraying to moisten the paper for removal. 
the picture face down was the picture that was revealed. 
I lined the entire picture with a black gelly roll pen. 

I used some painter's tape to tape off the edges of my canvas and sprayed them with my eBrush to create a frame. 
I hope you enjoyed today's quick project using our eBrush by Craftwell and checking out our siphon system! 


October 14, 2015

HOME

eBrush Design Team: Jan Hunter  Week 13 Cycle 2


Our holidays this year are going to be a jumble of activity as we pick up, pack up, and head west again after 15 years here in the Midwest.  I'm looking forward to hanging this project in our new home in a couple of months.

I was excited that the papers from our sponsor this month, Teresa Collins, offered this clean palette to play with.
The greens and pinks included in the array of papers were perfect for my altered canvas project!
For my project I used:
eBrush with the SN adapter
Spectrum Noir markers (FS6, TN2, TN7, GT1)
Off-white acrylic paint
16 x 20 canvas
chipboard (banner pennants)
TC papers (GlamFactor [Triangles], ProjectPins [Gold Dipped, Lattice], Collector's Edition [Guilded]
Brown patterned paper (stash)
Vinyl (stencil)

Glue (I also used a Xyron machine - with permanent adhesive)
die cutting machine that will accommodate BIGZ dies
electronic die cutting machine (letters, banner pennants, circles, vinyl stencil for the acronym sentiment)
Die - Tim Holtz (On the Edge Distressed Doily)
Ribbon and other embellishments as desired.
01 black Micron pen
foam paint brush
other odds and ends

Using my electronic die cutting machine, I cut all the pieces referred to above and set them aside.  Weed the vinyl - removing the letters and leaving the background and apply some transfer tape and transfer the vinyl to the canvas.  Save the backing and tape if you use vinyl and plan on using the stencil again.  Cut any additional pieces you may need using the manual machine.
I hand cut or tore the pieces for the house,  heart, tree and sun and grass.  Set aside.


 Arrange  your stencil on the canvas as desired, burnish lightly to make sure the bleeding of your spray is minimal.  Color as desired.  The Spectrum Noir markers dry very quickly, so you can remove the stencil as soon as you finish spraying that last letter (if you plan on using the pattern again, then cover with the transfer tape and burnish back onto the tape.  Apply the backing as additional protection until you're ready to use it again.  If you're using stencil material you can spray the back with repositionable spray. I added some "doodling" to each of the letters using my Micron pen


Set up your ebrush and spray all the pieces you want to have some additional depth and texture on.  Glue the "grass" down first.  Now add the additional pieces.  You can use Modge Podge to secure things on the canvas.  Be sure to smooth so you don't get any buckling.  A few of the pieces I ran through the Xyron Creative Station, including all the lettering.  Spray the edges of the canvas with a brown marker.
If you used a liquid glue to secure everything on the canvas, you'll want to set it aside to dry thoroughly.  You can seal the entire front of the canvas with Modge Podge if desired.


Now assemble your banner pieces as desired.  To tone down the brown I sprayed on the edges earlier, dry brush some acrylic across the top and edges of each pennant and on the doily.  Let dry.    Thread the ribbon through the banner pieces and arrange as desired on the canvas.  I used a glue dot on the back of each pennant to help hold the pieces where I wanted them on the front of the canvas.  Use some hot glue or a thumbtack to secure the ribbon to the back of the canvas frame.  Add any additional embellishments as desired.


Thanks for dropping by and we hope that you'll continue to stop by frequently!  Don't forget that the rest of the Craftwell Design Team for this term are still posting this week.  So check out all the great eBrush projects!


And have you entered the #Fallforebrush Contest?  Don't miss out and be sure not to forget to add the #fallforebrush to your fall crafting shares!

And lastly, I'm so excited to be a part of the team again for the next few months!
Have an awesome week!


September 4, 2015

Faux Shadow Box

eBrush Design Team: Yolie Burke Week 10 Cycle 2

Happy Friday, this is Yolie from the Team eBrush sharing a faux shadow box.

I loved playing with Bella Blvd's Just Add Color collection.  I took a 12" x 12"canvas and used the back side.  I then used the eBrush with Sharpies to color the white canvas and the wood frame.


I then used a heart stencil and modeling paste to decorate one side of the frame.


Once the modeling paste dried, I placed the stencil back on and eBrushed the hearts with a Sharpie.


Here's my faux shadow box.


Here's a closer look.  The flower background paper was black and white, screaming to be eBrushed and so I did.  No rhyme or reason with lots of over spray and I love it.  The enamel heart was green, but I eBrushed that too.

This is a photo of my husband and yours truly.  He over smized and looks sleepy or maybe the sun was in his eyes.  By far not the perfect picture, but it's OK.  It's us and I love us.


Here it sits on my mantel.  Thank you for stopping by today and enjoy your weekend.

August 31, 2015

Bella Canvas from Peggy

eBrush Design Team: Peggy Oliver Week 10 Cycle 2


Hello, Peggy here to show you how I made this 8x10 canvas using Bella Blvd papers and embellishments and my eBrush by Craftwell USA.
This month we are partnering up with Bella Blvd and their fantastic line of Just Add Color.

Supplies used today are: 
Canvas
Gesso
Old paint brushes
Sharpie Markers
Glue


I prepared my canvas with white gesso as this canvas was not already done for me. 
Gesso will give the surface "tooth" for the paint to grip onto and help keep the paint on the surface rather than leak through. 
First I placed my sentiment/words using stickers from the Bella Blvd. line. I spelled out "ART SPLATTERS". Then I made my background with stencils using my eBrush from Craftwell USA. 
I used sharpie markers and randomly placed my stencils to cover much of the white space. I used three different stencils to fill the background in and  I used three shades of blue and green.


Next I used my eBrush to create some splatter marks (I love this effect and I use it often).  I held my eBrush really close to the canvas and sprayed in one spot and let the air take the ink across the surface using green and yellow sharpies.  I also wanted to create some circles and I used white gesso with lids/caps from various bottles on my desk. I dipped them into the gesso and placed them onto my canvas.

Then it was time to get some Bella Blvd. goodness onto my canvas. I cut the 12x12 papers from the Just Add Color line to fit my 8x10 canvas leaving a quarter inch all around and creating a frame. 
I tore some paper and glued them down. I colored some cut out flowers from the collection and sprayed them with my eBrush with yellow sharpies to match my color scheme. 


I had some old paint brushes that were as hard as a rock so instead of throwing them away I glued them down! I made them co-ordinate by dipping the tips in yellow paint.  I used the stickers from Bella Blvd to give the eye more to look at and make my canvas more interesting. Finally it was time to add some dimension to my letters and I used black, and yellow sharpies to trace around my letters.

 
I now have a canvas for my art room/studio. And yes.. Art Splatters just as much as Art Matters.. lol 
Thank you for taking the time to view my post today. 
I hope everyone had a great weekend and I will see you next Monday!


'
 
Copyright © 2014 Craftwell Blog. Designed by OddThemes - Published By Gooyaabi Templates