eBrush Design Team: Jan Hunter Week 13 Cycle 2
Our holidays this year are going to be a jumble of activity as we pick up, pack up, and head west again after 15 years here in the Midwest. I'm looking forward to hanging this project in our new home in a couple of months.
I was excited that the papers from our sponsor this month, Teresa Collins, offered this clean palette to play with.
The greens and pinks included in the array of papers were perfect for my altered canvas project!
For my project I used:
eBrush with the SN adapter
Spectrum Noir markers (FS6, TN2, TN7, GT1)
Off-white acrylic paint
16 x 20 canvas
chipboard (banner pennants)
TC papers (GlamFactor [Triangles], ProjectPins [Gold Dipped, Lattice], Collector's Edition [Guilded]
Brown patterned paper (stash)
Vinyl (stencil)
Glue (I also used a Xyron machine - with permanent adhesive)
die cutting machine that will accommodate BIGZ dies
electronic die cutting machine (letters, banner pennants, circles, vinyl stencil for the acronym sentiment)
Die - Tim Holtz (On the Edge Distressed Doily)
Ribbon and other embellishments as desired.
01 black Micron pen
foam paint brush
other odds and ends
Using my electronic die cutting machine, I cut all the pieces referred to above and set them aside. Weed the vinyl - removing the letters and leaving the background and apply some transfer tape and transfer the vinyl to the canvas. Save the backing and tape if you use vinyl and plan on using the stencil again. Cut any additional pieces you may need using the manual machine.
I hand cut or tore the pieces for the house, heart, tree and sun and grass. Set aside.
Arrange your stencil on the canvas as desired, burnish lightly to make sure the bleeding of your spray is minimal. Color as desired. The Spectrum Noir markers dry very quickly, so you can remove the stencil as soon as you finish spraying that last letter (if you plan on using the pattern again, then cover with the transfer tape and burnish back onto the tape. Apply the backing as additional protection until you're ready to use it again. If you're using stencil material you can spray the back with repositionable spray. I added some "doodling" to each of the letters using my Micron pen
Set up your ebrush and spray all the pieces you want to have some additional depth and texture on. Glue the "grass" down first. Now add the additional pieces. You can use Modge Podge to secure things on the canvas. Be sure to smooth so you don't get any buckling. A few of the pieces I ran through the Xyron Creative Station, including all the lettering. Spray the edges of the canvas with a brown marker.
If you used a liquid glue to secure everything on the canvas, you'll want to set it aside to dry thoroughly. You can seal the entire front of the canvas with Modge Podge if desired.
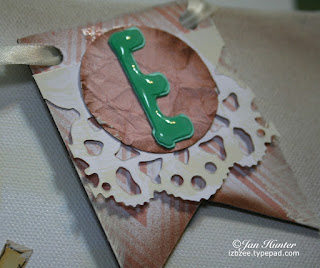
Now assemble your banner pieces as desired. To tone down the brown I sprayed on the edges earlier, dry brush some acrylic across the top and edges of each pennant and on the doily. Let dry. Thread the ribbon through the banner pieces and arrange as desired on the canvas. I used a glue dot on the back of each pennant to help hold the pieces where I wanted them on the front of the canvas. Use some hot glue or a thumbtack to secure the ribbon to the back of the canvas frame. Add any additional embellishments as desired.
Thanks for dropping by and we hope that you'll continue to stop by frequently! Don't forget that the rest of the Craftwell Design Team for this term are still posting this week. So check out all the great eBrush projects!
And have you entered the #Fallforebrush Contest? Don't miss out and be sure not to forget to add the #fallforebrush to your fall crafting shares!
And lastly, I'm so excited to be a part of the team again for the next few months!
Have an awesome week!


Post a Comment