DO NOT MISS
>>Follow our Facebook page for updates! >>Join our Craftwell Design Team: Apply Now!
Showing posts with label SVG. Show all posts

December 16, 2016

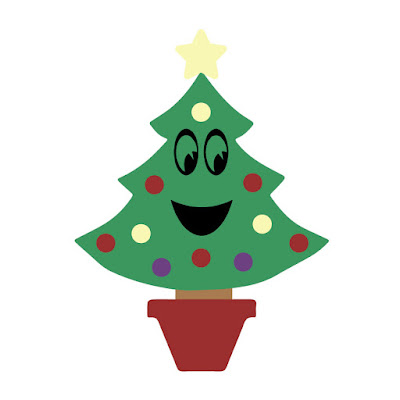
Freebie Friday: Holiday Tree SVG

Happy Friday! Today we bring you all a free SVG to help with the holiday spirit! They say nothing in life is free, but clearly they haven't been here to visit the Craftwell blog on Fridays!

Check out this little guy! Just in time for your last minute cardmaking!


December 9, 2016

Freebie Friday: Snowflake Window Clings

'Tis the season for many of us throughout the world to start celebrating the holidays! There is always a stereotypical winter scene to accompany such events, but sadly we do not always get to experience that magic depending on where we live.  Those days are now over with this freebie Friday of snowflake SVGs you can turn into your very own window clings!


Simply use a clear vinyl to cut out on your digital die cutter.  In this case, Dixie Belle Chalk Paint adds a fabulous color to the final product.  Attach to your window and enjoy the magic of the holidays!


December 2, 2016

Freebie Friday: Snowman SVG

FREEBIE FRIDAY!

Freebie Fridays are my favorite days of the week! Who doesn't love something free!? Last week's Reindeer SVG was so popular we decided to bring you another free SVG: a snowman. This cute little guy will look precious on any project or card throughout the Winter season.


Don't Forget! Sale Ends Today!

The sale ends December 2nd! Get yours now! Use the following code at checkout: CYBERSALE2016


  • $1 for any eCraft SD card
  • $5 for any embossing folder (A6, A4, Letter, Universal)
  • $5 for tool kits
  • $20 for travel bags
  • $79.99 for eBrush Standard Bundle
  • $129.99 for Cut'n'Boss + (4) BONUS Random Embossing Folders
  • FREE shipping for orders of $100 or more
  • FREE eBrush with purchase of $150 or more

October 27, 2016

Spirited Away Bath Token Chocolates - FREE PRINTABLES INCLUDED

SPIRITED AWAY "BATH TOKEN" TREATS:
A STUDIO GHIBLI THEMED HALLOWEEN!

Hello everyone!  My name is Judith Kim, a new Craftwell Design Team member, coming at
you with a cute idea for your Halloween this year!

As a fan of the animation studio, Studio Ghibli, I thought it would only be appropriate to create some treats & decor in the theme of the famous film,
Spirited Away.  I mean, just look at those visuals!


There is a scene in the movie when a character, No Face, gives the heroine, Chihiro or Sen (she has two names; long story!), a bunch of bath tokens for her chore.  These bath tokens are not necessarily important in the film, but they registered as 'CHOCOLATE BARS' to me!

They have the perfect dimensions for it!  You can make them large to fit a full-size candy bar or just use the printables provided to create (4) mini candy bar boxes perfect for
a couple of the mini size chocolates!


ALL YOU'LL NEED:

RED CARDSTOCK
SCISSORS
EXACTO KNIFE
BRUSH PEN
GOLD METALLIC TAPE
DIGITAL DIE CUTTING MACHINE*
LASER PRINTER*
HEAT TRANSFER FOIL - GOLD & BLACK*
LAMINATOR*
(* = optional)

  1. a. ) If not foil laminating - Print out the templates provided onto red cardstock & cut out the templates with scissors or your digital die cutting machine using the SVGs.  The template provides (4) chocolate boxes for mini-size chocolate bars only.  Scale up to create for full-size bars.
    b.) If foil laminating - Use a laser printer to print out the templates with "FOIL-PRINTABLE" on red cardstock.  Do not cut out the templates yet.  Pre-heat the laminator.
  2.  a.) Once all the templates have been cut, use the metallic gold tape & brush pen to create the designs on the bath tokens.  There are SVGs of the designs if cutting with machine.
    b.) Cut out strips of gold foil for the circles, triangles & diamond shapes.  Cut pieces from black foil to cover the stripes.  Place on the printed cardstock and run through the laminator.
  3. a.) Glue the tabs on the sides to form a flat box.  Close with the top tab.
    b.) Once cooled, take off the remaining foil.  Cut out the templates & glue the side tabs.  Close with the top tab.
  4. TADA!  NOW YOU GOT BATH TOKENS FILLED WITH CHOCOLATE!
AND THAT'S IT!

Here are some soot spirits grabbing their fair share of chocolate!


Hope you enjoyed this concept!  And I'll keep you updated on the latest of my Studio Ghibli themed Halloween here: http://designdotexe.tumblr.com/

Thanks everyone! :)

-Judith

July 1, 2016

Summer Drinks and Treats By Sonja Bakonyi

We welcome another guest designer, Sonja Bakonyi. She has a delightful Summer special cooling drinks and treats in her post! Thank you so much Sonja!

Hello all, Sonja with Sugar Bean Cards here to share my newest card set. This week is going to be a hot one! I figured some summer drinks and treats were in order!


 These cute files are all from Miss Kate Cuttables. 

For this card, I started out with white paper. Anything that does not have stripes or a pattern on any of the cards, started out as white paper, colored with my eBrush from Craftwell.


 I don't know about you, but I enjoy a nice cup of raspberry lemonade! This card is a shaker card and has specs of pink and yellow to represent the raspberries and lemon.


 Or perhaps a margarita should be my go to drink during this hot streak!


 Brain Freeze, it happens to the best of us!


 A nice sweet, juicy, fall down your chin, melt in your mouth watermelon is always recommended!


Thank you for enjoying these summer treats with me!
Materials Used:
DCWV 'Hello Darlin' Stack
Margarita

Cute Sweet Summer Set
Cute Sweet Summer Set SVG cutting files for scrapbooking cute svg cut files for cricut cute svg cuts cute svgs
Lemon
Cute Lemon & Lime SVG files for scrapbooking cute lemon svg file cute lime svg file free svg cuts
Raspberry
Raspberry Set SVG scrapbook cut file cute clipart files for silhouette cricut pazzles free svgs free svg cuts cute cut files


Craftwell eBrush
Sharpies
Aleene's Original Tacky Glue
Scotch Advanced Tape Glue
Elements Brads
Silhouette Cameo

August 12, 2015

Ice Cream Treats with KadoodleBugDesigns

Ebrush Design Team: Jan Hunter Week 9 Cycle 2


Hi, it's my turn up on the Craftwell blog today, sharing a fund design using a file from KaDoodle Bug Designs, our eBrush sponsor for the month of August!  I just love this little duck! 


Let's get started...
You'll need
electronic die cutting machine and software
white card stock
card background paper (stash - from an old Cards Beautiful collection)
eBrush - SN adapater
Spectrum Noir markers - BG1, CT2, CT3, CT1, Ly1, TN1, TN2, OR1, PP1, EB7, EB8, True Black
Watercolor pencils - blue and indigo (stash)
Sharpie White pen (stash)
Adhesive and pop up dots or mounting tape
Glossy Accents

Shadow box  (optional)
card stock strips to make bases for the pop-up (optional)

Cut all the pieces using your cutting software.  I ungrouped the pieces and stacked them, grouped and then resized to fit a 4.25 x 5.5 card base.    Ungroup to move to the mat as a single layer to cut.


I wanted a little more texture so I ran the two base pieces of the ice cream cone through an embossing folder.  Set aside.


Get your ebrush and adapter for Spectrum Noir markers and start coloring.  I colored all the larger pieces with their base color using the ebrush with markers.  You can layer your color for subtle shading or add another tone or hue for more definition.  I generally chose the next deeper tone in markers for this project. 


I colored the eyes using some water color pencils and used a water brush to blend.  When dry, I added some quick strokes with a black micro pen for a little more definition.  I also added some white highlights.


Once all the coloring is done to your satisfaction, you can begin piecing it all together.  I chose to add some additional finishes for a little more shine and highlight.  A quick brush over with some Glossy Accents on the melted "chocolate" area as well as the eyes.  Set aside to dry.


Glue together as shown in the design photo from KBD (use the link above).  It was really very helpful and easy to follow.  TIP:  I glued the chick  together first before adding to my card front.

I used a sentiment stamp from an old, old set from PTI and just added that to the background piece.  This card is for one of my granddaughters and I wanted a way to showcase it a little more -- so I'm displaying it in a shadow box frame with no glass/transparency.  I've popped the card up using a pop up frame made with some additional cardstock which is securely fastened to the base of the frame.  The box can be hung on a wall or sit on a dresser or bookshelf for display. 


Thanks, KBD for the fabulous file!   I'm sure it will be used again and again!  Stay tuned,  there are more projects from the DT coming your way!  Check back again

 Hope you'll drop by again and share some crafting time together. AND don't forget to drop by the KBD blog and check out all the latest news!


GIVEAWAY ALERT! $25.00 Gift Certificate for Kadoodle Bug Designs!  Make sure to comment on this post , ALSO  like FB pages : Craftwell and Kadoodle Bug Designs


December 17, 2014

All flakes welcome - Snowflakes and Snowmen, that is!

Ebrush Design Team: Jan Hunter Week 5 Cycle 1

Love this sweet Snowman Garland! Jan has the holidays all wrapped up!  Please don't forget to visit her blog! 


Hi Everyone.  It's Jan again with a fun project that can brighten even the bleakest of winter days.
I love snowmen and have quite a collection -- that stays out all year long.  I haven't added anything for a couple of years and having an eBrush sure makes is easy to put something together quickly.


This garland will be gracing the living room window and likely will be "hanging out" all year long!

You'll need:
images for your garland (I used an old papercrafting magazine pattern for the snowman and a snowflake from basic shapes in my electronic diecutting machine and software)
white cardstock
eBrush and AD adapter (use the foam cushion hack)
Markers - BIC Mark-Its (black, red, med blue)
Red Glitter Pen, White gel pen
Wire
Fabric for knots, cut at 1 1/2 in x 9 in
Embellishments as desired
Xyron - permanent adhesive
wire, fibers or other material for stringing
Stencil material (I used an inkjet transparency)

Because my garland is made from from paper, I wanted the images to be fairly sturdy. Trace your image. In the software, ungroup the image and set aside all of the top pieces. Don't delete as they will be used to create your stencil.  I cut the stencil (hat and scarf) and set aside.  Cut the base image for your snowman x 4. Repeat for the snowflakes

Run 2 layers of your images through the Xyron and set aside with one more layer that does not have the adhesive.

It's time to get ready to use the eBrush -


Once all your painting and coloring is completed, run the top image through the Xyron and add to the previous layered pieces.  Do the same with the snowflakes.  Once all your images are completely stacked, using a piercing tool, make a hole on opposite sides of each image and string as desired. Embellish as desired... adding some glitter and gel pen highlights.  Don't forget to spray your fabric pieces as well.  I used a stencil from one I had on file.


Thanks for dropping by.  Please feel free to drop by my blog for additional ideas and projects made using the eBrush. Happy Crafting!

'
 
Copyright © 2014 Craftwell Blog. Designed by OddThemes - Published By Gooyaabi Templates