DO NOT MISS
>>Follow our Facebook page for updates! >>Join our Craftwell Design Team: Apply Now!
Showing posts with label upcycle. Show all posts

June 26, 2020

A Happy Moment (upcycled wood block)


Hello all you Makers! Desiree, here again to share my latest Craftwell make!
This one is very special to me, as the picture which is the star of this project has some of my most precious loved ones in it! They are my precious mom, Lana, my Aunt Linda, and my Aunt Sherry, who sadly gained her angel wings last November.
Anyways, onto the pics of the project and the other details! Just had to share a bit about my loved ones first!

After being inspired by the pic of my mom and aunts, I knew that I wanted to make something featuring it! It must be girly AND it MUST express happiness! I decided to upcycle a recent good will find. A 4in. x 4 in. wood block. I painted it white and after drying, I cover it with some FolkArt Extreme Glitter paint. After the layer was dried I used some Prima Effect Paste in Unicorn from Art Extravagance. Once that dried I sealed it with a clear aerosol sealer. I also used some Precision Craft Glue from Bearly Art!


I had to feature my cute SNAP Machine and the dies she would be cutting for me. Right?! I decided to use the Craftwell Happy die, which has been in my stash in forever and it's a go-to for sure! I also used a die by Anna Griffin, that I found on-line recently and waited to get! It is one of her pretty pocket dies, and I love it! For this project though, once it was cut out I had to mid the die cut a bit. I was happy with the end result.


I used my eBrush by Craftwell, of course! To do some shading to my die cuts. I did some distressing to my background paper, "happy" element, and to the bow.
For the happy banner element, I traced and hand cut an inset background piece from a scrap of paper.


I pieced together and adhered my distressed background piece, and my pocked piece that I modded.
I realized my little distressed bow needed an accent piece, so I got out these adorable dot embellishments I have had FOREVER. Found them in my stash, I remember buying them from Michael's YEARS ago!! Heheheh. I love them! 


I was wanting more for this project! To the stash I went! I found these old school K & Company daisies, and these adorable blinged out hearts that I got from hobby lobby a while back.
These made my heart so happy! I did not use that pink dot however. On the bow was just enough of
those I thought.


Here is the final product. I kind of love the end result! I more than love this precious picture, and the moment of happiness that was caught! I am so very blessed to have such wonderful women in my family! I am so blessed! I hope you find yourself blessed! I also hope you have been inspired!


Please remember to come back, check out what me and my fellow design team members are up to! I hope you have an amazing day!!

           ðŸ’– - Desiree'

July 19, 2018

DT: Steampunk Box

Hi,

This is Veronica from vicky's scrapping passion, sharing with you my next post for Craftwell. 
I made decided to upcycle a nice packaging box from a Fendi Perfume for my husband to put inside his gym hoodies:

This:

In to this:


More details: here in my Snapguide and in my blog.

Craftwell Tools

Snap

Other Companies:

Printed paper, World Life Collection,
Distress Collage Medium, TH, Ranger
ModPodge
Broad Tip Glue paint, CTMH
Metallic foil tape,
Steampunk gears, light bulb, and more gears, Creative Embellishments
Metallic Water Colors,
Hitch Fasteners, IdeOlogy, TH
Black Metallic Texture Paste, Heidi Swap
Dies, Graphic 45
3D embossing folder, TH, Sizzix
Distress paints, TH, Ranger
HeroArts Shimmer mist.
Liquid Gloss, Ranger


I hope you enjoyed my altered perfume box and follow my blog as well: vicky's scrapping passion.


Many blessings


Vicky Tovar


January 4, 2017

So Many Smiles

2016-12-27 16.04.06 copy
Our 23rd wedding anniversary is just around the corner and I found this saying on CreativeFabrica.com and it's perfect for what I had in mind....  a not so mini way of sharing a bunch of photos we've taken over the years -- goofy smiles included -- yeah, I know you don't see any of those smiling images -- but you do see some fun embossed pieces using folders from Teresa Collins and Craftwell.  The sentiment was eBrushed using a stencil cut on my electronic die cutting machine.  Let's get started on the process....
You'll need:
eBrush and marker adapter
Cut-n-Boss
markers (Sharpies were used in this project)
vinyl
electronic die cutting machine and associated software
So Many Smiles file
embossing folders (Decor Circles, Alpha, Beautiful Words, Stars,Twill Herringbone Preppy Houndstooth, Diamonds, Cabana)
Prepped Wood (I'm recycling another shelf)

fabric strips or twine
heavy duty stapler
Painters' tape
scrap paper or copies of photos  cut into 4 inch squares
binder clips
Transfer tape
Sawtooth hanger - and nails
Sealer

Open the So Many Smiles file in your machine's software.  Size as desired.  Cut using your machines settings for vinyl.  Weed (remove the lettering), creating a stencil.  Apply transfer tape.  Set aside.  At this point, add the sawtooth hanger to the back of the board if you plan on hanging your board.  Apply the stencil to the wood.  Lightly burnish to make sure that no spray will bleed under the vinyl while you're spraying. 
EBrush


Get your eBrush ready!  Seat the markers for an even spray.  Spray and color as desired.  Let dry. Remove the stencil carefully. Spray with two very light coats of sealer, letting the first coat dry for a few hours before spraying again.  This will add a little protection and keep the marker from scratching if your board has a really slick surface (My shelf was still a bit too "slick" and the marker scratched off in a couple of spots and touching up created another scratch instead of fill). 

2016-12-27 16.04.39 copy
I chose to use some fabric strips -- 1 inch by 45 inches tied together with a simple knot.  I knotted one end and secured it to the back of the board with a staple.  You could also use a glue gun to secure the strips in place....  Wrap the strips around the board as desired, securing with staples as needed.  Set aside
Gather your embossing folders  -- time to use the Cut-n-Boss. 
CW-CNB-BD1-2

Using the 4 inch squares, emboss as desired -- using some fun folders in the Cut-n-Boss.  Attach to the fabric strips with a binder clip....
2016-12-27 16.04.24 copy
I'll add some photos  a little later....  I don't want T so see the pics until I give him the gift!  In the meantime, I hope you'll be enjoying some time in your creative space this week! There's more ideas using the eBrush on my blog -- so please feel free to drop by and browse! 


December 7, 2016

Upcycling Delight by Jan Hunter

2016-11-28 16.24.30 copy
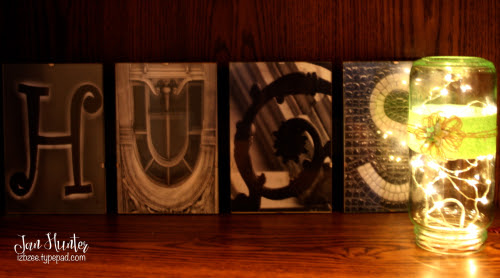
Up-cycling an old bottle, a pop can, a stripe of Dixie Belle Chalk Paint and some twine makes for a quick bit of home decor for the foyer to light up a shelf. 

You'll need:
eBrush, Siphon Adaptor
Cut -n-Boss
Painters' tape
bottle (with or without a lid)
Dixie Belle Chalk paint (Mint Julep)
twine
pop can, empty and clean
Tin snips
Star die
sequins (optional)
twine flower
glue dot
LED lights

Let's get the star out of the way first.  For the star, cut the pop can with the tin snips.  Lay out flat... using the Cut-n-boss and the sandwich for your star die, you'll cut a star for each bottle.  Set aside.  Be aware that the edges may be very sharp --
2016-11-19 18.06.12 copy
Wrap the bottle with painters' tape leaving about 1 - 1 1/2 inches of the glass exposed.  Be sure burnish the edges of the tape to keep any bleeding to a minimum. 

2016-11-11 16.15.09


Get your eBrush and siphon ready.  I diluted the Dixie Belle Paint a bit (not quite a 1 to 1 ratio).  Spray the bottle and set aside to dry.  My photos didn't turn out for this step -- sorry.  


2016-11-16 14.50.15
Carefully, remove the painters' tape from the bottle. 
2016-11-16 14.51.28

Lightly spray the star if desired.  Let dry.  I chose to add some Ranger Ink Patina using a small cloth. 
Add a couple of sequins as desired to the star with some glue.  Add the star to the twine flower with a glue dot.

Starontwineflower
 Wrap some twine around the bottle on top of the painted strip. Attach the twine flower and star to the twine wrap. 

2016-11-20 09.27.05 copy


Since my bottle didn't have a lid, using a glue dot, attach the end of the LED light thread to the bottom of the bottle.  The switch fits just inside the mouth of the bottle I'm using.  Turn it upside down so the mouth of the bottle is the bottom and the switch is inside the mouth of the bottle. .
2016-11-28 16.24.30-1 copy


This was quick and easy.  You could also fill the jar with notes or goodies for a fun last minute holiday or any occasion gift!  

Have a crafty and creative week!  Be sure to stop by my blog for additional ideas using Craftwell products!

November 9, 2016

Pumpkin Whimsy by Jan Hunter

Last week's post featured pumpkins.... I regret to inform you that today's post features more pumpkins!  I hope you'll bear with. I didn't want anything too formal looking, but not quite prim either.  Maybe this leans a bit more on the whimsical side... so here goes!

2016-10-16 11.03.25 copy

We've been shredding a bunch of old paperwork the past several months.  This last batch of shreds didn't make it out for the latest pick-up -- so we decided to put it to good use.

You'll need:
shredded paper (or crumpled paper would work too)
garbage and grocery bags
twine
masking tape
eBrush and siphon adaptor
Createx Airbrush paint
Hammered copper paint (spray can)
Patience ( you have to wait for the paint to dry)
Partially fill the garbage bag and two small grocery bags  (our local markets are still using plastic) with shreds.  loosely shape into a circle and tie the tops into a knot.  The largest and middle bag knots should lie pretty flat.

2016-09-21 07.04.19 copy
Using the twine, shape the pumpkin by wrapping the twine over and under the bag.  Tie off .  Repeat for each "pumpkin."

2016-09-21 07.15.25 copy
Make sure your work space is protected -- I worked in the garage and have lots of cardboard to protect surrounding surfaces from any overspray.  If you're sensitive to fumes and choose to use the copper spray, make sure the area is well ventilated.  TIP:  Allow at least 2 to 3 days for all your paint to dry on the plastic surface of the bags.

Wrap some masking tape around the knot of the smallest pumpkin to create a stem.  Using the eBrush with the siphon adapter, spray the stem and the area where the twine is wrapped.  Just to add a little depth to the colors you'll be spraying on top.  Your paint may pool a bit and will not dry immediately.  This is where the patience comes in.  LET IT DRY completely before going to the next step.

(sorry, the pics for this step and the next did not turn out) 

I wanted a bit of metallic - so I sprayed with some hammered copy spray paint -- since I didn't have any acrylic or enamel metallics for use in the eBrush on hand...  LET IT DRY completely.  We were experiencing some heat and humidity the days I was working on this, so the pumpkins had to sit for a couple of days.....  can you see me pacing and checking to see if the paint was dry yet? 

Once the metallic paint is fully dry, get your eBrush ready with some orange paint and spray to give the copper paint a hint or orange.  Spray more in some areas and lightly in others.  This adds to the look. 

Use some E6000 to secure the pumpkins in a stack.  You can spray with 2 coats of sealer for a little more weather proofing if your pumpkin stack will be directly exposed to the elements and not protected.  Add some foliage, raffia or ribbons to finish.

2016-10-16 11.02.30 copy

If you try this, and put your own spin on it, I would love to see the pictures!  In the meantime, I hope you'll build in some creative time this week and every week!  Nurture your creative soul! 

Don't forget that the rest of the Craftwell team will be blogging for the next two weeks this month.  Don't miss out on any of their creative projects. 
             
 Happy Crafting!  
Jan  :o)
  Nurture your creative heart today!

November 1, 2016

Office Bliss by Claire Campanella


My office can get a little crazy and my supplies end up everywhere, especially after finishing a project. I wanted to create some simple storage containers that I could leave out on my bureau or desk and not be visually assaulted by another cluttered mess. 

I used the Cut ’n Boss to repurpose these cans into beautiful storage containers for my craft supplies. I was able to clear up the clutter and display my supplies at the same time. 

To complete this project, I used:


Different sized vegetable and spice cans
Goo Gone
Razor blade
A clean dry towel
Double sided tape
Scissors
X-acto knife
3 differently patterned papers from Michael’s
Pencil
Ruler
Cut n’ Boss
Cut n’ Boss plates A and D
Craftwell Modern Stripe folder
Craftwell Alpha A6 folder
Lace trim

First, I removed the labels from the cans using soap, warm water, and Goo Gone. I also used a razor blade to scrape off some excess glue on the cans and then rinsed and dried them.


I measured the cans and cut the strips of patterned paper to size. 


I fed the papers through the Cut n’ Boss to add pattern and texture to my containers and give them a nice pop.


I mostly used double sided tape to attach the paper to the cans. I used the glue stick for the edges that weren’t laying perfectly flat. I also used an X-acto knife around the rim of the can to even out the edges of the paper if they weren’t perfectly aligned with the edge of the can. 


Now my arts and crafts room is that much more organized plus the containers are a work of art in themselves!

August 3, 2016

Happy Go Lucky Upcycle By Pam Bray

 
Happy Wednesday!!!
Pam here on the Craftwell Blog today sharing with you an easy upcycle project using instant coffee tins. 
So get that hot water going and get to drinking so you can have an empty tin to work with, giggling with you. 
But...seriously any tin would work for an upcycle project. 
  
 
Begin by die cutting two borders out using die, two "A" plates, "B" plate,  metal shim,  and platform along with the Craftwell Cut N' Boss. 
 
 
Run pieces through the Xyron Creative Station or use favorite adhesive. 
 
 
Cover tin with adhesive pieces. 
 
 
Die cut labels and doilies with pattern paper using the two "A" plates, "B" plate, metal shim and platform along with the Craftwell Cut N Boss. 
 
 
Run die cut pieces through Xyron Creative Station or use favorite adhesive. 
 
 
Add large label and honeycomb die cuts  to front of prepared tin. 
 
 
Add smaller label to front with pop dots. 
Add fussy cut image to front.  


Apply washi tape around lid edge. 

 
Adhere pattern paper to top of lid along with die cut pieces.  


Add knob to top of tin. 
 
 
Adhere small strips of pattern paper and metal brads to side of tin. 


So from an empty tin to a fun storage container, candy dish, gift box, etc. 
It is a fast, easy and a fun upcycle project.
 

I hope you have enjoyed my ABC Primer Upcycle Project. 
If you missed any of the projects this week make sure to check them out. 
Thanks again for stopping by the Craftwell Blog. 
Hugs Pam 
 
Supplies:
Craftwell Cut N Boss
Sizzix Labels Die
Sizzix Hello Doily Die
Sizzix Mixed Media Die
Graphic 45 ABC Primer Collection
Graphic 45 Washi Tape 
Instant Coffee Tin
Knob 
Metal Brads
Xyron Creative Station
                                                                  Pop Dots
'
 
Copyright © 2014 Craftwell Blog. Designed by OddThemes - Published By Gooyaabi Templates