
DO NOT MISS
>>Follow our Facebook page for updates! >>Join our Craftwell Design Team: Apply Now!
Showing posts with label sewing. Show all posts

April 15, 2016

Fabric Key Holder Love by Tyra Babington


Hello It's Tyra and I want to share this die cut fabric tag and key holder with you! 

Supplies: Craftwell Cut 'N Boss,sewing machine, steel cut dies, fabric scraps, interfacing, embroidery floss, needle, buttons, steel hardware. 

Patchwork Keychain Supplies version 2 CraftWell Tyra Babington


Step 1: Select the dies you want to use to create the fabric tag. Using the size of the steel die as a guide, cut out fabric and interfacing to a size slightly larger than the steel die. Fuse the interfacing to the fabric according the the instructions enclosed with the interfacing (save every scrap of interfacing because I guarantee you'll be using your Cut 'N Boss to make more!).  


Patchwork Keychain Cut Interface CraftWell Tyra BabingtonPatchwork Keychain Cut Interface 2 CraftWell Tyra Babington


Step 2. Use the Cut 'N Boss to die cut all of your fabric pieces! Hooray! No measuring required!
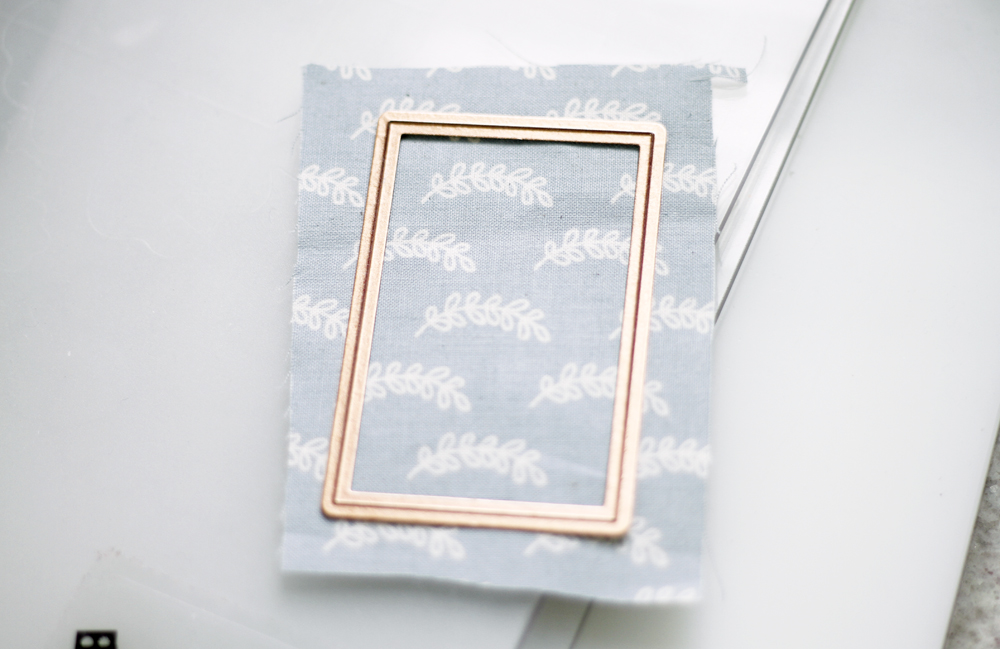

Patchwork Keychain die cut CraftWell Tyra Babington


Step 3: Assemble and sew all fabric pieces together! Sew on fabric embellishments or add buttons using a needle and embroidery floss. Use an additional piece of fabric to attach the metal key ring to the fabric fob. Optional: For a more polished look, place the "right sides" of the fabric together and sew together using at max a 1/4 inch seam allowance. Leave a small opening on one side of the fabric tag and use an object like a chop stick or bone folder to push the fabric through the opening, exposing the right side of the fabric. Push the corners out so they are nice and pointy. Iron the key fob along the seam. Sew close the opening. Sew on additional fabric embellishments or add decorative buttons. Use an additional piece of fabric to hide the opening and attach the metal key ring to the fabric tag.
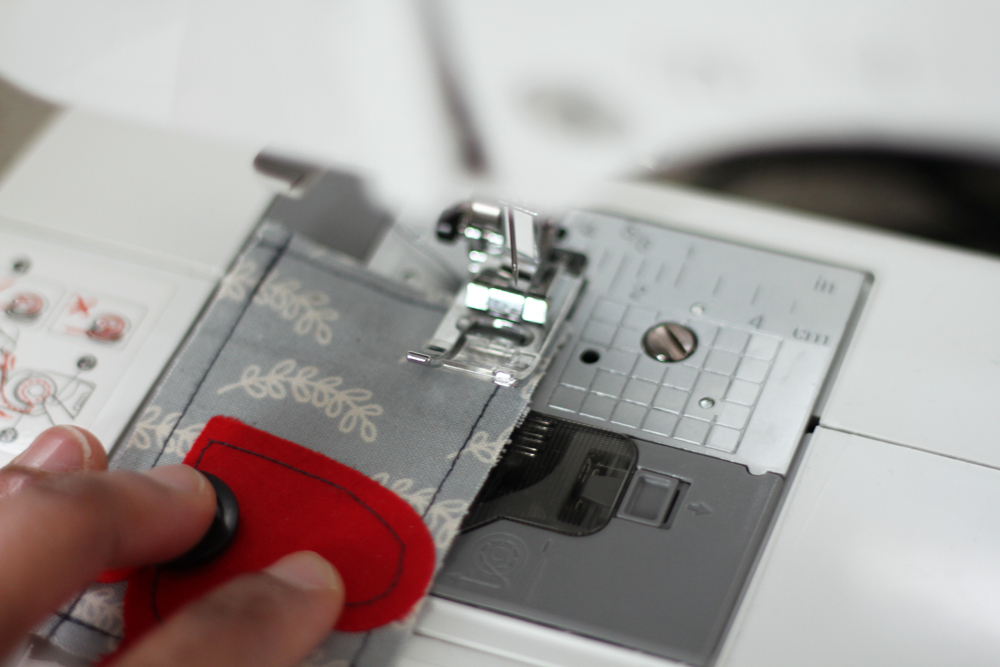

Patchwork Keychain Step Sew CraftWell Tyra Babington


I wanted to create something super simple and easy, not requiring a lot of fuss. I hope I have inspired you today! Thanks so much for stopping by!


Patchwork Keychain Feature CraftWell Tyra Babington

March 8, 2016

Shine Like A Star

                 Cut 'n' Boss Design Team: Suzanna Lee Cycle 12

Hey there Craftwell fans, Suzanna here today to share with you an easy to create mobile! It entails little more than your Cut'N Boss, cardstock (5 monochromatic shades), staggered shaped dies, an embossing folder and some thread in your sewing machine. Using the Cut'N Boss takes a lot of the fussy work out of die cutting and embossing as you can run several things through at once as well as not have to crank the machine! Just enter the "sandwich"into the opening and let the machine do all the work for you!


In addition to the Cut'N Boss, here's what you need to begin with;


I ran A LOT of cardstock through. I initially thought that I would use a lot more of the stars than what my finished project has. Less is more in this case. You can't appreciate the emboss or the monochrome if there are too many strands. Using the standard die cut sandwich, run your cardstock through the Cut'N Boss and cut out various sizes and shades. I have one of each size and a random extra of each shade.

I then used my sewing machine to stitch together strands of each of the 5 shades beginning with the darkest and working my way to the lightest shade (almost white).


Next, put the sewn strands into your large embossing folder and run the above sandwich through the Cut'N Boss. I was able to put 3 strands through each pass thus only have to do 2 passes!

Attached your strands to your hoop, tie twine to create the hanging mechanism and enjoy! This could be a fun idea for a baby's room. I have mine hanging in my craft room. I love when the light shines and you can really see the emboss!


Thanks for popping in today! If you create something from this tutorial or something similar, be sure to share it with us!

Supplies
Craftwell/TC Cut'N Boss
Craftwell/TC Beautiful Brocade Embossing Folder
Cardstock - Bazzill
Dies - Little B
Hoop - misc craft supply
Thread - Gutterman


June 10, 2015

Cloudy with a chance of Sunshine

Ebrush Design Team: Jan Hunter  Week 5 Cycle 2


After all the rain we had during the month of May, this little gal is definitely a ray of sunshine!
IMG_0003
She's definitely one of a kind.  She's made of muslin that has been stenciled using the Puntos stencil by Latina Crafter and Craftwell's eBrush with the Siphon adapter using Tulip Fabric dyes.
Here are a few pictures of the process. Get all your equipment ready -- Let's SPRAY!
Siphon2_0
Click on the photos for a larger image:
IMG_0046
IMG_0048
IMG_0047
I heat set all of the stenciled pieces before cutting and stitching..  After rinsing out the glue on the yellow piece, let dry and press.  Complete as directed in the pattern that you choose.  The body for this doll sits in a Mason Jar.  I used a pattern from my doll making era!  Add the overskirt and tie in place.  Add the hair and any additional embellishment.
I made an origami parasol following the directions found in this youtube video.  I sprayed the paper squares using the eBrush and Sharpie markers using the same stencil as used for the doll.
IMG_0053


Doll making is always fun!  Let your creativity flow.  Thanks for dropping by.  Hope you'll be spending some time crafting soon!
Thanks to our sponsor, Latina Crafter for the wood veneers and stencil used in this project!
Justthewayur1

 Latina Crafter


January 4, 2015

Sharing for 2015 - The Craft Room!

I always wanted a place to come together with good friends and share my love of crafting, art and sewing. This is a sharing of actual "Craft Group". They meet and share ideas and projects. Maybe this is your year to get the craft room fever! Thank you Jan Hunter for sharing!

Come Play with us!


We've been "playing" now for 8 1/2 years now.  Hard to believe that this now 2x a week gathering has been going on for this long.  It's still fun!
We started in May of 2006, meeting together once a month... making cards  Our motto was and still is:  "There are no Rules, just opportunities for embellishment."  Well, as things go, we soon discovered that once a month wasn't sufficient to get all the cards made , learn new crafting techniques or stay caught up... so we soon started meeting every Saturday starting at 10am and going until the last gal dropped!  LOL  We've had a few Saturdays where 12 hours later, we were still crafting.


We started with eight women and continued to share with friends.  A few have moved away, we've experienced the passing of one of our group, shared the highs and lows of life in general.  We've learned much from each other.


Early in our 2nd year of gathering, we started meeting on Wednesday's too.  It was fun to get together during the middle of the week and continue to learn and grow from each other.  Every woman in our group has certain strengths and loves sharing what they  make during their sessions in the craftroom.We started with making cards and 3D creations, a little bit of home decor and other crafting.  We've made paper, painted on canvas, folded paper and oh, so much more over the years - filling our homes (and our kids, and friends) with many of our projects.  There are a few gals who drop by, that don't craft -- but they enjoy the company and companionship of the group.  All are welcomed and it's always fun to visit.


While we still use steel rule dies and embossing folders, stamps and inkpads  from several well known companies, we have upgraded to electronic cutting machines and so mch more, including the use of Craftwell's ebrush in a couple of our most recent gatherings.  The sewing machine even makes an occasional appearance.  And we've even gone on a couple of road trips to pick up some additional stash!  So much fun and lots of adventures!

It's not hard to start your own group... just visit with a few friends, invite them over for an afternoon or evening of crafting.  For a couple of your first gatherings, prepare a quick craft for everyone to do to start things off and then let them work on their selected projects for the rest of the time.  We generally have a potluck and invite everyone to share a dish.  We've never been disappointed and it's always a surprise to see what is on the counter!  Lots of crafting time and oodles of great conversation every time we get together.


If this is something you'd be interested in starting in your area, please feel free to leave a comment. I'd love to help you get started.

Wishing you a very Happy New Year and a busy year of Happy Crafting!
'
 
Copyright © 2014 Craftwell Blog. Designed by OddThemes - Published By Gooyaabi Templates