DO NOT MISS
>>Follow our Facebook page for updates! >>Join our Craftwell Design Team: Apply Now!
Showing posts with label pocket dies. Show all posts

April 11, 2016

Card Mania: Featuring the Talents of Mitsyana Wright


Hello, Crafty Friends!! It's a new term with Craftwell's Cut'n'boss team and I'm so excited to start this term off with a bang!! Today, I have a group of cards to share and will  teach you how I made amazing 3D embellishments with a variety of Teresa Collins dies.

Supplies Used
Cut'n'boss (Craftwell)
Teresa Collins Pocket Dies- Today, Thankful Holiday, Girl's Best Friend, Lover's Lane (Craftwell)
 Truly Mitsyana- Terrific Tags (Brutus Monroe) 
Natural Burlap Stack (DCWV)
Classy Copper Stack ( DCWV)
 Brads (Prima Marketing Inc) 
Crop-a-dile (We R Memory Keepers)
Liquid Lacquer
Pages from an old book
Hemp twine


First, I used my Cut'n'boss machine and several different Teresa Collins dies, I cut out my diecuts from pages from an old book. With a large cutting platform, I can cut out several dies at once.

Also, these dies are very durable. So durable that I cut through 5 pages at a time. These pages were from an old book and cut very easily. I easily could have cut through more b the looks of it.


Next, I cut out these frames from metalic paper from DCWV's Classy Copper Premium Stack. This sheet had a houndstooth pattern to it and when diecut, gave the appearance of hammered metal... very cool!!


The Cut'n' boss doesn't only cut Craftwell brand dies but other competitor brands as well!! And not just for paper either!! Here I used one of my tag dies from the Terrific Tags set with DCWV's Natural burlap!! How freaking awesome is that?! For amazing results I used the following platform combo...

From Bottom to Top
D PLATE
A PLATE
B PLATE
MATERIAL 
DIE (CUTTING EDGE FACING MATERIAL)
A PLATE

Run this combo through your machine a few time to ensure best cutting results.
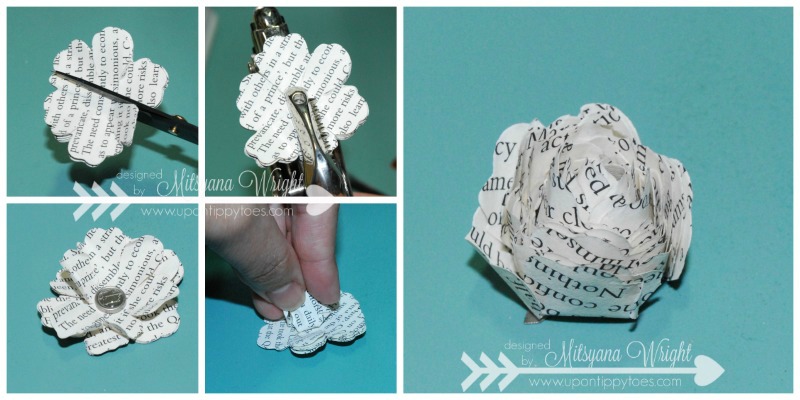

To make the rose I used the smallest flower from the Teresa Collins Girl's Best Friend set. I stacked my 5 layers on top of each other. And cut slits about a 1/4" toward the center of my flower, crating flower petals. 

Then I punched a hole in the center of my flower and fastened it with a brad.

Then, I pulled each petal upward toward the center. I skipped every other petal while working on a rotation. This ensured that each petal was separated. 

Then I curled the edges out the outer petals by pulling the edges slightly back.
For the daisy, I used the smallest flower from the Thankful Holiday set.  Again, I used 5 layers cut from and old book pages. This time I cut my hole first, inserted my brad, then cut my slits for the petals. Then I rotated each flower so that the flower petal below showed from between the petal from above. 

Next, I pinched each petal in half . I did this to each petal for each of my flower layers.

The butterfly was the easiest of all the dies to make three dimensional...
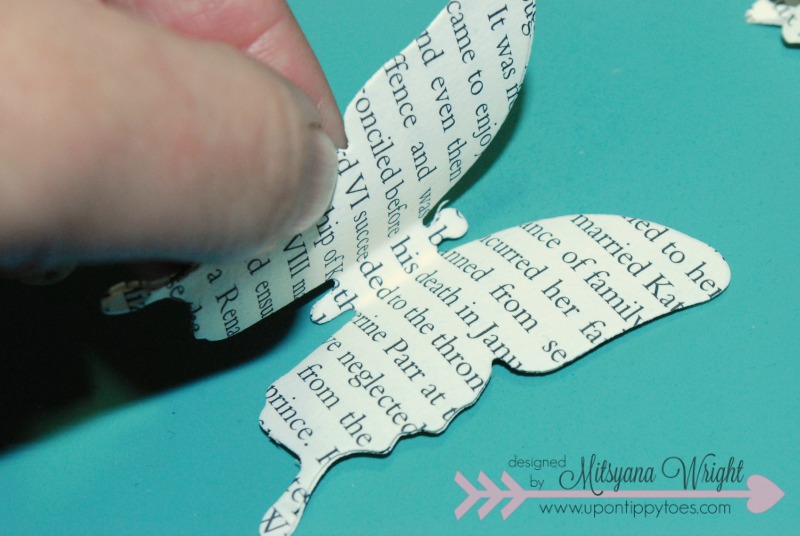
This time, I used only 4 layers. I glued just the bodies (not the wings) of the butterfly together. When my glue dried I bent the wings up.

I used my Creative Station Lite to attach my copper frames and some of my flat die cuts, like my butterfly, leaves, and frames.

I used the tag die on each card fronts but on one card I turned it sideways for a different look and tucked a doily die cut under it.  and trimmed off the overhanging edges. You don't need to have use your dies upright... a lot of the times if you tilt or turn your diecuts it give a whole new look.


Here are a close up of all the cards I made with all the different embellishments I made.


I hope you enjoyed a quick break down on how I create my embellishments!!

For more inspiration please visit my personal blog at:

Until, next time...
Happy Crafting!!
 
 ~ Mitsy


February 24, 2016

For my Love....

Ebrush Design Team: Jan Hunter Week 9 Cycle 3

Hi everyone, Jan here for this Wednesday's Design Team project.  Even though this is a little late for Valentine's Day... I do like the way this turned out.  I'm excited to be able to use a few dies from Teresa Collins for this project.  The script is delicate and beautiful and the tab is perfect for the pull out.


You'll need:
Electronic Die Cutting machine, software
Sew Crafty SVG Kit (wall decor file - frame and background svgs)
Hearts (dies and basic shapes library
cardstock
markers, Red, Gold, Black
eBrush
Teresa Collins Dies (Personally Noted, Tabs & Tags)
Cut-n-boss
Adhesives


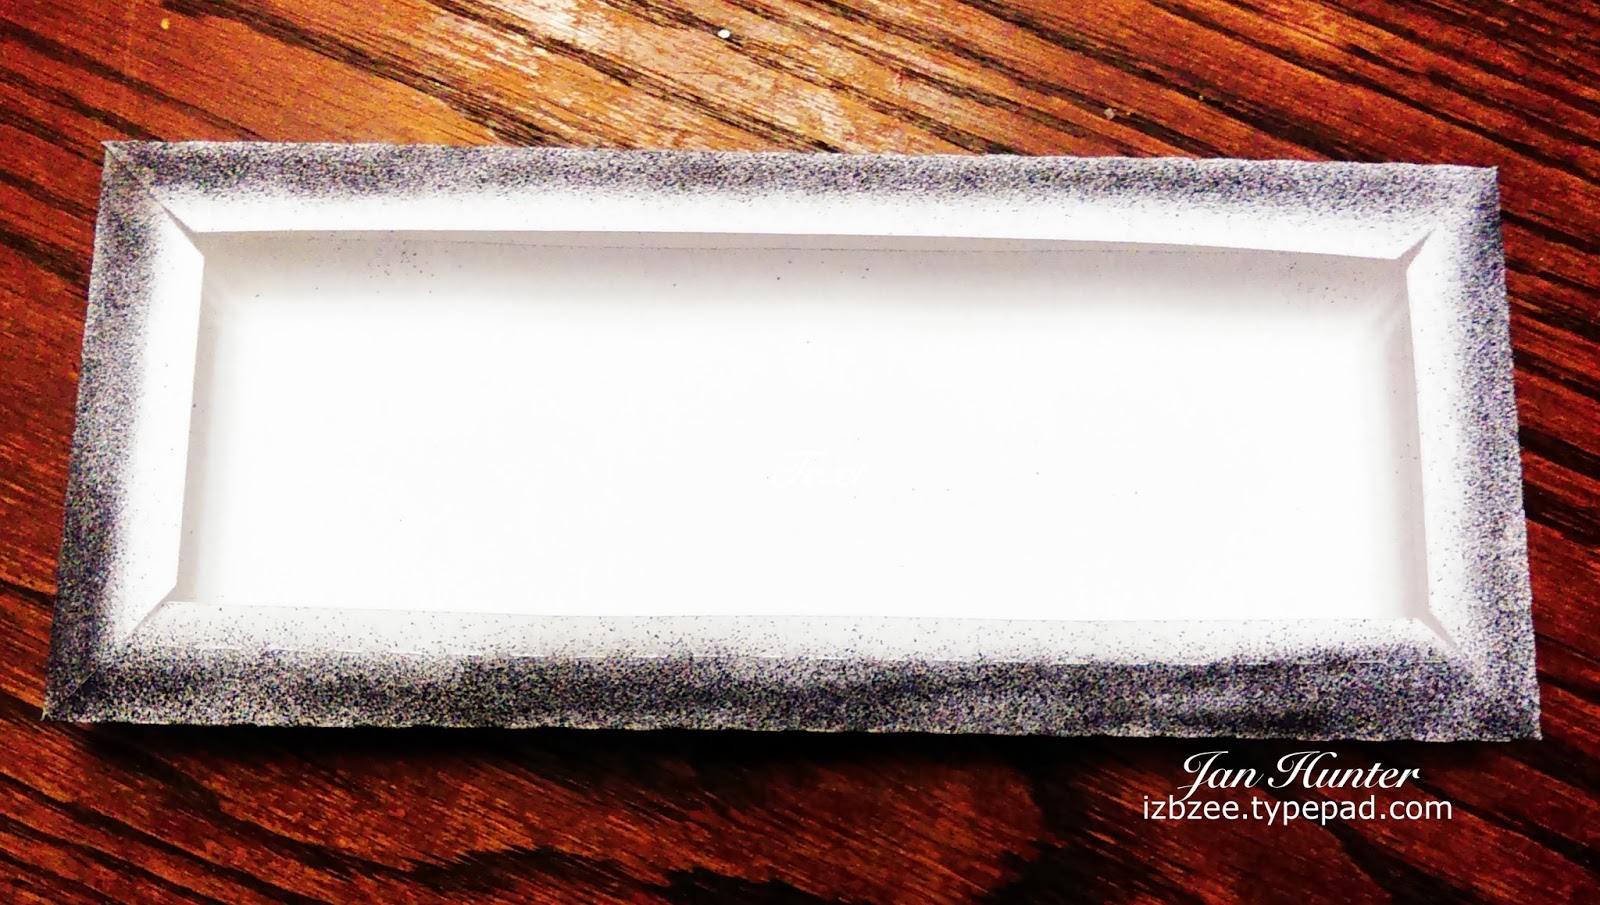
Follow directions to put the frame base together.  You can find those details here.  Do not put the background piece on yet.  Cut the hearts and the words Lucky, You and a tab from the die collections. 
Color the frame and the die cuts as desired using markers and the eBrush.  It's quick and easy. 


TIP:  Sargeant Arts mettalic markers fit in the SP adapter using the foam cushion hack -
Not so juicy markers can still be used if you like a mottled look. 


Create a pull out by cutting a piece of cardstock that looks like the photo below.  Add the tab die cut to the strip.  The tabbed strip will need to pull to the right in this instance.


 You will need to add a 1/2 inch wide strip of paper to the back of the front of your box approximately 1.5 inches in from the right side.  Trim the ends as needed so they are flush with the edge of your front.

Insert the pull out at this point.  Embellish the front and pullout, adding hearts, the die cuts and any other sentiments you wish to include and the pull out and apply to the frame.


Add your ribbon hanger if desired, then glue the front with the pull-out tab attached to the front of the box.  You're done!  This was a gift for my hubby!  He LOVED it and is still raving about the pull out.


Hoping you've created some time in your busy schedule to do a little crafting!  Be sure to stop by Craftwell's blog for more ideas and projects using Teresa Collins dies and the Craftwell eBrush. 


February 22, 2016

Special Birthday Wishes

Ebrush Design Team: Peggy Oliver Week 9 Cycle 3


Hello! Peggy here to show you my special 7th birthday card made with 
my eBrush by Craftwell USA and our sponsor Teresa Collins products. 

I used these dies to make my cut outs and I eBrushed my parts with yellow markers. 
I layered my pieces onto a card base. 


I used stickles to embellish and that was it! 
Super Cute right? 


I hope you enjoyed today's card brought to you by Craftwell USA


October 1, 2015

Remember this!

eBrush Design Team: Mitsyana Wright Week 12 Cycle 2

Hey Crafty Friends... It's my turn up for Team eBrush. These next two weeks we will be featuring awesome papers from Teresa Collins!! Yay!!

These papers are so super fab that they make your projects shine... literally!! I'm digging all the gold foil throughout her lines. And as a bonus many of her lines coordinate very well with each other!


Supplies Used
Teresa Collins Pocket Dies- Butterfly, Phrases, Honeycomb (Memory Collection), Flowers and leaf (Girls Best Friend & Thankful sets)- Craftwell
Teresa Collins papers- (Project Pink- Cards, Lattice, Gold), (Collectors Edition- Gilded, Geometric)
Stemmed leaf  (Small Ivy die - Die-Namites)
Sharpie Markers (Green, lime green, orange, brown)
Spectrum Noir Markers (IB2, CR2, CR5)
Gesso (Liquitex)
Modeling paste
Stencil (DCWV)
Polka Dots background stamp (Hero Arts)
Hot Glue gun and sticks
Assorted paper flowers (Prima Marketing)
Assorted ribbon & Tulle (Offray)
Assorted Buttons (Buttons Galore)
Diamond Glaze (Judikins)
2Way Glue Pen (EK Success)
Cutter Bee Scissors (EK Success)
Corner punch (EK Success)

I started by cutting out several the little golden square out of my Teresa Collins Lattice paper. I loved the look to this foil... it's has a nice shine without being overpowering.

Then I slid them into my Xyron "X" to turn them into instant stickers.

Then I just peeled them and arranged them randomly onto my sheet of Teresa Collins Gilded paper.

 I used my die cut machine and cut out 1 large leaf, 2 stemmed leaves,  2 honeycombs, and 1 of each phrase.

I ebrushed all my die cut pieces and paper flowers.


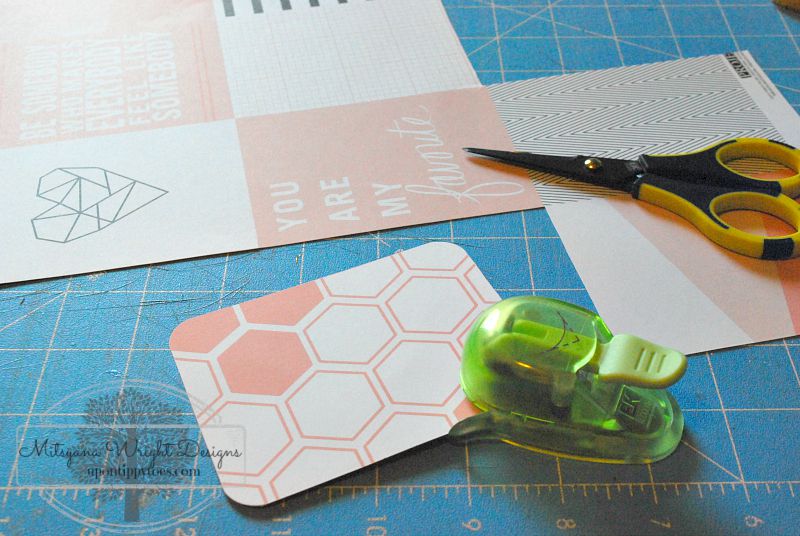
I cut out this awesome honeycomb panel from my Teresa Collins Cards sheet. Then rounded the corners.


I used my glue pan to adhere my different phrases onto a sheet of  Teresa Collins Gold paper... it has a lovely water brushed look on the backside of the gold!


Next I ran all my ribbon, die cuts, panel, and picture through my Xyron Creative Station!! Extra large platform is great for not just the BIG jobs but the many Small ones as well... so much better than having do them one at a time!!

Then I gessoed this adorable wood veneer bird cage I found at Michael's. Then I ebrushed it in Spectrum Noir IB2.

I also used more gesso to add details onto my butterfly wings.While that was drying...

I arranged and attached all my newly adhesive'd pieces. I hot glued buttons onto my flowers and used Diamond Glaze to attach them to my layout. And I made sure to use my glue pen to do the delicate honeycombs.

I cut out some Teresa collins Gilded paper to make my white and gold foiled roses. I used the flower die from the Teresa Collins Memory Collection for the flower and cut a total of 8 of the small flowers (4 for each rose). 

I love mixed media but hate the time it takes for most pastes and paints to dry. With the ebrush I can do mixed media with little to NO drying time!! The bird cage was ebrushed with my Spectrum Noir IB2 marker and dried INSTANTLY! I even ebrushed after I had attached all my elements onto my layout... around my main focal area  and pretty much everywhere I had a bit of honeycomb.

And here is my finished layout. 
Now I have a dainty page to match my precious baby girl (Who's not a little baby anymore)! 


Hope you liked my project for today!!

Until next time...
HAPPY CRAFTING!!
~ Mitsy

For more pictures & details of this and other of my crafty projects please visit my personal blog at:

www.upontippytoes.com

March 19, 2015

Romantic Rose Thank You Card & Free SVG

Ebrush Design Team: Mitsyana Wright  Week 11 Cycle 1


Supplies Used
eBrush (Craftwell)

Teresa Collins Cut'n'Boss machine (Craftwell)

Teresa Collins pocket dies (doily, leaves, and framed ticket/ label)
Spectrum Noir Markers (CR3, FS8, GB10, TN7, CG2, DG3)
Moment ink pad (Tsukineko- Tuxedo Black)
Sentiment Stamp (Virginia Turtle- Hedgehugs & Daisies)
12x12 sheet of acetate (overhead projection sheets or tansparencies would work fine)
Light box & stylus
Foam adhesive
Hot glue gun and glue sticks
Double-sided adhesive
Blue painter's tape
Flower stamens
Feathers

First, I downloaded the free SVG file from the Craftwell blog. Then I cut it out of acetate with my digital cutter. I separated and re-sized into 6"x 6" squares. I  made sure I used a sharp blade and did a multi cut. At least 2, but 3 times is better. This will make your stencils.


I taped my first stencil down to my work surface using blue painter's tape to hold it securely n place. I then sprayed down my first layer using my eBrush aand Spectrum Noir in CR3. The first stencil was the biggest flower of the templates.

This sis the result after just spraying the first stencil!! Looks good already!

I repeated the steps with second biggest flower stencil and instead of CR3, i used FS8. I know totally different color families... but hey. it works! I can start to see the flower building!! Looks awesome!

For the smallest details of the flower I actually layered 2 different colors on top of each other. I first used GB10 then TN7... Those two blended together to make that reddish brown above. This flower is looking outstanding!!

`
I saved the leaves for last to make sure the flower lined up properly. For the leaves I also used 2 different greens. Spectrum Noir CG2 and DG3. I ebrushed a base of CG2 then only accented it with DG3 around the edges. AND OH MY... the results... GORGEOUS!!!


Then I took each stencil (one at a time) and layered it over their matching image, taped it to my paper with blue painter's tape, and then flipped it over and used a stylus to emboss and raise the image. 

Check out these results!! It gave the flower a lot of POP!! LOVE IT!!


Then with my Pocket Dies from Teresa Collins and my Cut'n'Boss. I cut out my pieces. I cut my doily into fourths... you'll see why in the next pic.


This is how  I assembled my card. the doily wasn't big enough to cover the whole back and my rose image would have been completely covered. So this is a good way to fake the appearance of a having a huge die without actually having one! 

Check out all the layers and dimension!!


I lastly attached my feathers leaves, and paper rose, Which I also ebrushed with the same Spectrum Noir markers above (CR3 &  FS8). I then stamped my sentiment. This is from Virginia Turtle's Hedgehugs & Daisies set.    I love the font used... It coordinates with the card perfectly!! 


Here is the beautiful end result!! I just love it! I am definitely going to using this stencil over and over! It is very romantic!

Special Thanks to Judith Kim for making such an AWESOME file!!

Hope you all enjoyed this tutorial!

~ DT Mitsy

Come and visit my blog for more inspiration!


'
 
Copyright © 2014 Craftwell Blog. Designed by OddThemes - Published By Gooyaabi Templates