
DO NOT MISS
>>Follow our Facebook page for updates! >>Join our Craftwell Design Team: Apply Now!
Showing posts with label ink. Show all posts

June 12, 2023

Happy Birthday

Hello everyone! This is Berina here, with a quick and simple birthday card perfect for a girl!
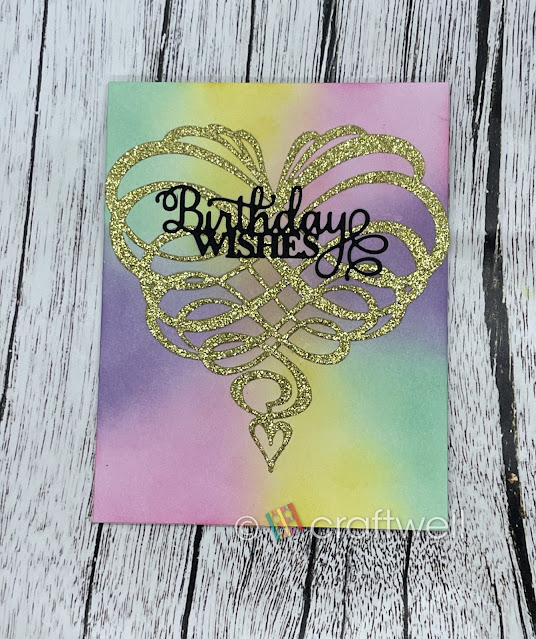

My daughter had a My Little Pony themed birthday and I wanted to make a card using the beautiful colors. So I inked the card base with light pink, purple, yellow and mint in a alternate fashion in diagonal. Then I die cut Spellbinders - Amazing Paper Grace - Swirl Heart on a gold glitter card stock and adhered it on to the card base. I die cut the sentiment using Creative Expressions - Belated Birthday Wishes die on black card stock and snipped off the 'belated'. I used SNAP to die cut.

I didn't know what to expect when I thought about making this card, but I do like how it turned out. What do you think? Do let me know. Thanks for stopping by. Have a great day!

-Berina

December 22, 2020

DIY Holiday Tags

Hi everyone! Been while and I wanted to share my project.

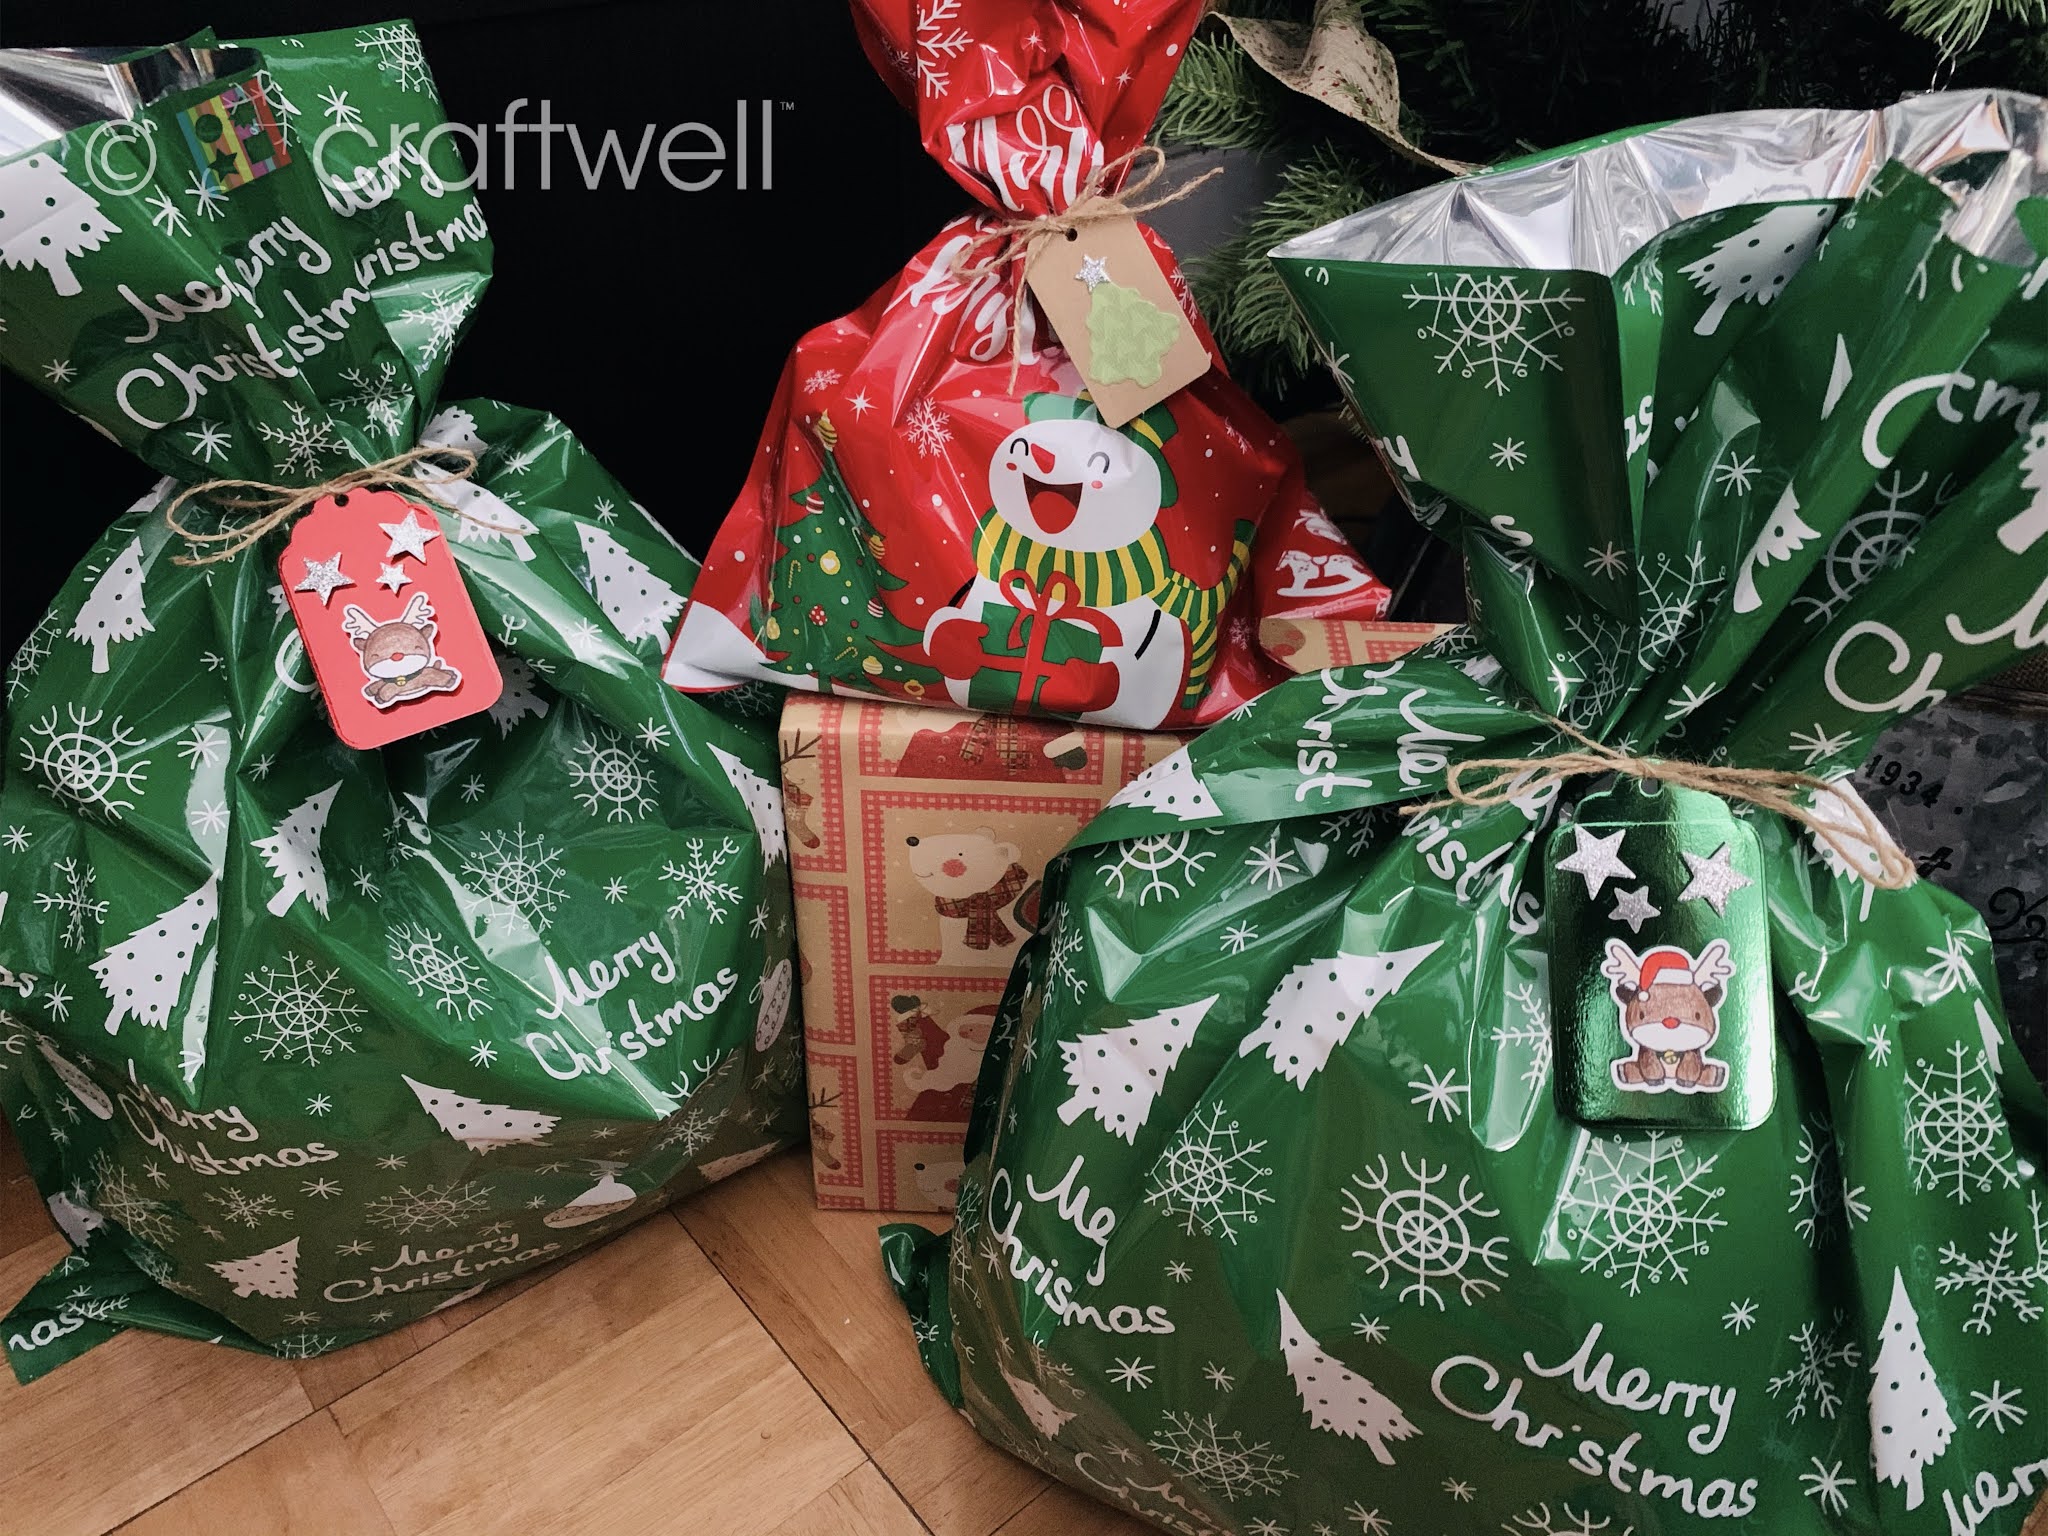
Katie here with a fun and simple DIY Holiday Tags that anyone can do.

Who needs to buy tags when you can just make your own, right?


Here's what I used to make my tags:

- Craftwell's eBosser

- Recollections Christmas Tags stamp & die set from Michaels

- Hampton Art Mama Elephant Reindeer stamp & die set from Michaels

- ColorBox black stamp dye

- Color pencils

- Recollections Traditional Foil cardstock from Michaels

- Glitter cardstock

- Plain white cardstock

- Kraft paper

- Twine

- Foam adhesive squares


Reindeer Tags:

I started off by stamping the reindeers in black dye onto the plain cardstock then cutting them out from the stamp & die set from Recollections and colored them. Taking the tag die, I cut into one of each of the red & green foil cardstock. I also die cut some stars with the glitter paper. With all the pieces all cut-out and colored in, I used the foam adhesive squares behind each and placed them however I wanted on the tags. Attach each tag onto the gifts with twine and your gifts are ready! Don't worry, on the back there's space for messages.


Finished tag with the red foil cardstock


I also made the Christmas tree tag and it was about the same process, but used some leftover pattern paper for the tree and kraft paper for the tag itself.

I hope you all liked my project and it might not be that fancy, but could be great for those who are beginners. Feel free to left comments and feedback.

Until next time! Happy Holidays! Stay safe and warm.

- Katie


November 19, 2020

JOY

  Hello everyone!! This is Berina here today, with this beautiful Christmas card. 

Christmas is one of my favorite occasions to make cards for. I love trying different color combos, but I definitely love the traditional colors more, which is apparent by this card. I die cut the pine leaves, ornaments, holly and poinsettia using dies from Spellbinders on white card stock and colored them all with Copics. Coloring them gives a little more dimension. I die cut the letters JOY on gold glitterstock - after all how can you make a Christmas card without even a little glitter! I inked the top and bottom of the card stock with Hero Arts Forever Green ink. I arranged all the die cuts on the card base and adhered them. I added some poinsettia sequins and glitter balls to finish the card.

How do you like my card today? Please do let me know. Thank you for stopping by! Have a great day and stay safe!!

- Berina

April 22, 2020

Thanks A Bunch

Hello everyone!! This is Berina here on the blog today, with this Thank You card with pastel color theme.


I die cut the balloon using the Sizzix - Favorite Things Collection - Hot Air Balloon die on the patterned paper from Brutus Monroe on my Cut'n'Boss. I took an A2 card base and used the Brutus Monroe Cloud stencil and Sidewalk ink to create a subtle cloud background. Then I assembled the die cut of the hot air balloon and adhered it down. I wanted to use the banner from the same die set for the sentiment, but didn't have any stamp that would fit in there. So I wrote the sentiment "Thanks A Bunch" on the banner. I adhered some flowers from this package.

How do you like this card? Please do let me know!! Thanks for stopping by. Hope you all are staying safe!!

-Berina

January 31, 2020

DT: Angel Tags


Dear Scrappers,

This is Veronica, from Vicky's Scrapping Passion sharing my post for Craftwell:
For this post, i wanted to share the angel tags I made for my friend for the Epiphany: 


I used the Angel spellbinder dies to make this simple but cute tags. I stamped a German sentiment with olive StanzOn ink and used DCWV solid gold foiled double sided paper:


I attached some CTMH twine and tied around the goodie bags I made for my friends.

I love how they could use these tags as ornaments too.


Please make sure to visit my blog for more inspiration and to follow me.

Happy February,

December 17, 2019

Christmas Window

Hello everyone! This is Berina here today, with a Christmas card.


I started by cutting the window using the Spelbinders die from an A2 card base and a piece of Brown Butter card stock. I stamped the brown butter card stock with the Barn Wall stamp with Brutus Monroe Macchiato ink. I inked the die cut piece of window with the same ink too. I adhered acetate on the window and using a knife, cut out the panels on the acetate so that the window can still open and close. I sandwiched this acetate piece with the window, between the A2 card base and the brown butter panel. I die cut the candles on the window using the die from Divinity Designs. I heat embossed the sentiment from the Divinity Designs - stamp set with Gilded Embossing powder. I die cut the Christmas Tree (which is on the inside of the card) using the Spellbinders die on Brutus Monroe Glitterstock.


I'm loving using these dies on my Cut N Boss - it's really quick and easy. How do you like this card today? Please do let me know in the comments. Thank you for stopping by. Have a great day!!

-Berina

September 5, 2019

DT: Gift Tags/Bookmarks for the teachers


Dear Scrappers,

This is Veronica, from Vicky's Scrapping Passion sharing my post for Craftwell:
I made some gift tags for the chocolates, I gifted to my kids teachers and wanted to share them with you:


These gift tags are very sturdy and could be use as bookmarks too. I used "Thanks" sentiment stamp from Sizzix, its complimenting circle die, and some religious sentiments dies and doilies from BoBunny for the  bookmark. I also used some Clear Scraps acrylic angel shapes, I had previously alcohol inked for some of the tags/ bookmarks, and decorated them similarly to the circle tags. For some of the tags, I also used shipboard stickers from BoBunny (see the "dream big" tag).


I used my CutNBoss for cutting out the circle tags, sentiments and dollies. I also used some leftover gold foiled printed papers and gold cardstock to cut out the circle tags, the doilies and the sentiments.

Here you can see the angel tags in better detail:


I hope you enjoyed these super easy to make tags/bookmarks and visit my blog for further ideas:

February 21, 2017

Lisa Somerville a blast from the past!!!

 Lisa Somerville 


We revisit one of Lisa Somerville's posts. This is so spring looking and so much fun to create!. I'm sharing an altered tin using the eBrush and Alcohol Inks.

Here's my finished tin:


Supplies:
Craftwell eBrush 
Inks - Alcohol Inks
Other - Non Stick Craft Mat, Tin


Be sure to cover your work station, or work on a Non Stick Craft Mat.  You may also want to wear old clothes or gloves, as the Alcohol Ink does tend to spread. You can easily remove the Alcohol Ink from your hands or any other surface using Ink Blending Solution.

Place a drop of alcohol ink on the tin


Use the eBrush to spread the alcohol ink, blow the air until the ink is dry.


Continue this process with additional colors of alcohol inks, until the tin is covered.


Let tin, embellish as desired or add a stamped tag.


You can use this same method to create fun backgrounds on Glossy card stock, or use it to decorate some Easter Eggs!

Thanks for stopping by the Craftwell Blog, I hope I've inspired you to create Art! For more inspiration, please visit my blog!

'
 
Copyright © 2014 Craftwell Blog. Designed by OddThemes - Published By Gooyaabi Templates