DO NOT MISS
>>Follow our Facebook page for updates! >>Join our Craftwell Design Team: Apply Now!
Showing posts with label hot air balloon. Show all posts

January 20, 2023

Hot Air Balloon Plant Accents

Plants looking a little lonely by themselves?

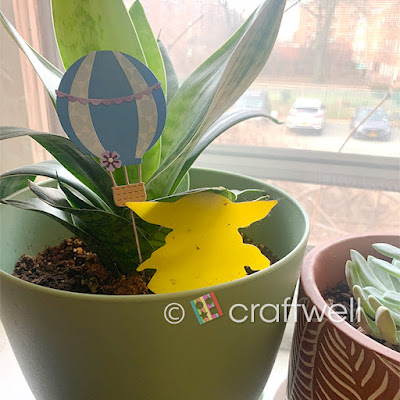
I have just the thing! Made these cute little hot air balloons for my indoor plants.

A nice and simple project anyone can do, and also great for kids.


Materials

Craftwell eBosser

Sizzix ThinLit - Hot Air Balloon Die Set

Leftover cardstock paper

Hot glue gun

Wooden skewers


I'm the type that likes to use what leftover cardstock paper or scraps for my projects. So I figured I do that for this project since the pieces were going to be pretty small. 

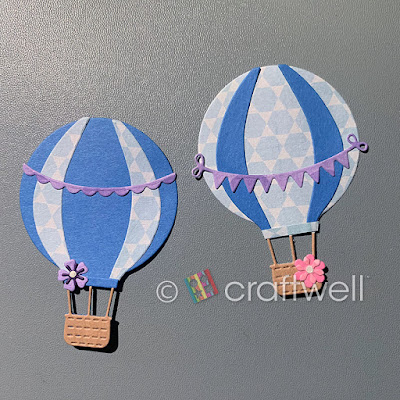
I started off using both patterned and solid color paper of a blue shade for the balloon part. The other pieces I chose purple, craft paper and pink. Some pieces were also leftover from other project (like to keep them just in case).

Fun part! Assemble all pieces together and below you can see a photo of the hot air balloons before attaching the wooden skewers.
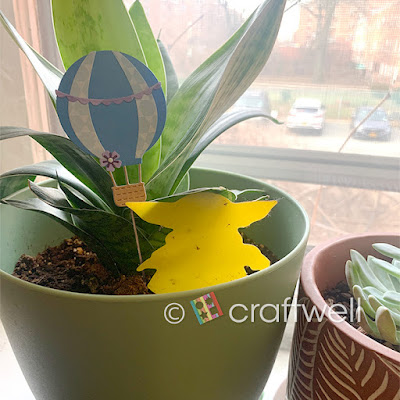


Finished project!


Hope you all liked my project and got inspired!

Till next time.

- Katie


February 5, 2021

Thanks a Bunch

  Hello everyone!! This is Berina here today, with a simple thank you card. 

I used the Sizzix Hot Air Balloon Die on pattern papers from Brutus Monroe to make the hot air. This die has become one of my favorites - it can be used for a lot of different types of cards. I've made quite a few with it so far. The sentiment is from a stamp set by Verve stamps. I adhered a piece of grey card stock on an A2 card base and matted it with a white card stock. I adhered the hot air balloon next and stamped the sentiment. Love my Cut'n'Boss for all the die cutting!

How do you like my card today? Please do let me know. Thank you for stopping by. Have a great day.

- Berina

October 14, 2020

Light Up Balloon

Hello everyone!! This is Berina here on the blog today, with a light-up card. Believe it or not, this is my first light-up card and certainly won't be my last :)


I made this for my Dad's birthday. I started by making the card base. I took an A2 card base and adhered a light blue cardstock panel on to it. I folded the top of  the card base in to half, to make the easel. I die cut the hot air balloon using the Sizzix Hot Air Balloon die, on card stock and vellum using my Cut N Boss. I slightly colored the vellum with Brutus Monroe inks. I sandwiched the lights in between the cardstock and the vellum balloons and adhered it there and then placed the yellow pieces on the balloon. I die cut a few clouds using the die from the same die set. I adhered the switch part of the light behind one of the clouds. I die cut a banner and wrote 'Happy Birthday' since I couldn't find a stamp that would fit in it. I die cut another banner using another stamp set and wrote 'Dear Appa' - Appa is how I call him and it means Dad in our language Tamil. I adhered this banner with foam tape, on the inside of the card and it will serve as the 'stopper' for the easel. Here's a pic of it with the lights on:

And here's one with it flat, ready for the envelope:

How do you like my card today? Please do let me know. Thank you for stopping by. Have a great day.

- Berina

August 13, 2020

Tri-fold Shaker Card

Hello everyone!! This is Berina here on the blog today, with this tri-fold, see through shaker thank you card.
I started by making the see through shaker. I die cut 2 hot air balloons using the Sizzix Hot Air Balloon Die on the patterned paper pad from Brutus Monroe. I took a piece of string attached the balloon and the basket part to it, leaving enough length at both ends of the string, so that I can attach the ends of the string to the frame. Now I adhered the other balloon and the basket on the back side, so that the thread is sandwiched between the 2 pieces of balloons and both front and back looks the same. I took a panel of size 4 3/4" x 5 1/2" of card base weight (110 lbs) and scored at 1/2" mark along the 4 3/4" side. This 1/2" will later be adhered to a A2 card base, making a tri-fold. In this panel, I cut out a window leaving a border of 1/2" along all sides. I adhered acetate on to it. I sandwiched the thread from the hot air balloon between the window panel and foam tape, on the top and bottom. I added shaker mix from Doodles Paper Playground. I closed the shaker with acetate on other side as well. I took out a panel of Silver glitterstock from Brutus Monroe and cut out a window frame, leaving 1/2" around all the sides. I adhered this frame on the shaker panel, to hide the foam tape.
Now I took a regular A2 card base and adhered the 1/2" extending out from the shaker panel on to one end of the card base. I inked one of the panels with BM Speckled Ink with the BM Cloud stencil to create a sky like scene. I die cut the sentiment "Thanks" using the BM thanks die on silver glitterstock and added it to the panel. Here's a view of the card, fully opened up.

How do you like this card? Please do let me know your thoughts and comments. Thank you for stopping by. Have a great day!


April 22, 2020

Thanks A Bunch

Hello everyone!! This is Berina here on the blog today, with this Thank You card with pastel color theme.


I die cut the balloon using the Sizzix - Favorite Things Collection - Hot Air Balloon die on the patterned paper from Brutus Monroe on my Cut'n'Boss. I took an A2 card base and used the Brutus Monroe Cloud stencil and Sidewalk ink to create a subtle cloud background. Then I assembled the die cut of the hot air balloon and adhered it down. I wanted to use the banner from the same die set for the sentiment, but didn't have any stamp that would fit in there. So I wrote the sentiment "Thanks A Bunch" on the banner. I adhered some flowers from this package.

How do you like this card? Please do let me know!! Thanks for stopping by. Hope you all are staying safe!!

-Berina

March 17, 2016

Hot Air Balloon Garland by Alexia Misso

Hi crafty friends! I'm back today with a new inspiration, a Hot Air Balloon Garland. I recently found this idea on the internet I think it's the cutest idea ever! Not sure how much you would be interested in making one of this but I prepared the tutorial for you, just in case you know. Hehe.


Supplies:
·         Circle Die (any size you prefer)
·         Hole punch (preferably a small one)
·         Patterned Cardstock
·         Glue
·         Scissor
·         String/Twine


Direction:
Step 1: Prepare circle die-cuts (four circles make one hot air balloon).
Step 2: Fold all circles in half.
Step 3: Take one of the fold circle to use as base, punch a small hole with a staple. String through twine or ribbon.
Step 4-6: Apply glue on the rest of the folded circles and adhere to the base, as shown in picture 4, 5 and 6 above.
Step 7: Refer picture below, cut rectangles to create the baskets for the hot air balloons. Connect the balloon and the basket using twine.


Here is the completed project, I hope you enjoy the tutorial. Happy Crafting!


'
 
Copyright © 2014 Craftwell Blog. Designed by OddThemes - Published By Gooyaabi Templates