DO NOT MISS
>>Follow our Facebook page for updates! >>Join our Craftwell Design Team: Apply Now!
Showing posts with label glitter. Show all posts

August 13, 2020

Tri-fold Shaker Card

Hello everyone!! This is Berina here on the blog today, with this tri-fold, see through shaker thank you card.
I started by making the see through shaker. I die cut 2 hot air balloons using the Sizzix Hot Air Balloon Die on the patterned paper pad from Brutus Monroe. I took a piece of string attached the balloon and the basket part to it, leaving enough length at both ends of the string, so that I can attach the ends of the string to the frame. Now I adhered the other balloon and the basket on the back side, so that the thread is sandwiched between the 2 pieces of balloons and both front and back looks the same. I took a panel of size 4 3/4" x 5 1/2" of card base weight (110 lbs) and scored at 1/2" mark along the 4 3/4" side. This 1/2" will later be adhered to a A2 card base, making a tri-fold. In this panel, I cut out a window leaving a border of 1/2" along all sides. I adhered acetate on to it. I sandwiched the thread from the hot air balloon between the window panel and foam tape, on the top and bottom. I added shaker mix from Doodles Paper Playground. I closed the shaker with acetate on other side as well. I took out a panel of Silver glitterstock from Brutus Monroe and cut out a window frame, leaving 1/2" around all the sides. I adhered this frame on the shaker panel, to hide the foam tape.
Now I took a regular A2 card base and adhered the 1/2" extending out from the shaker panel on to one end of the card base. I inked one of the panels with BM Speckled Ink with the BM Cloud stencil to create a sky like scene. I die cut the sentiment "Thanks" using the BM thanks die on silver glitterstock and added it to the panel. Here's a view of the card, fully opened up.

How do you like this card? Please do let me know your thoughts and comments. Thank you for stopping by. Have a great day!

April 16, 2019

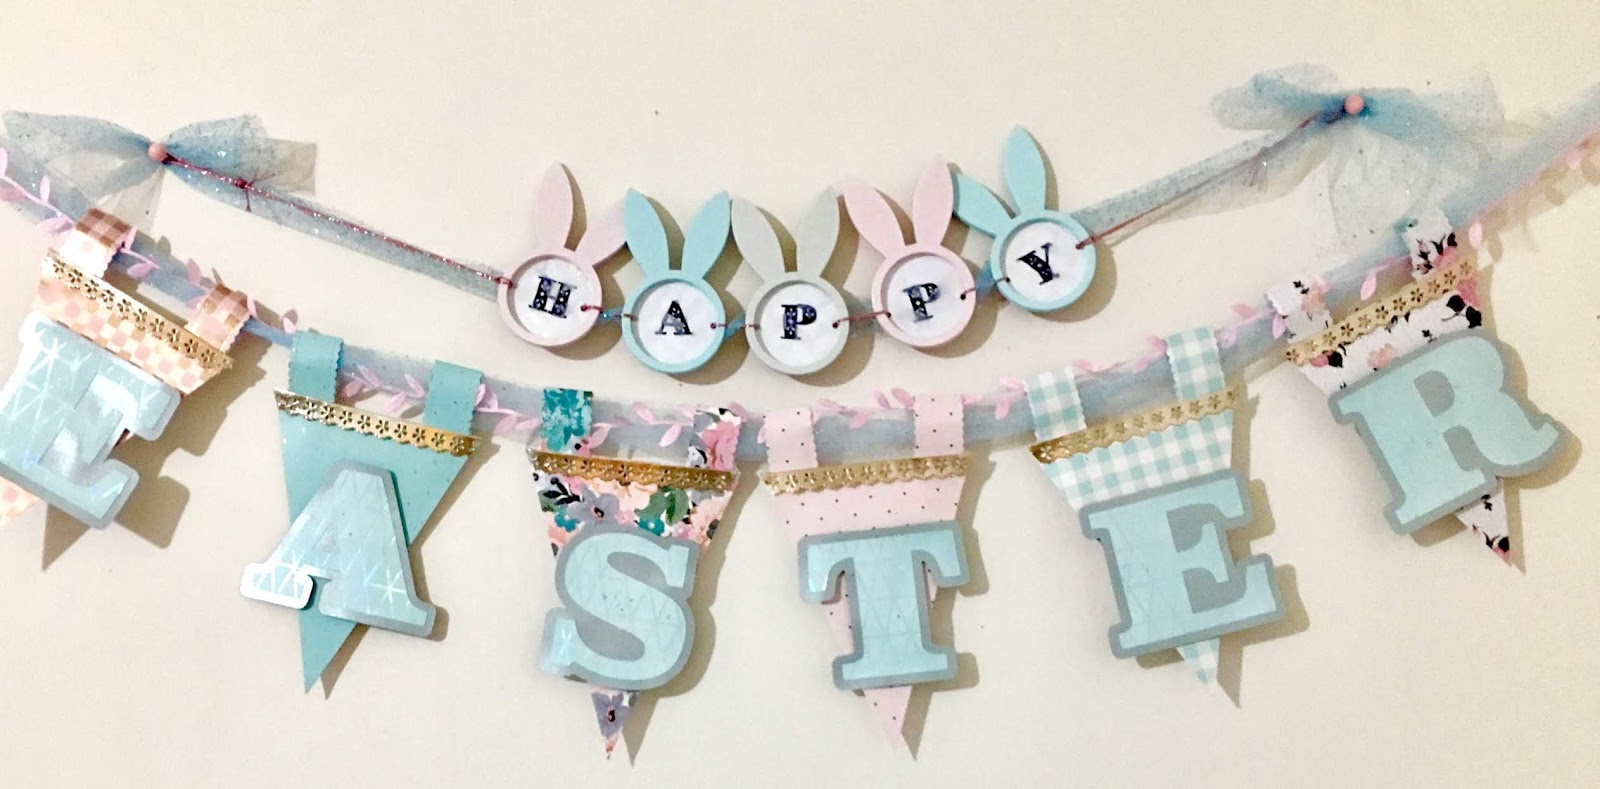
Happy Easter Banner

Hello there! Welcome to the Craftwell blog! Desiree', here to share a banner I made to celebrate Easter! For me Easter is full blessings! So being a little extra is a must!
And this banner is just that, extra! Heheh!


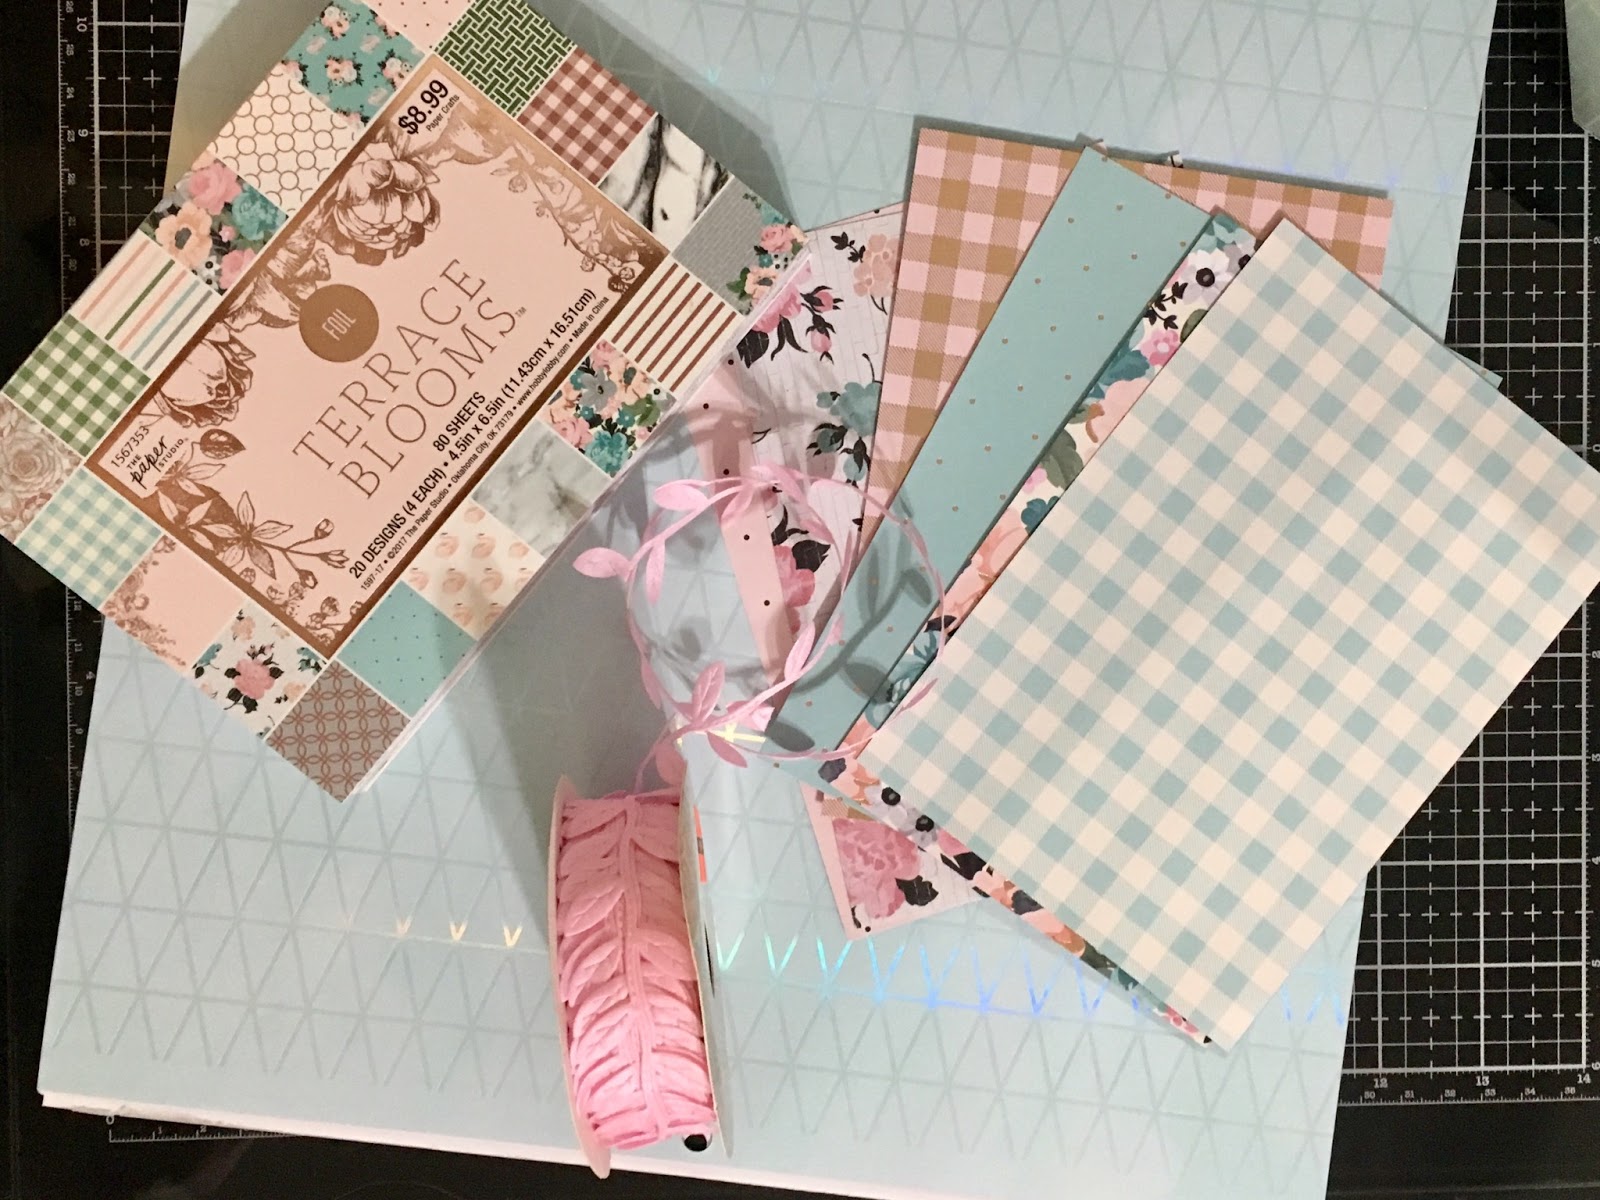
So if you have came across any of my posts on this blog (and I hope you have) you will know all my projects start with choosing the papers! 💖 This task was made super easy by using the Paper Studio, Terrace Blooms, 4.5x6.5 stack. I also used a couple of 12x12 pieces of paper from an older stack in my stash by DCWV, called Water Color Ombre. I used some 65 lb. metallic paper too. I love the papers I chose!


More and more I am obsessed with die cutting! I love the ease of it and the way the finish of the edges on a die cut!
I unfortunately did not have a die to cut the kind of banner shape I had in mind, SO I busted out my WRMK, banner punch board. Then cut my banner pieces out.


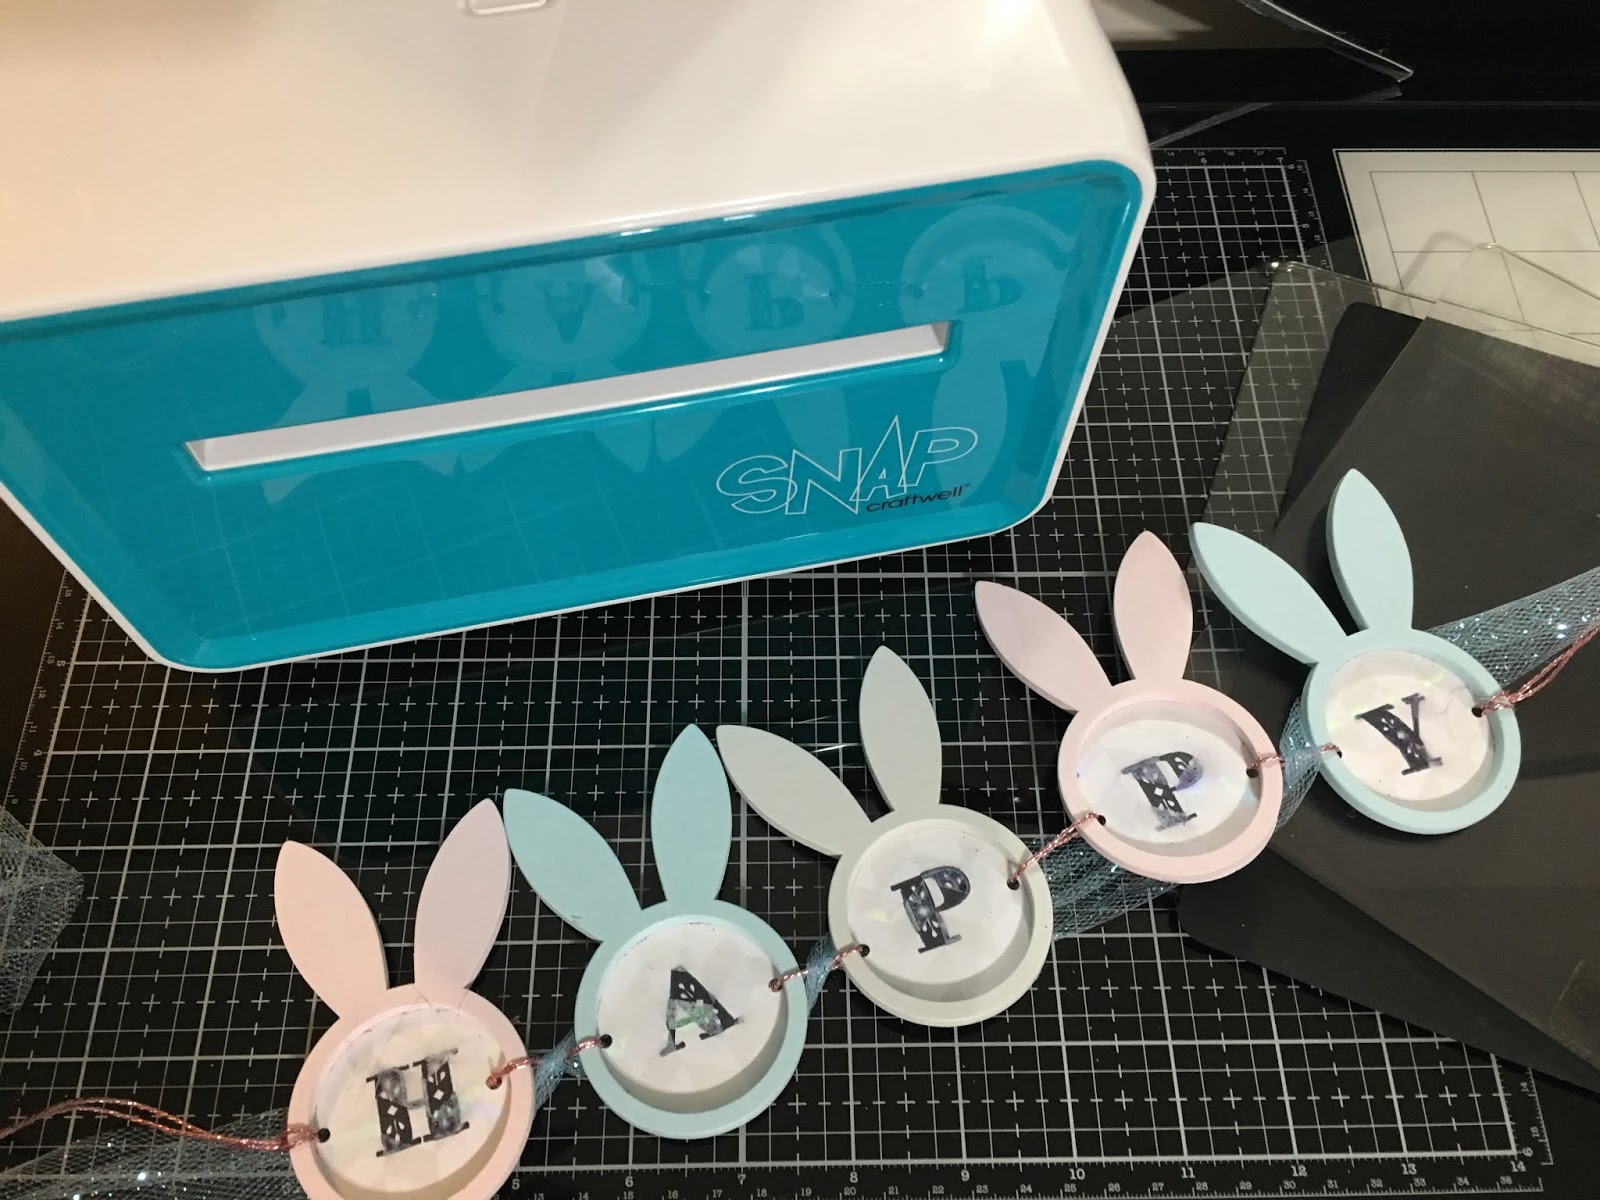
Next I did some stamping! Using the epic Tim Holtz stamping platform, of course. So I stamped H-A-P-P-Y out on some of my paper. Oh! Forgot to mention the bunnies!
I had bought some napkin rings from the Spot area, and knew I would utilize them in crafting! Muhahah!
FINALLY it was time to use my Snap machine and die cut out each letter with a circle die to fit my bunny napkin holders! Which are now part of my banner set up.


I had NO alpha dies! So I had to cut some out using my electric cutting machine. So I did just that! I also punched a couple of holes on each circle for stringing the trims and to be able to hang this part of the banner.
I used the blue paper from the water color stack, and cut out a shadow in that metallic silver.


I die cut some of my banner scraps and made some scalloped hanging tabs for my banner pieces. 
This part was repetitive BUT worthwhile. 
I decided to add a little metallic trim too! 
Once it was all pieced together I loved the end results.


And after each banner piece was together, attacked and trimmed up, it was time to string it all together, and so I did. Thing is, last minute I decided to not only use that pretty pink leaf trim pictured somewhere above BUT I decided to for the first time utilize this pretty blue glitter tulle! OMG! The mess was pretty and massive! LOL


It was like fallout from a nuke missile BUT in the form of glitter! LOL It all ended happy though, because I loved the qY it all came together! Hope you do too!


So there she is in all her spring flavored cuteness! As always, I hope you came, you saw, and were inspired! Easter blessings to you all and please keep coming back! 

     ðŸ’Ÿ - Desiree'

March 14, 2019

Lucky! Artist Trading Card & Greeting Card!


Hello again! It's your girl Desiree', back on the Craftwell blog, and I am sharing two projects with y'all today!
That must make this your LUCKY day! LOL Just kidding!
So on to the details...

I first picked out my papers and such, I ended up choosing to use only 2 dies, but I stretched those out to make 2 projects! I used the Craftwell Lucky tag die and a little heart one by Craftwell too!
The papers by The Paper Studio, were recently bought at Hobby Lobby and were on sale! The glitter paper was on clearance even! All the other things were in my stash.


I cut out my dies with my Snap machine of course! Keeping in mind I wanted to use the positive and negative parts of my cuts.
I then started to piece together some embellishments using the die cuts.
I cut four hearts and made a four leaf clover for the ATC from the glitter paper. I also used a tiny doily with the Lucky tag and a sticker to make a cluster embellishment for my other project. I kind of love the way they turned out. I decoupaged my patterned paper onto my ATC card BEFORE I adhered any of my other elements to it.
I also used some washi tape behind the word lucky, so it would pop a bit more.


I kept the paper strip I cut my hearts out from and used it as a border on the top of this card. Added more washi for poppage and some shamrock bling too.
As I said before I cut the shamrock paper to cover my ATC, then decoupaged it, and sanded the edges to make them nice and clean. I also cut a strip to accent my card.
Then I cut a thinner strip of that glitter paper, had to! Because GLITTER! LOL Seriously though.
After stacking things and adhering them I was almost done. Just had to add some ribbon, seam binding, and a felt bow to my tag, a little Tim Holtz, small talk too and BOOM! They were all complete! 


As always thank you for coming by, please come again!
 I hope you liked what I shared and found some inspiration! In advance let me wish you all the most blessed St. Patty's day EVER! 


May 11, 2018

Mother's Day Wishes

Hello everyone!! It's Berina here today with a elegant Mother's Day card.


For this card, I started by cutting a piece of white cardstock with 2 dies from the Spellbinders - A2 Scalloped Borders die set. Then I embossed it with Modern Stripe embossing folder from Craftwell. I die cut the elaborate tag from Spellbinders - Renaissance Tags die set from grey card stock. 

Since the grey card stock was so thin, I die cut another layer from a piece of heavyweight white card stock and adhered them together. I die cut the flowers and flourishes from the same die set from silver glitter paper. 

I stamped the sentiment from Verve Stamps -  Joyful Blooms stamp set and die cut it with the oval die from the same tags die set. Now to assemble the card, I took a top-folding A2 card base and adhered grey card stock on it. Then I adhered the die cut and embossed white card stock panel. I adhered the sentiment oval panel on to the grey tag and adhered it on to the card with foam tape. I adhered the silver glitter paper flowers and flourishes (I cut them into small pieces) around the sentiment tag. I added a few pearls to add some elegance to the card.

What do you think? I'm so much in love with die cutting!! I used my Cut N Boss to die cut all these intricate dies and emboss with the folder. I love it!

Thanks for stopping by today! Have a great day.

-Berina
Blog Facebook Instagram Youtube


September 16, 2016

Midnight Dreary by Yolie Burke

Once upon a midnight dreary, while I pondered, weak and weary,
Over many a quaint and curious volume of forgotten lore—
    While I nodded, nearly napping, suddenly there came a tapping,
As of some one gently rapping, rapping at my chamber door.
“’Tis some visitor,” I muttered, “tapping at my chamber door—
            Only this and nothing more.” -- Edgar Allen Poe, The Raven

It's Halloween time and time for some serious Edgar Allen Poe readings.  Which is your favorite?  The Raven of course is my all time favorite.  This is Yolie with team eBrush ending week 3 of our Teresa Collins' sponsorship.

I embossed white card stock using the Cabana A6 embossing folder on the Cut N' Boss.


Have you had a technique fail?  I have had plenty of them.  I was planning on doing the emboss resist, but the embossing powder I used has a bit of glitter.  So when I went to rub off the excess ink, the cotton pad snagged on the glitter and left a big fuzz on the card stock.   So back to square one.  This time, I decided to eBrush the background and leave it as is.
I used the Versa Marker and applied it to the embossed stripes, then dusted the iridescent embossing powder.

The iridescent background looks amazing, difficult to capture on film, but trust me it looks great.


The title, banner and the witches are all cuts from Cricut's Design Studio.  I used DCWV's 2016 Halloween Night Stack.


I tried to capture the iridescent background on these darker photos, you'll need to look closely, it's there. :)


Thank you for stopping by today and enjoy your weekend.

December 9, 2015

Sweet & Simple Tags-2

eBrush Design Team: Jan Hunter 4 Cycle 3

Jan Hunter has created another sweet tag set. The recipient of these beautiful tags will know the love and work put into them.  How wonderful to have these cherished tags.

Hi everyone, Jan here with another pair of ebrushed tags for the holidays.  Tags can add such a fun element to any packaging and they're even better when they can double as part of a gift or double as an ornament. 


For these projects, I used:
Die cutting Machine
Tag (basic shapes library)
Trio of Snowmen (Sizzix eShape store)
CraftwellUSA eBrush
Siphon Adapter
Spectrum Noir markers
Ribbon
large glitter snow
chip board snow flake (stash)
Bigz die (Card, petal)
PC Winter Shiver die (snowflake)
embossing folders (optional)
glue dots
liquid glue (dries clear)


Create your tags using basic shapes from the library in your electronic cutting machine's software.  I set mine up to cut two layers.  One slightly smaller than the other using an inset shadow.  Import the trio of snowman and resize to fit on your tag.  They are pretty small (just over an inch tall).  Cut.

I used all white paper to start.


  Using Spectrum Noir markers and the eBrush, spray the bottom layer tag in a light brown.  Set aside.


Spray the top layer.


Then run through the Cut-n-Boss in the desired folder. 
Using a light layer of clear drying glue, "dip" your tag into the glitter and let dry.  Shake off any excess.

Color the snowmen.  I left the bird off of this set.  Using pop dots, add the snowmen to the tag.  Add a bit of ribbon.  I used a glue dot to hold my ribbon in place so as not to use a knot. 


For Tag 2Cut two tags, again, I used the inset tag feature in my die cutting software.  Using the eBrush spray both layers as desired.  Emboss the top layer of the tag.  Center and adhere the two layers, centering. (see photos above)

Using the snowflake die, cut 2 times to create a stencil.  Cut one petal card using the die.  Now using the eBrush and your stencil, create a random design on the card which will become your envelope.  Fold and adhere to create the envelope. The back flap is not folded down. 


Color the Snowmen, hats and bird.  Color the chip snowflake and add a little more color use the fine tip of the marker and add a snowflake design.  Adhere the snowmen to the tag and the chip snowflake to the center front of the envelope.  

If desired, add another tag to the top adding a simple to and from to the tag.  Add a bit of ribbon and slip into the envelope.


Thanks for dropping by!  Hoping your schedule is including some creative time this holiday season... happy crafting! 

May 20, 2015

It's a purple kind of day

Ebrush Design Team: Jan Hunter Week 4 Cycle 2

I am in love with this pansy creation! Love the 3d effect ....love the whole thing...it is a purple thang...

IMG_0023
For this week's eBrush design team project, I decided to make some flowers to go along with an old song from my youth.

For this project you'll need:
eBrush and SN adapter
Markers (Spectrum Noir - LG2, DG2, DG3, Blender, HB2, HB3, TB7)
Large Balled Stylus
Glue
Yellow Glitter
Pansy SVG File (SVGCuts.com)
digital cutting machine and software
Digital paper ( Vintage Pansies)
8 x 10 canvas
Collage Pauge (glossy)
ModPodge (glossy)
White cardstock
White copy paper
Printer
Cut the pansy file at the size it imports.  For this project I cut three flowers and three leaves in white cardstock. Set aside.  The picture below is just the flower parts.

IMG_0014

I used the ebrush and markers to color my flowers.  You can add a bit more interest by using the blender marker and flick in a few extra veins.

EBrush


IMG_0011
Add a few details.  Then using the stylus, create a little more dimension.
IMG_0015

Put the flowers together -- add a small drop of glue in the center of the flower and liberally add some glitter and let dry.  Remove the excess.  Color the leaves as desired and add some dimension using the stylus.  Add a thin coat of Modge Podge to the flower and the leaves. Glue the leaves to the back of the flower.
IMG_0017

Using an editing program, create the document for your background.  I used Paint 2 (MAC) and imported the digital paper and then added the wording for this particular canvas,
Little purple pansies touched with yellow gold,
Growing in one corner of the garden old,
We are very tiny, but must try, try, try,
Just one spot to gladden, you and I.

In whatever corner we may chance to grow,
Whether cold or warm the wind may ever blow,
Dark the day, or sunny, we must try, try, try
Just one spot to gladden, you and I.

Pansies are among my favorite flowers for Spring and Fall color.

Print and tear the edges of the printed paper.  Using the Collage Pauge, apply the paper to the canvas as directed by the manufacturer.  Let dry.
Arrange and glue the flowers to the canvas.  Add some additional embellishments as desired.

IMG_0021

Thanks for dropping by today.  Hope you've created some crafting  time in your schedule this coming week!
Justthewayur1


January 31, 2015

Guest Post by Beth Wheeler - Glitter Queen

I am so happy to be able to share this lovely guest post with you! Beth is a prolific eBrush artist and is very active on the eBrush by Craftwell Facebook group. She is very inventive and creative. I hope that you will join and interact with all of our members!

Good day eBrush fans. This is Beth the Glitter Queen with a totally gorgeous Valentine’s card to share with you. I wish you could see it in person as the photo does not do it justice.   Grab a cup of coffee or drink of your choice and join me on a crafting adventure using the eBrush.

Add caption


I had to do some modifying of my original technique to use with the eBrush and when I finished the card I thought why didn’t I eBrush the tissue paper first. I used acrylic floor wax but you can substitute white glue that you have thinned.  I prefer the acrylic floor wax as I get more of a translucent look plus I happen to have a bottle left over from making Christmas ornaments a couple of years ago. I would rather be crafting than waxing floors.

Let’s get started. Supplies you will need. Thin plastic I use plastic from page protectors. An embossing folder. I used a Darice one. I don’t know the name of it. As well as some kind of embossing machine.  Tissue wrapping paper. Acrylic floor wax or white glue which you have thinned with water. Of course your eBrush and markers of your choice. I used Spectrum Noir markers from the  purple set. Ultra fine or fine Glitter is optional. Normally I use just one color but for this card I used several different colors. If you wish to color the embossed plastic then markers which will work on plastic. I used a Sharpie.


First you will run your plastic through your embossing machine. Ebrush your wrapping tissue, Do a larger piece than the size of your embossed plastic as you may need to do some patching. Then decide whether you want to use the embossed side as your front or the debossed side. You will get a slightly different look if you use the debossed side as the front.  Take either your glue or your floor wax and using a sponge brush apply to the back side of the plastic. Place your tissue paper over the plastic and use the sponge brush to adhere it using a pouncing motion.  Don’t panic if you should get a hole. Just tear off a small piece of tissue paper and patch the hole. Once the tissue paper is down tight while it is still wet you will sprinkle glitter if you are going to use it. I like to lightly sprinkle my glitter and do it in layers.  I like to turn the piece over as I work with the glitter to see how it is looking in the front. Another reason for having a larger piece of wrapping tissue as you can turn your plastic panel over to look at it without getting your hands messy. When you are satisfied let dry. trim to size and  then finish your project.

This technique can be used for more than just cards. If you have an embossing machine which will hold larger embossing folders you can use this technique to make an insert for in a glass container and use a battery operated candle. Of course you can also do this technique without embossing the plastic. You can even stamp on the plastic using an ink like Stazon and adhering the tissue paper to the back.

I hope you will try this technique. It is a fun technique and the results are stunning. Thank you for stopping by.
'
 
Copyright © 2014 Craftwell Blog. Designed by OddThemes - Published By Gooyaabi Templates