DO NOT MISS
>>Follow our Facebook page for updates! >>Join our Craftwell Design Team: Apply Now!
Showing posts with label beginner. Show all posts

March 16, 2022

eBrush Fun

 Hi everyone!

Katie here with a fun project using Craftwell's eBrush and markers. I'm not an advanced eBrush user, but I can still utilize the marker adapters and create something pretty. 

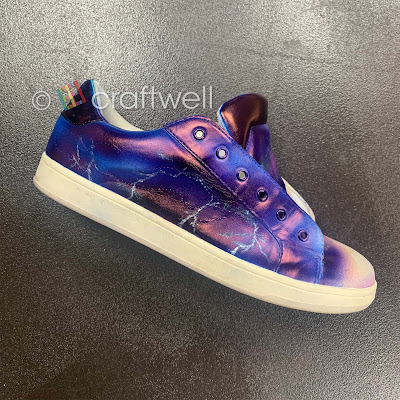
I took used pair of sneakers, which had some stitched on patches and doodles on it. I only airbrushed one sneaker and decided to save the other side for another time.

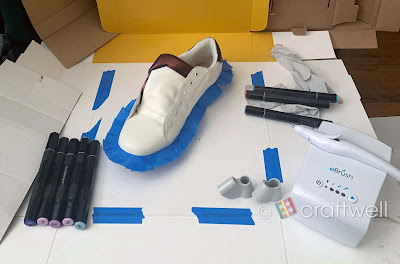
First, took off the patch with seam ripper which you can find at a Michaels or something. I used was rubber alcohol with a paper towel to clean the sneaker the best I can.


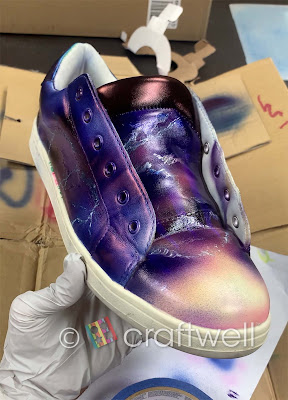
For the design, I was inspired by sunsets and storms. I thought some darker shades will help hide the doodles made on the sneaker. One side of the sneaker and tongue will have a sunset, and the last side will have a thunderstorm. To help, I went onto google for some image ideas and gathered my materials.


Materials

Craftwell eBrush

Spectrum Noir marker adapter

Spectrum Noir markers

Tulip Metallics - White fabric paint

Painter's tape

Gloves

Cardboard


Next step, taped the top edge of the sole to which I want to keep white untouched. Took some cardboard I had lying around to line my area and placed a small piece in the shoe so I don't any color on the inside. From there, I started off with lighter shades then worked myself up to the darker ones. 

I used the white fabric paint to create lightning bolts and clouds.


Here I have my finished project:
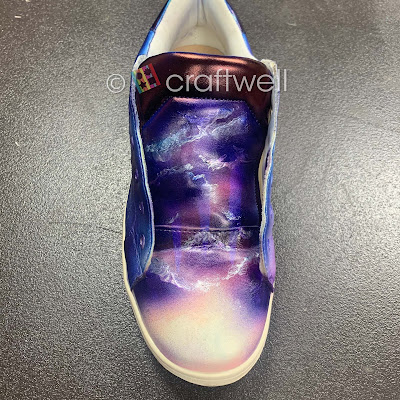


Hope you all enjoyed my project and it inspired you.

Till next time!

- Katie

October 27, 2016

Spirited Away Bath Token Chocolates - FREE PRINTABLES INCLUDED

SPIRITED AWAY "BATH TOKEN" TREATS:
A STUDIO GHIBLI THEMED HALLOWEEN!

Hello everyone!  My name is Judith Kim, a new Craftwell Design Team member, coming at
you with a cute idea for your Halloween this year!

As a fan of the animation studio, Studio Ghibli, I thought it would only be appropriate to create some treats & decor in the theme of the famous film,
Spirited Away.  I mean, just look at those visuals!


There is a scene in the movie when a character, No Face, gives the heroine, Chihiro or Sen (she has two names; long story!), a bunch of bath tokens for her chore.  These bath tokens are not necessarily important in the film, but they registered as 'CHOCOLATE BARS' to me!

They have the perfect dimensions for it!  You can make them large to fit a full-size candy bar or just use the printables provided to create (4) mini candy bar boxes perfect for
a couple of the mini size chocolates!


ALL YOU'LL NEED:

RED CARDSTOCK
SCISSORS
EXACTO KNIFE
BRUSH PEN
GOLD METALLIC TAPE
DIGITAL DIE CUTTING MACHINE*
LASER PRINTER*
HEAT TRANSFER FOIL - GOLD & BLACK*
LAMINATOR*
(* = optional)

  1. a. ) If not foil laminating - Print out the templates provided onto red cardstock & cut out the templates with scissors or your digital die cutting machine using the SVGs.  The template provides (4) chocolate boxes for mini-size chocolate bars only.  Scale up to create for full-size bars.
    b.) If foil laminating - Use a laser printer to print out the templates with "FOIL-PRINTABLE" on red cardstock.  Do not cut out the templates yet.  Pre-heat the laminator.
  2.  a.) Once all the templates have been cut, use the metallic gold tape & brush pen to create the designs on the bath tokens.  There are SVGs of the designs if cutting with machine.
    b.) Cut out strips of gold foil for the circles, triangles & diamond shapes.  Cut pieces from black foil to cover the stripes.  Place on the printed cardstock and run through the laminator.
  3. a.) Glue the tabs on the sides to form a flat box.  Close with the top tab.
    b.) Once cooled, take off the remaining foil.  Cut out the templates & glue the side tabs.  Close with the top tab.
  4. TADA!  NOW YOU GOT BATH TOKENS FILLED WITH CHOCOLATE!
AND THAT'S IT!

Here are some soot spirits grabbing their fair share of chocolate!


Hope you enjoyed this concept!  And I'll keep you updated on the latest of my Studio Ghibli themed Halloween here: http://designdotexe.tumblr.com/

Thanks everyone! :)

-Judith

November 26, 2014

Wonderful Journal

Ebrush Design Team: Jan Hunter Week 2 Cycle 1

What a great project. I can see this a very wonderful gift for the right person! Thank you Jan for this fine project!

Hi this is Jan and I'm so excited to share another project with you.  I'd rank it as a Beginner project -- it's simple to complete.


IMG_0057
This is a gift and should be arriving at a new home shortly.  I hope they like it.
I'm enjoying making this mini-albums and journals.  They do make great gifts... just saying.  :)

I used the recipe and divider cards file from here as the cover and divider pages in this journal.
You'll need white cardstock for your covers and section divider cards and if you wish, some designer paper for your divider cards
journaling paper ( I used some plain copy paper -- cut to size with a paper trimmer)
eBrush (SN adapter)
Spectrum Noir markers
stencils, texture paint and word stamps

Decide on your size and cut your cover and divider cards with your electronic cutting machine. I used the pen tool to write the title and added shadows and cut.  Now, to my favorite part of creating these days!  PAINTING!   I used the eBrush and Spectrum Noir markers to create the background for the cover.

Ebrush-snmarker
IMG_0114
Carefully, trace and cut 3 copies of your stencil -- I'm using Birch Landscape from memoryboxco.com. Once they are cut, adhere them in a stack.  ( I used the Xyron to do this job).

IMG_0110
IMG_0112


The inside dividers are also ebrushed with stencils, texture paste and stamped.   I used a free background paper I found online (http://MelStampz.blogspot.com) several years ago.

 I used the Xyron machine to add adhesive to the layers of the title and secure on the front of the journal.  I used the bind-it-all to secure all the pages.
It's a fun and quick project.

IMG_0113
Don't forget to check out what the rest of the team has been up to.... visit Craftwell's blog for all the updated posts.
EBDTlogo

Thanks for dropping by.  Hope you're inspired to create something too.  Happy Crafting!  And wishing each of you a very Happy Thanksgiving filled with *Greatitudes (memories that bring you joy and remind you of all that you are grateful for).
'
 
Copyright © 2014 Craftwell Blog. Designed by OddThemes - Published By Gooyaabi Templates