DO NOT MISS
>>Follow our Facebook page for updates! >>Join our Craftwell Design Team: Apply Now!
Showing posts with label Easter. Show all posts

April 16, 2019

Happy Easter Banner

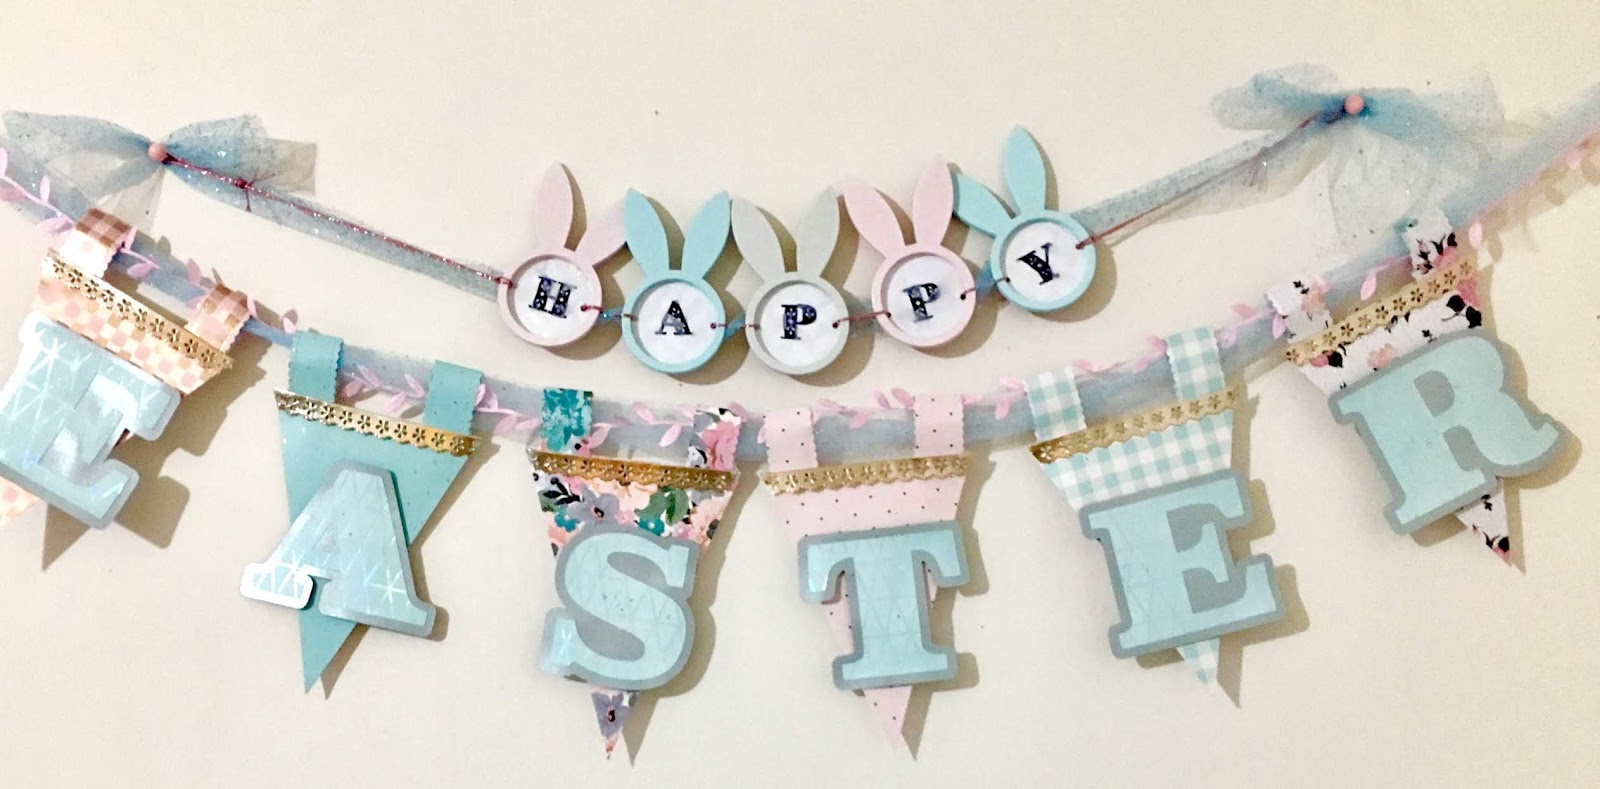
Hello there! Welcome to the Craftwell blog! Desiree', here to share a banner I made to celebrate Easter! For me Easter is full blessings! So being a little extra is a must!
And this banner is just that, extra! Heheh!


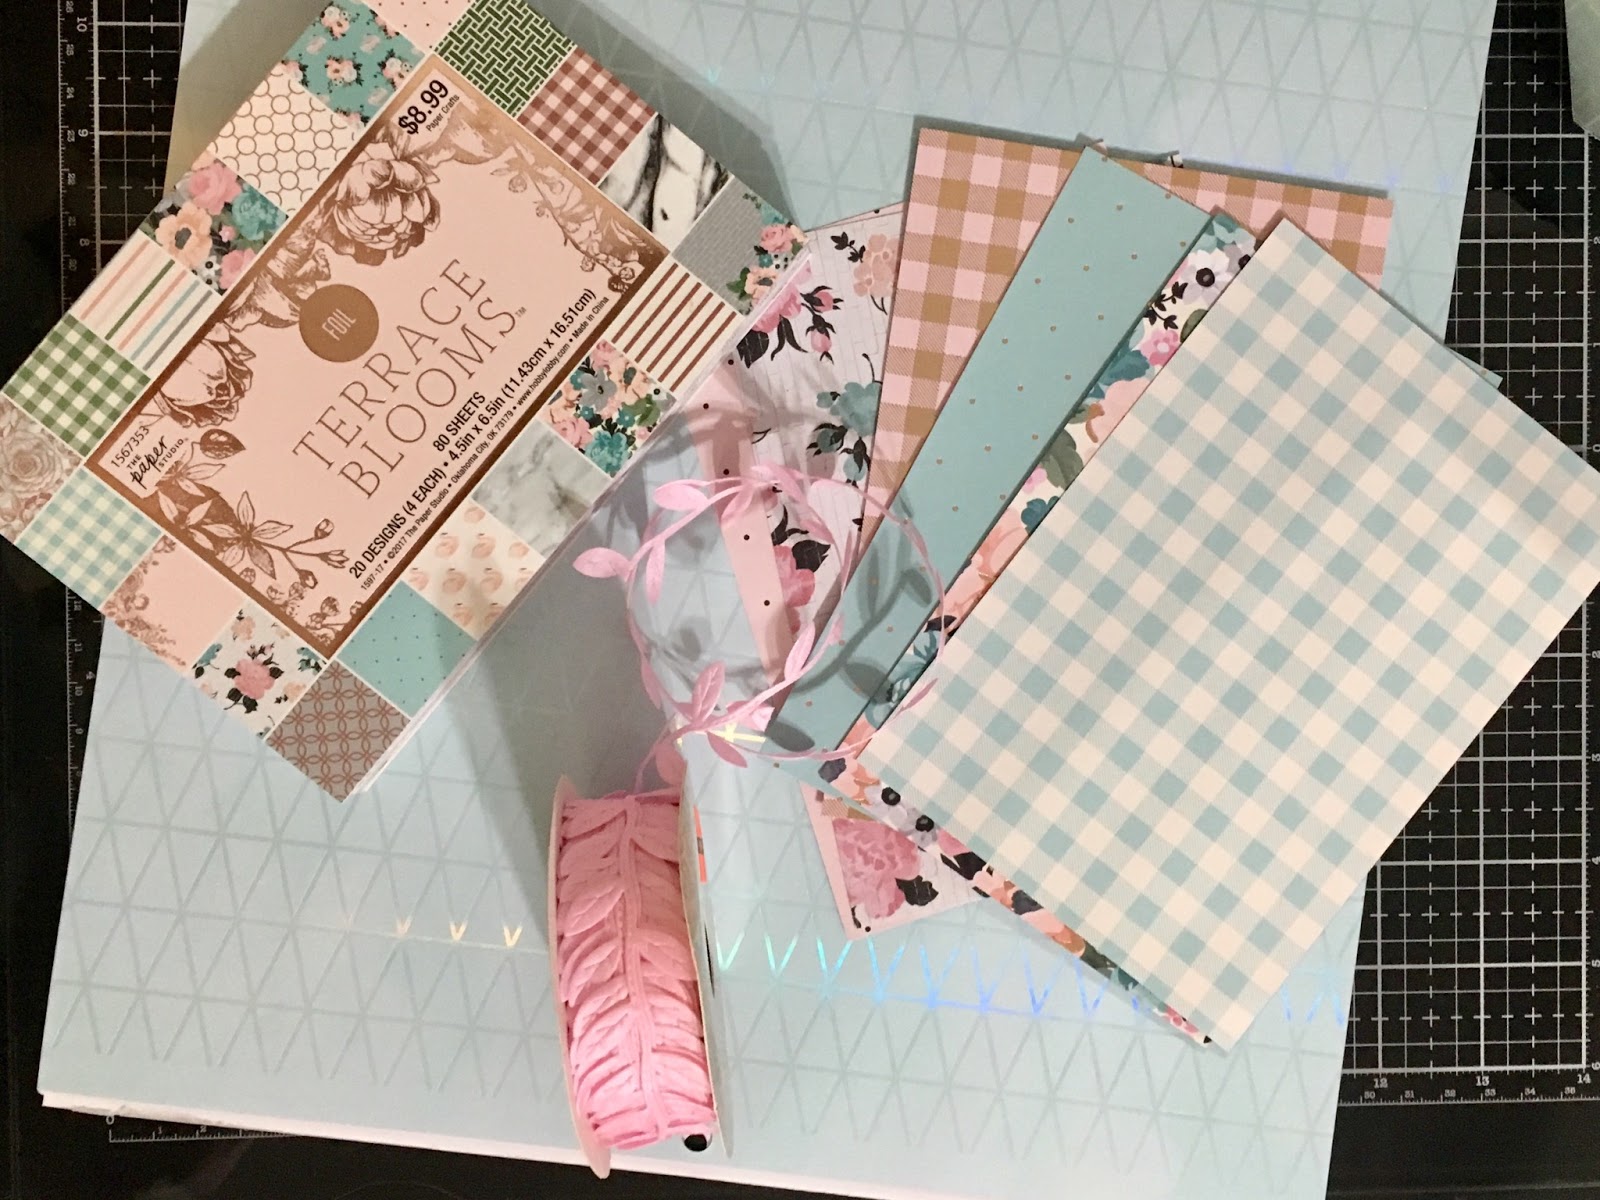
So if you have came across any of my posts on this blog (and I hope you have) you will know all my projects start with choosing the papers! 💖 This task was made super easy by using the Paper Studio, Terrace Blooms, 4.5x6.5 stack. I also used a couple of 12x12 pieces of paper from an older stack in my stash by DCWV, called Water Color Ombre. I used some 65 lb. metallic paper too. I love the papers I chose!


More and more I am obsessed with die cutting! I love the ease of it and the way the finish of the edges on a die cut!
I unfortunately did not have a die to cut the kind of banner shape I had in mind, SO I busted out my WRMK, banner punch board. Then cut my banner pieces out.


Next I did some stamping! Using the epic Tim Holtz stamping platform, of course. So I stamped H-A-P-P-Y out on some of my paper. Oh! Forgot to mention the bunnies!
I had bought some napkin rings from the Spot area, and knew I would utilize them in crafting! Muhahah!
FINALLY it was time to use my Snap machine and die cut out each letter with a circle die to fit my bunny napkin holders! Which are now part of my banner set up.

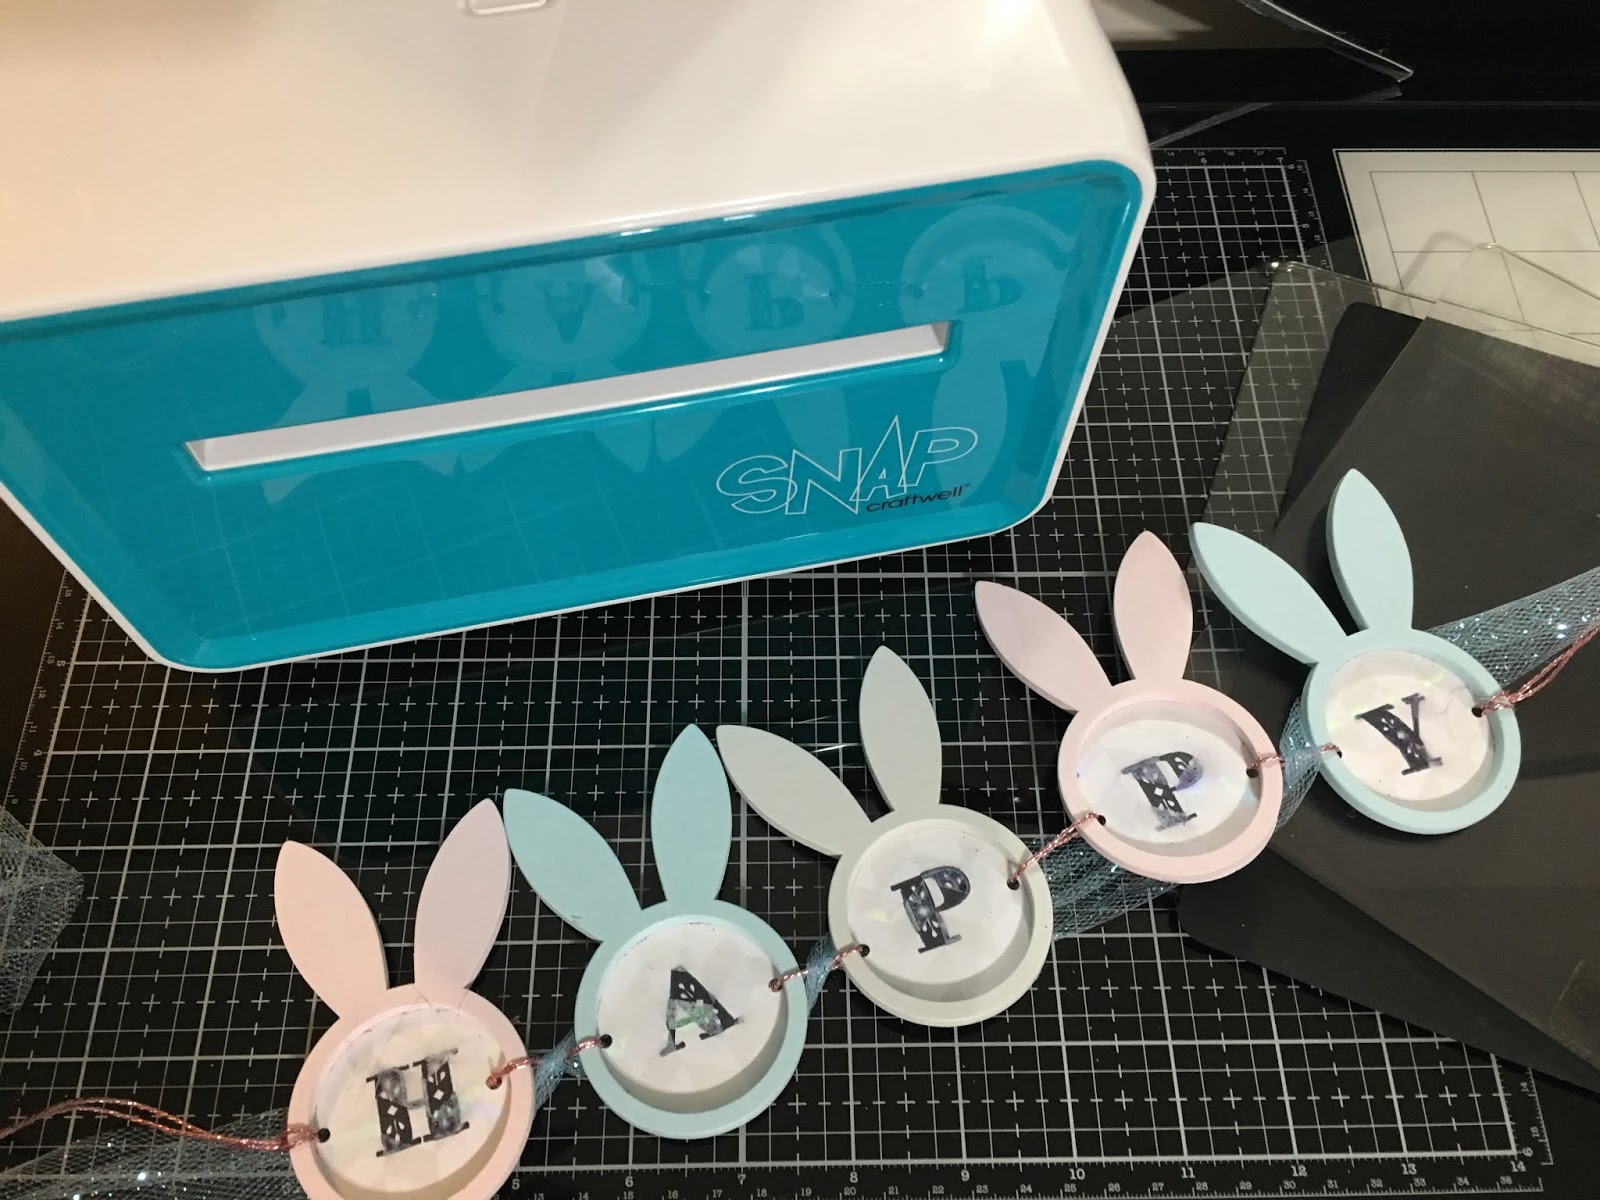

I had NO alpha dies! So I had to cut some out using my electric cutting machine. So I did just that! I also punched a couple of holes on each circle for stringing the trims and to be able to hang this part of the banner.
I used the blue paper from the water color stack, and cut out a shadow in that metallic silver.


I die cut some of my banner scraps and made some scalloped hanging tabs for my banner pieces. 
This part was repetitive BUT worthwhile. 
I decided to add a little metallic trim too! 
Once it was all pieced together I loved the end results.


And after each banner piece was together, attacked and trimmed up, it was time to string it all together, and so I did. Thing is, last minute I decided to not only use that pretty pink leaf trim pictured somewhere above BUT I decided to for the first time utilize this pretty blue glitter tulle! OMG! The mess was pretty and massive! LOL


It was like fallout from a nuke missile BUT in the form of glitter! LOL It all ended happy though, because I loved the qY it all came together! Hope you do too!


So there she is in all her spring flavored cuteness! As always, I hope you came, you saw, and were inspired! Easter blessings to you all and please keep coming back! 

     ðŸ’Ÿ - Desiree'

March 20, 2017

Home Kool Kitty Basket Surprise!


We are having so much fun getting ready for the Easter Bunny! Reilee and Matthew are really digging their Craftwell equipment.  They really are giving the Cut N Boss and the eBrush a work out!


Materials:

Cardboard egg carton
Hot glue gun
Ebrush and adaptor piece for sharpies
Sharpies
Scissors ***need adult supervison
Cut the egg carton into individual holders, cut and shape so that two will fit together and make an egg shape. Hot glue the two pieces together. Then color your eggs using the ebrush and sharpies. Let dry. Can use tissue paper, fake grass or even real grass to fill baskets (shown in last week's video). Place eggs in baskets.


March 16, 2017

Memories- Pam Bray! Easter Egg Art Frame


 Hooray!!!
 It is Wednesday here on the Craftwell Blog which mean its me...
Pam here to share with you. 
Are you starting to think about Spring....
How about Easter?
WELL....
I love it all, lol. 
SO....
Today I am sharing with you how to make a fun Easter Egg Art Frame using some of your fabulous Craftwell products along with the Cut N Boss. 
BUT...
First you will need to cut three ovals or if you have a die cut three of them from pattern paper. 
THEN....


 Pick three of your favorite Craftwell embossing folders....
I KNOW.... 
That will be hard, lol. 
I selected the Love Triangles, Honeycomb and So In Love Embossing Folders. 
Place one egg into each folder an run through the Cut N Boss using two A and D Platform. 

Ink prepared eggs with distress ink using a blending tool.

Die cut Honeycomb Die from Teresa Collins Memory Pocket Die Collection using pattern paper. 
(I like to put adhesive on the back of my intricate pieces prior to cutting them.)
Also...die cut Easter letters. 
ALL....
will need to cut using the Cut N Boss with two A plates, B plate, metal shim and D platform.

 Die cut three of the doily dies using the two A plates. 
Ink edges using brown ink and distress tool. 

Place Seasonal Impressions Spring Paper that has been lightly distressed using a sanding block to the inside of frame. 
Decorate each of the eggs using the honeycomb die cut and pattern paper.

 Fussy cut images from pattern paper. 
Layer some together with pop dots. 

Add gemstones and pearls to decorate the eggs.
Mat die cut letters with brown card stock. 
Add to frame, staggering them out. 

 To finish your Easter Egg Art Frame.... grab a few random buttons and twine. 
Add them to the corners with glue dots. 


 I hope you have enjoyed my Easter Egg Art Frame
BUT 
More importantly I hope I have inspired you to create one for yourself. 
Until next time
Pam
Craftwell Supplies:
Cut N Boss
Love Triangles Embossing Folder
Honeycomb Embossing Folder
So in Love Embossing Folder
Teresa Collins Memory Collection Pocket Dies

Other Supplies:
Graphic 45 Ladies Diary
Graphic 45 Once Upon a Springtime
Sizzix Doily Lace Die
Spotlight Alphabet Die 
Core'Dinations Seasonal Impressions
Distress Ink: Tea Dye, shabby Shutter, Abandoned Coral
Chestnut Roan Ink
White Paint 
Sanding Block
3 Buttons
Pink Twine
Small Flowers
Frame

March 13, 2017

Monday is Home Kool Kitty Day!!

Join our fun times!


We are having fun making little baskets for our Easter celebration! We love playing with our Cut N Boss! Even Mattie can work it! Of course Mommy is always with us. Here is our supply list! Please watch our video!


Materials:
paper
Sizzix basket cutting dye
glue
eyelet fasteners and tool
Cut n Boss machine

Cut your basket out using the paper and basket cutting dye.  
Glue the inside of the basket together.  Use the eyelet fasteners and tool to fasten the basket's top and handle together.

***If you want the handle to move, do not fasten the eyelets too tight.  Just enough to hold them in place.

Next week...stay tune.  We will be making eggs out of egg cartons for our baskets.

~~Home Kool Kitty~~

February 23, 2017

A wonderful Easter Wreath by Barabara Rankin! We revisit our past designers!!!

Easter is on its way! Barbara Rankin revisit!

Hello eBrush fans!  I hope you are all enjoying your week and staying crafty.  Today, I want to share a video tutorial with you using the fabulous and ever-so-easy to use Craftwell eBrush.  Since Easter is this coming Sunday, I made a pretty little wreath using dollar store products and alcohol markers.


So, let's play!


Supplies used:

eBrush by Craftwell
Copic Markers
Grapevine wreath
Easter eggs
Flowers and leaves
Lasercut wood embellishment


I hope you have enjoyed my video today and I always hope to be able to inspire you in your creative journey.  With the eBrush, it is an easy journey.

Stop by the Craftwell blog for more inspiration from the team.

Thanks so much for stopping by, and have a very happy and blessed Easter.


March 25, 2016

Easter Home Decor

Ebrush Design Team: Yolie Burke Week 11 Cycle 3


Happy Easter! This is Yolie with Team eBrush sharing an Easter Home Decor project.

I took Easter eggs and painted them with acrylic paints; white, purple and yellow.


I then used the eBrush with Sharpies to add some more color.


I decorated with lace ribbon and rhinestones.


The Easter eggs are 18" in height and I purchased them last year after the Easter sale for .15 each.  So be on the look out after season sales.  I decorated 6 of them, this trio sit on my mantel.


Thank you for visiting and Happy Easter!


March 24, 2016

Happy Easter Wreath

Ebrush Design Team: Barbara Rankin Week 11 Cycle 3


Hello eBrush fans!  I hope you are all enjoying your week and staying crafty.  Today, I want to share a video tutorial with you using the fabulous and ever-so-easy to use Craftwell eBrush.  Since Easter is this coming Sunday, I made a pretty little wreath using dollar store products and alcohol markers.


So, let's play!


Supplies used:

eBrush by Craftwell
Copic Markers
Grapevine wreath
Easter eggs
Flowers and leaves
Lasercut wood embellishment


I hope you have enjoyed my video today and I always hope to be able to inspire you in your creative journey.  With the eBrush, it is an easy journey.


Stop by the Craftwell blog for more inspiration from the team.

Thanks so much for stopping by, and have a very happy and blessed Easter.


March 16, 2016

Easter Egg Art Frame by Pam Bray


 Hooray!!!
 It is Wednesday here on the Craftwell Blog which mean its me...
Pam here to share with you. 
Are you starting to think about Spring....
How about Easter?
WELL....
I love it all, lol. 
SO....
Today I am sharing with you how to make a fun Easter Egg Art Frame using some of your fabulous Craftwell products along with the Cut N Boss. 
BUT...
First you will need to cut three ovals or if you have a die cut three of them from pattern paper. 
THEN....


 Pick three of your favorite Craftwell embossing folders....
I KNOW.... 
That will be hard, lol. 
I selected the Love Triangles, Honeycomb and So In Love Embossing Folders. 
Place one egg into each folder an run through the Cut N Boss using two A and D Platform. 

 
Ink prepared eggs with distress ink using a blending tool.

 
Die cut Honeycomb Die from Teresa Collins Memory Pocket Die Collection using pattern paper. 
(I like to put adhesive on the back of my intricate pieces prior to cutting them.)
Also...die cut Easter letters. 
ALL....
will need to cut using the Cut N Boss with two A plates, B plate, metal shim and D platform.
 

 Die cut three of the doily dies using the two A plates. 
Ink edges using brown ink and distress tool. 

 
Place Seasonal Impressions Spring Paper that has been lightly distressed using a sanding block to the inside of frame. 
Decorate each of the eggs using the honeycomb die cut and pattern paper.
 

 Fussy cut images from pattern paper. 
Layer some together with pop dots. 

 
Add gemstones and pearls to decorate the eggs.
 
 
Mat die cut letters with brown card stock. 
Add to frame, staggering them out. 
 

 To finish your Easter Egg Art Frame.... grab a few random buttons and twine. 
Add them to the corners with glue dots. 


 I hope you have enjoyed my Easter Egg Art Frame
BUT 
More importantly I hope I have inspired you to create one for yourself. 
Until next time
Pam
 
Craftwell Supplies:
Cut N Boss
Love Triangles Embossing Folder
Honeycomb Embossing Folder
So in Love Embossing Folder
Teresa Collins Memory Collection Pocket Dies

Other Supplies:
Graphic 45 Ladies Diary
Graphic 45 Once Upon a Springtime
Sizzix Doily Lace Die
Spotlight Alphabet Die 
Core'Dinations Seasonal Impressions
Distress Ink: Tea Dye, shabby Shutter, Abandoned Coral
Chestnut Roan Ink
White Paint 
Sanding Block
3 Buttons
Pink Twine
Small Flowers
Frame
'
 
Copyright © 2014 Craftwell Blog. Designed by OddThemes - Published By Gooyaabi Templates