DO NOT MISS
>>Follow our Facebook page for updates! >>Join our Craftwell Design Team: Apply Now!
Showing posts with label A6 embossing folders. Show all posts

May 31, 2019

Happy 1st Birthday Card

Hi everyone!
My name is Katie and I'm new to Craftwell's Design Team.
For my first post, I made a 1st birthday card using the SNAP machine and here's how it came to be.
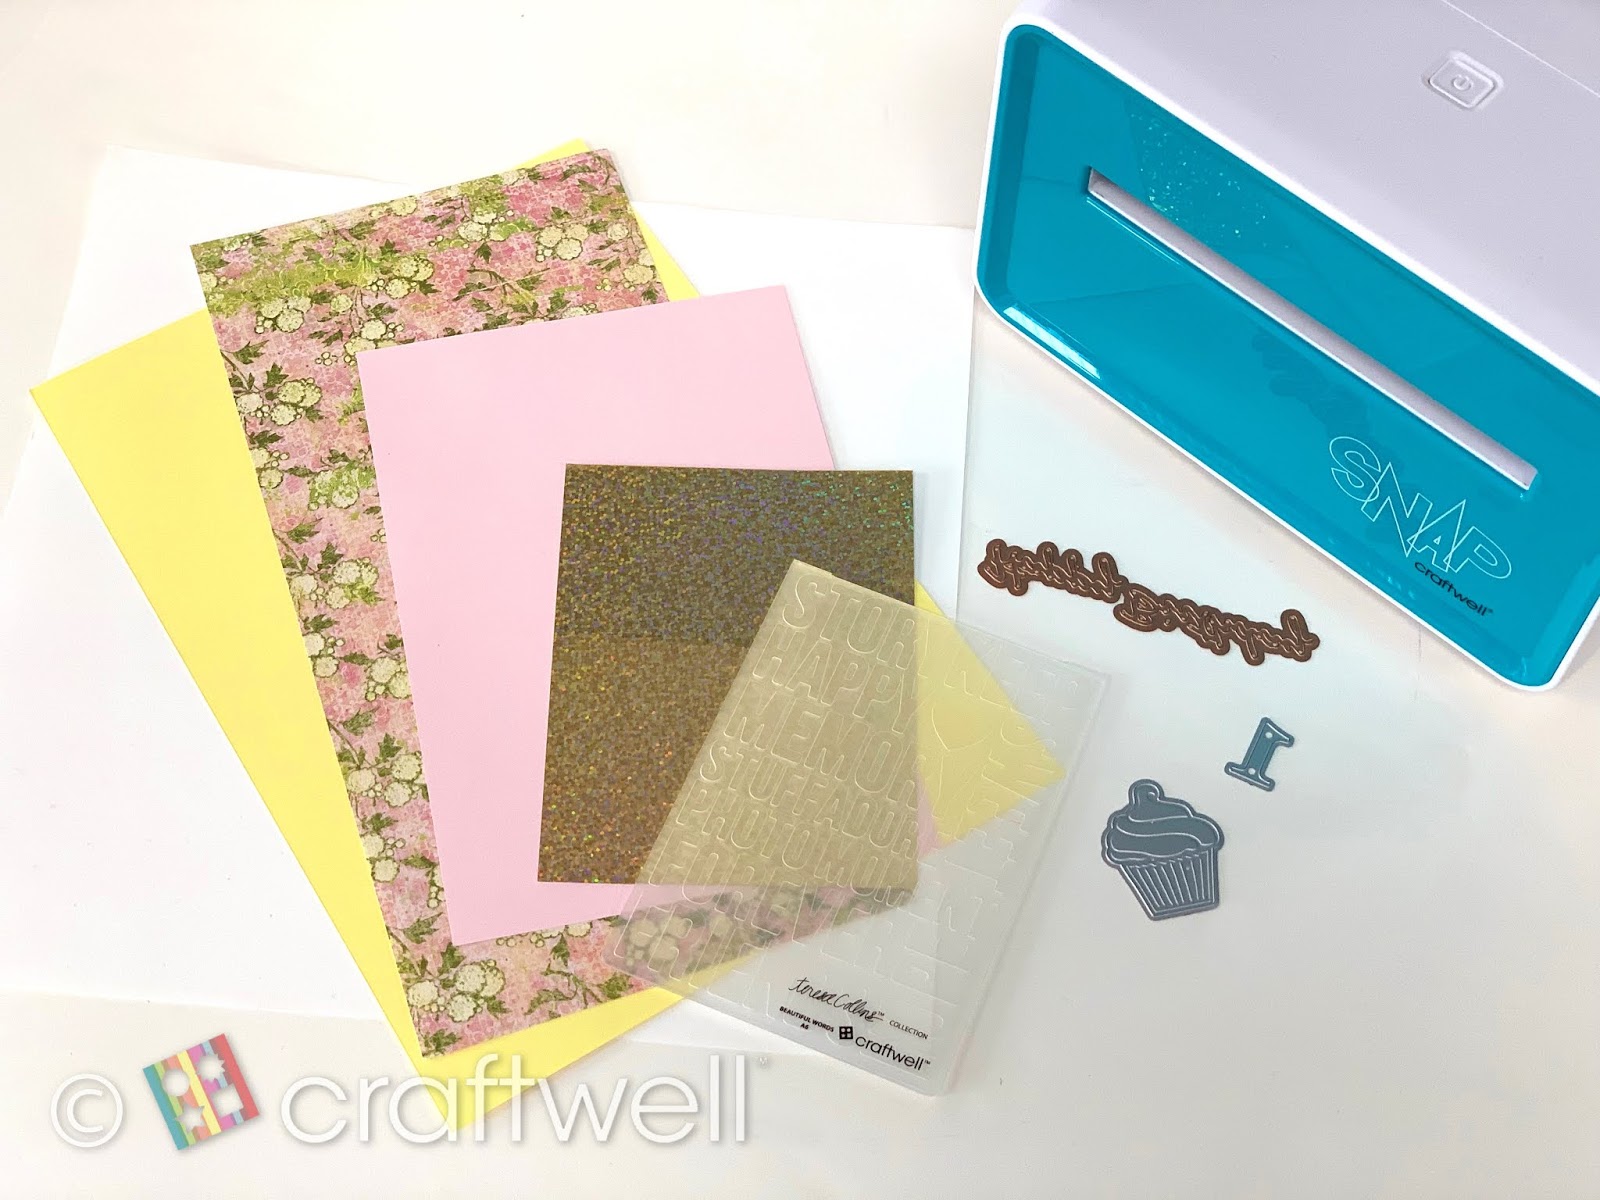
Materials: 

SNAP machine
Leftover paper from white, yellow, flower pattern, light pink and glossy glitter. 
A6 Beautiful Words embossing folder by Craftwell
Cupcake and number by Recollections
Happy Birthday Die by Spellbinder
Clear Glue by Aleene's
3D Foam Squares
Tweezers
Scissors from Craftwell's tool kit

First, we want to start by making the background to the card and cutting it close to the A6 dimensions. I ran the embossing folder through the SNAP and you have your embossed paper.

Next, we cut into the flower pattern and light pink paper with the cupcake die.
And do the same with the glossy glittery paper use the number 1 die.
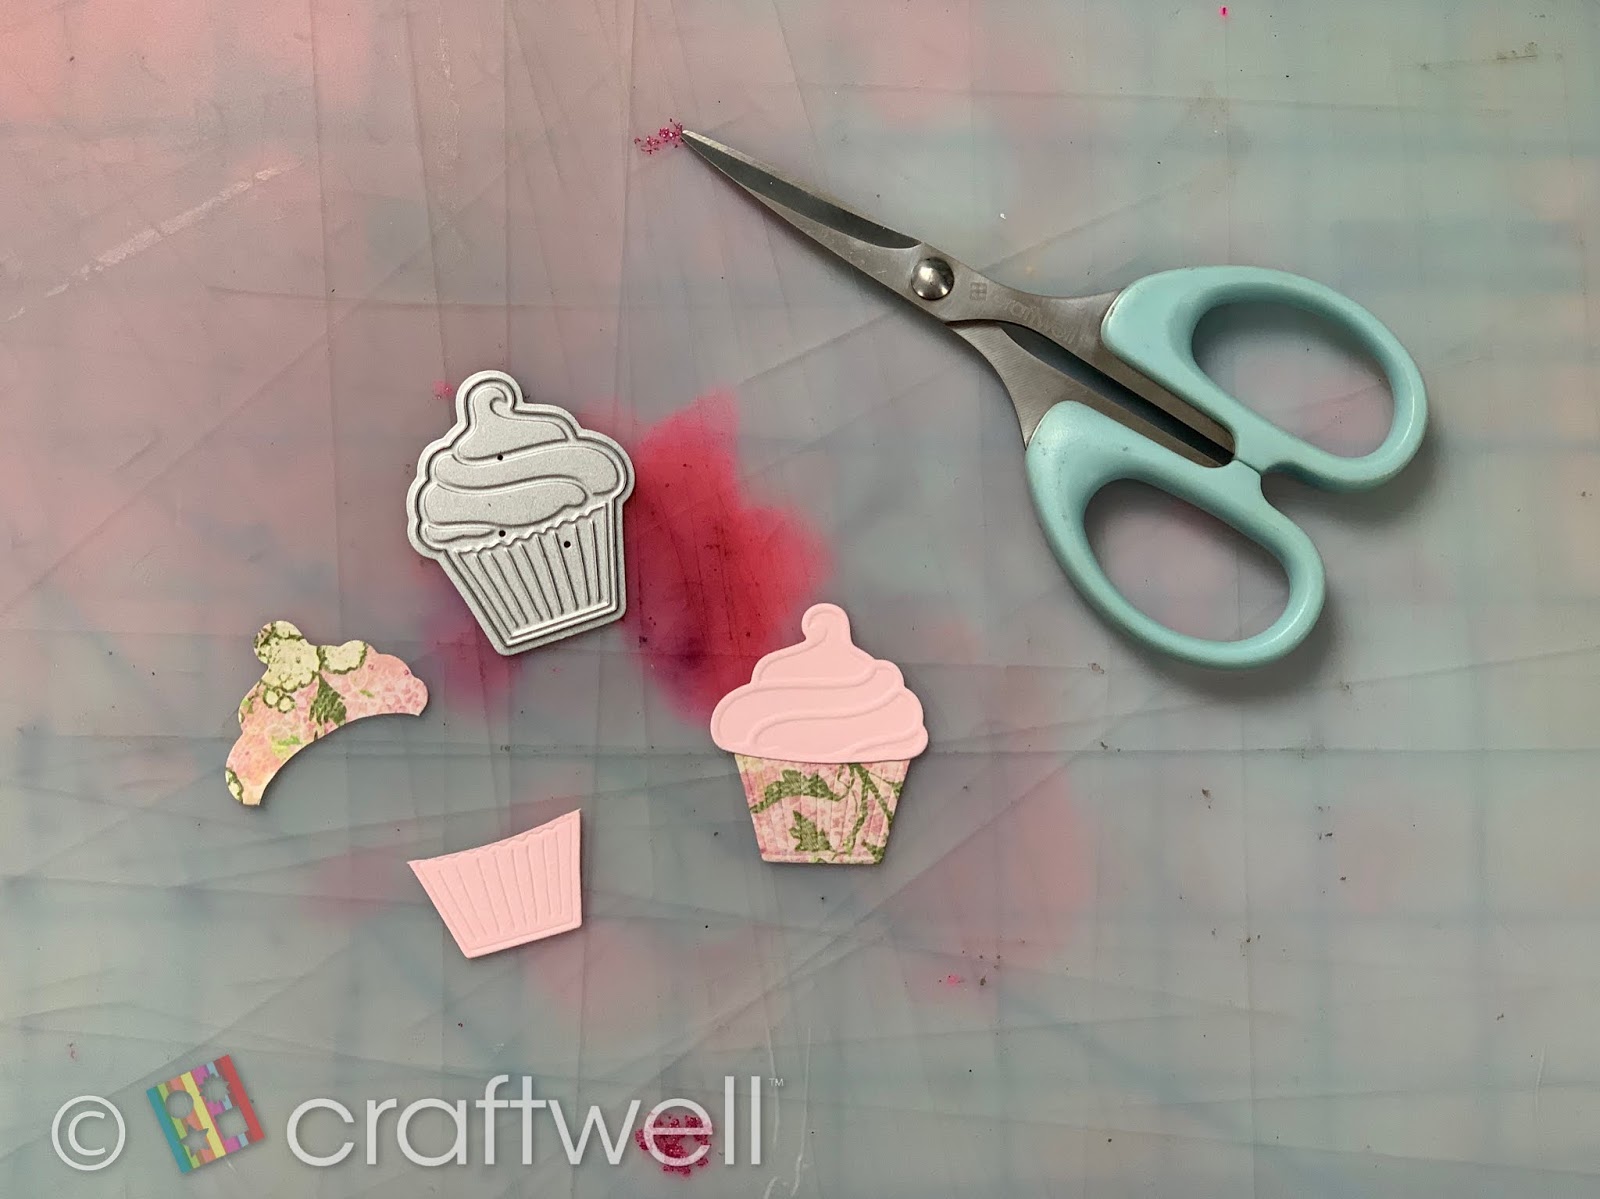
Here comes the fun part! Time to assemble the cupcake, which is really easy and quick. 
So I wanted the frosting to be pink and cut above where the cupcake wrapping would be. I did the same with the other cut out, but did the opposite and cut top where the frosting would be. Make sure you leave a little room so you have space to glue the frosting to it.

I took the embossed yellow paper and glued it to a white folded paper. You can cut it to whatever size you desire, but I just cut it about half a quarter inch more and glue them together. 
Next, I stuck a 3D foam square behind the cupcake and centered it in the middle. You will notice I place the number 1 last because I couldn't decide if I wanted it floating above or place it into the cupcake. In the end, I just glued at the top of the cupcake and I think it looks pretty good there :)

So... I went a little extra and designed the inside. 
Added another layer of yellow paper and a message inside of the card. I used whatever leftover paper I still had and cut out the words "Happy Birthday". And again, you all can design the inside however you want and have fun with it!

The end result of the front and the inside.

I hope everyone enjoyed this tutorial and got inspired for your next card! :)

July 3, 2018

Girly Happy Birthday Card


Hiya! Desiree' here to share my latest project for the Craftwell blog! 💗 I of course hit my craft stash AGAIN and decided to put some of my beloved horde to good use.

Tools and such used:
Craftwell Snap die cutting and embossing machine
Craftwell eBrush
From the Teresa Collins collection, by Craftwell, the Preppy Hounds Tooth, A6 embossing folder.
Tim Holtz Stamping Platform
Tim Holtz sentiment stamp {sorry does not have a title?}
The WRMK, Tag Punch Board
Heart die by Craftwell
Frame die and heart confetti die,
{from the stash stored on a magnet storage sheet and have lost the packaging for them, sorry.}
The papers used are from the DCWV Confetti stack, the Country Road stack by the Paper Studio.
Pink 65 lb. card stock,  vellum from my scraps, and the card stock stickers are a real throw back by
Melissa Frances, from the C'est La Vie, collection!

Whew! Now on to the project details! 
The first step was to figure out what I was going to use. As always. 😉 I decided I needed a tag, so I made one using the tag punch board. Next it was embossing time! 
My darling Snap machine made it delightfully easy to get a great impression!
I decided not to emboss the bottom of the tag. I wanted to leave room for the super-cute scalloped edge sticker I was going to use.


Die cutting needed to be done next. I cut the frame die out for the sentiment inside of the card. 
I wanted the sentiment to pop! So I used the eBrush and my two fave pink Sharpies to add some 
color around the edges of the die cut. Love that gradient effect so much!


My card base is 5.50x4.25 inches, I cut my patterned paper for the card front to 5x4 inches. I distressed the edges, adhered some of the dies cuts and popped it up on some pop dots for dimension.
I cut *Happy Birthday* from one of the confetti stack papers, cut another strip from the gold polka dot paper in the stack. Cut out a dove-tail shape at the bottom of them both. I stacked them together and added one of the pretty card stock stickers. I staggered them and then adhered them all together. I took a  bow I had made a while ago and decided to place them on my little embossed tag. 
I think it turned out to be such a cute embellishment! 


I wanted a clean line inside of the frame for the sentiment. I decided to cut out a rectangle to place inside the frame. After that I stamped the *I love you* sentiment onto the white rectangle. I glued some little clusters around the sentiment. I also like to write a personal message in every card I give to a loved one. So I placed the sentiment up on the top of panel of the card, when it is opened. That way there is plenty of space to let a special person know how much they mean to me! Once everything was dry, it was time to completely assemble my card!


Here it is. All assembled, so girly, and so pink! A bit vintage-esque. I LOVE how this turned out! I sincerely hope you do too! 


Feel free to leave me a comment, I love getting those! I hope that you were inspired by today's project, always do. 
I also hope you will come visit again soon! Until my next post sending you warm wishes and crafty love always!
                                  
💖 - Desiree'


May 24, 2018

Embossed Mixed Media Bookmarks

Hello there, friends! Linsey here today sharing my latest Craftwell project--some handmade bookmarks that are super simple and fun to create! These bookmarks are great for book, journal and planner lovers alike! They take very little time to make and are beginner level, which makes them a great craft project for kids too! Take a look....
I used my trusty SNAP Machine along with Teresa Collins 2 pack A6 Embossing Folders, Beautiful Words and Stars and Twill Herringbone to emboss plain white cardstock. Next, I put down a layer of clear gesso on each bookmark and let dry completely. Finally, the fun part....coloring them up! I tried something a bit different and used some Faber-Castell Design Memory Craft Gelatos to add color to each bookmark. There are lots of other color mediums you can choose to use--try inks, sprays, paints--your imagination is the limit!
I like how they all turned out totally different and unique to one another! The embossed texture adds the perfect amount of interest without a lot of bulk. A bulky bookmark is no Bueno! ;)
You can finish with painting a layer of Mod Podge or other protective sealant over the colored bookmarks to ensure no color smearing and a longer life span. These bookmarks add a pop of color and an element of fun to your daily life. I sure hope you've been inspired to create something pretty today! Thanks so much for stopping by an letting me share my project with you! Until next time, happy crafting!

April 26, 2018

Embossed Mini Pizza Box Favors

Hi Craftwell friends! Linsey here today sharing my latest project with you. Do you enjoy making your own party favors for special occasions? I sure do and these mini pizza boxes were the perfect blank canvas for my party favor decorating desires! Such a fun and easy project--perfect for kids and adults alike!
I wanted to keep the design clean and simple with crisp white cardstock so that the dry embossing would really pop. I had a great first experience with the brand new SNAP Machine Electric Embosser & Die Cutter! It's so easy to operate and comes in a compact and portable design so you can use it anywhere you like, including where space is limited. I used Teresa Collins 2-Pack A6 Folders, Twill Herringbone & Preppy Houndstooth Embossing Folders for the bases, then embellished each box with a variety of Spring stickers, satin ribbon and mulberry flowers. 
For a final touch, I used 2 scrap pieces of previously embossed cardstock to make a tab from Teresa Collins Tabs & Tags Project Dies and added a coordinating sticker to each die cut tab, then placed at the top left corner of each box front. 
And that's all for me! Thank you so much for stopping by and I hope you have a creative and very blessed day! 

November 17, 2016

DIY (Seasonal) Magnetic Memo Board

Sometimes you just need a reminder about certain conference calls or what to pick up from the store after work.  This magnetic memo board  is the PERFECT for all those little notes you need to keep.

Plus, the cute autumn theme can be changed up with different colored leaves; green leaves for spring or summer would be fantastic!  The leaves in multiple colors were painted with the siphon adapter & fabric paint.

YOU WILL NEED:

Dixie Belle Paints - Barn Red, Rebel Yellow, Midnight Blue, Chocolate, Drop Cloth
Picture frame
Paper clips
Craft blade or Exacto
Scrap of faux leather (tan)
Magnetic sheets
Chip brush
Leaf-shaped cutting dies - ProvoCraft Cuttlebug Leaves Dies
Super glue
Hard surface or window cleaner


1. Take (1) magnetic sheet and cut it to the size of the picture frame.


2. Emboss the magnetic sheet with Teresa Collins Woodgrain Cottage in the Cut'n'Boss using the following combination (bottom to top): D, A, Folder + Material, A.  MAKE SURE the magnetic side is FACE DOWN in the folder so that the pattern is DEBOSSED.


3a.  Use leaf-shaped cutting dies to cut out pieces of faux tan leather & magnetic sheet.  When cutting with the faux leather, place the leather side FACE DOWN on the cutting die.  When cutting with the magnetic sheet, place the magnetic/gloss side FACE UP.


3b.  ProvoCraft Cuttlebug dies with a 1/8" profile are quite thick for small metal dies.  The platform combination for these dies is as follows (bottom to top): D, Magnetic Shim, A, Dies, Material, A.


4.  Use an Exacto blade to cut small slits into the magnetic cut-outs.  Make sure that the small inner piece of the paper clip is on the matte/non-magnetic side of the leaf & that the small inner piece of the paper clip does not stick out of the bottom of the leaf.


5.  Use super glue on the magnetic side of the leaves & glue ONLY the large, back portion of the paper clip to the magnetic leaf.  Let dry.


6a.  Mix some Dixie Belle chalkpaints, Chocolate & Midnight Sky, to get the right shade of brown.  Mix 3 parts chalkpaint to 1 part hard surface cleaner or Flow-Aid.  I used the eBrush siphon cup, though you can also use the bottle.  Spray to cover the entire embossed magnetic sheet.


6b.  Once the embossed magnetic sheet was sprayed, use the residual paint to airbrush the sides of the picture frame.  The sides will not be covered by the magnetic sheet, so they were airbrushed.


7.  Use the chip brush to add some texture & bring out the highlights in the embossed magnetic sheet.  I mixed equal parts of Dixie Belle Chocolate, Barn Red, Rebel Yellow & Drop Cloth.


8.  Super glue the top half of the faux leather leaf to the non-magnetic, matte side of the leaf.  It is important to only glue HALF of the leaf to the side of the small inner paper clip.  Super glue the painted, embossed magnetic board to the picture frame.  Let dry.


9.  TADAAAA!  Now you have a mini magnetic memo board!
BONUS: Use fabric paint in the eBrush siphon to add colors to your leaf memo clips!


Hope you enjoyed this little office accessory!  Look forward to seeing what you make for your office!

-Judith

September 21, 2016

Embossed Autumn by Jan Hunter

I <3 embossing!  For this project, I used the Teresa Collins Herringbone and Hounstooth A6 folders.  I hope you can see it in the details.


Even the twill tape has the Herringbone design imprinted on it using the folder and some ink.

You'll need:
Teresa Collins Embossing folders
Ink
eBrush, marker adaptor (TB for this project0
Markers (Tombow 985, 977, 933, 847)
Stamps (Autumn Days, Glass Blooms)
Detail Embossing Powder (White by Ranger)
Twill Tape (1/2 inch wide)
Heat gun
staples, stapler
glue dots
Twine
Other embellishments as desired
Cardstock

Stamp and heat emboss the leaves, Set aside.
Emboss a piece of card stock measuring 4 x 5.25 using the Houndstooth folder. Using the Herringbone folder, emboss the left side of a piece of cardstock measuring 2.5 x 5.5.

Using the herringbone folder, slide the twill tape through the center area at the fold.  Flip the tape up and ink the bottom side of the folder where the tape will lay.  Lay the twill tape on the inked portion and press with your hands or a brayer being careful that the tape doesn't move. The pattern will be pressed into the tape.  Remove the tape.  Repeat as needed for the remainder of your tape.  Heat set ink if needed.  "Pleat" the tape and if desired stitch or staple.  You could also use glue dots to secure the pleats in place.  Clip the ends into an inverted V.  Set aside.

Using the eBrush, edge the sides of the white cardstock the base and the smaller piece using the brown (977).  Set those pieces aside (oops, no picture os this step).

Using the lightest colored marker in the eBrush, begin coloring the leaves. Add layers of color wiping excess off off the embossed areas.  Trim the leaves.


Arrange the leaves on the strip of paper, adding pop-up dots as desired for some added height. Stamp the sentiment to the same strip. Add the twill tape using glue dots to secure. Wrap some twine around the whole strip of card a couple of times. Finish the twine as desired.

Secure the large embossed cardstock to the card pase. Add the strip securing with tape or glue.  Add any additional elements as desired.

Change the dimensions to 4x6 and choosing a fall sentiment, this would look very nice framed.

Wishing you happy crafting and don't be afraid to mix textures with embossing folders OR to add more dimension using the folders and ink to tape or ribbons.  There's lots of fun to be had.

Wishing you time in your crafting room this week and every week!

'
 
Copyright © 2014 Craftwell Blog. Designed by OddThemes - Published By Gooyaabi Templates