DO NOT MISS
>>Follow our Facebook page for updates! >>Join our Craftwell Design Team: Apply Now!
Showing posts with label sequins. Show all posts

February 14, 2023

Love Donuts

 Hi everyone! Happy Valentine's Day 💕

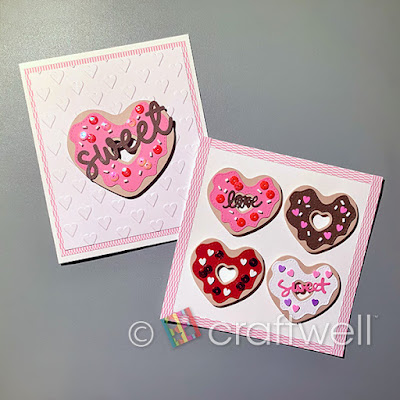
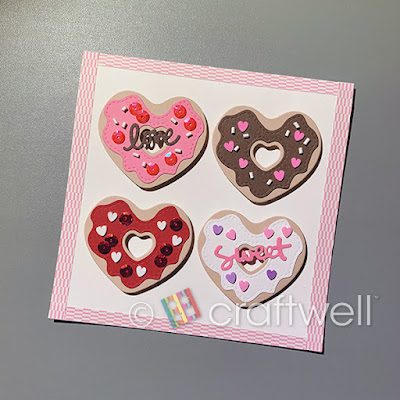
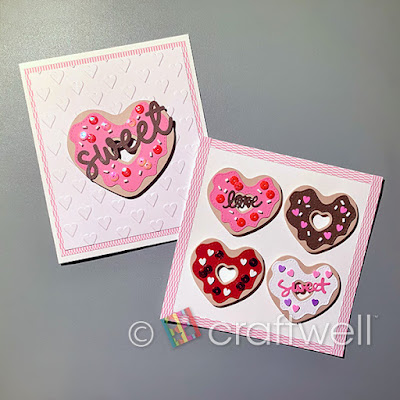
I made some sweet treats just for the occasion. Who doesn't love donuts shaped as hearts?


Materials

Craftwell eBosser

KSCraft Heart Shape Donuts Cutting Dies

Cardstocks from Michaels

Variety of confetti and shapes from Amazon

Foam adhesives

Elmer's glue stick


Taking selected cardstocks to cut out shapes using KSCraft heart shape donuts cutting dies and taking So In Love embossing folder to emboss on a plain cardstock. 

I assembled all the pieces to how I liked it and below is the finished cards. 

I couldn't resist making two cards.


I hope everyone enjoyed my project and got inspired!
Until next time.

From Katie

December 17, 2021

Christmas Ornament

 Hi Everyone!

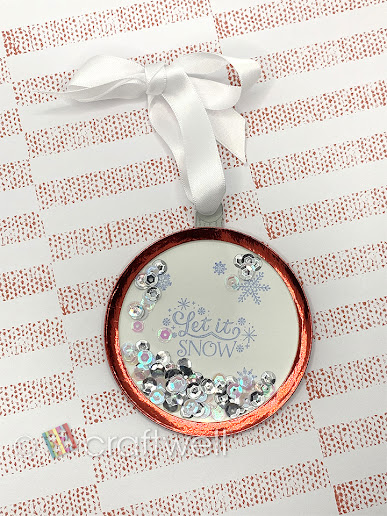
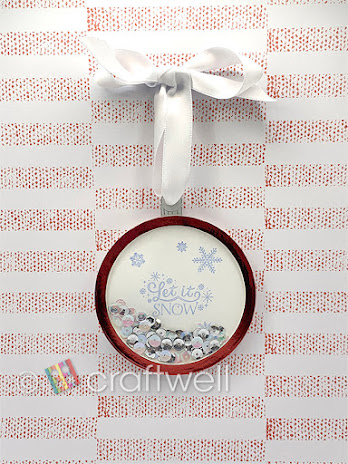
Christmas is closing in and I thought it would be fun to make a shaker ornament to place on your tree.

Or it can be used as a gift tag as well.


MATERIALS:

Craftwell's eBosser

Metallic Red, White and Grey Cardstock from Michaels

Hygloss Overhead Projector Sheets Acetate Transparency Film

Waffle Flower Nesting Basics Dies Bundle from Amazon

Christmas Themed Stamps from Michaels

Sequins from Amazon

ColorBox Assorted Colors Ink Pad

Single Hole Punch

White Ribbon

Clear Glue


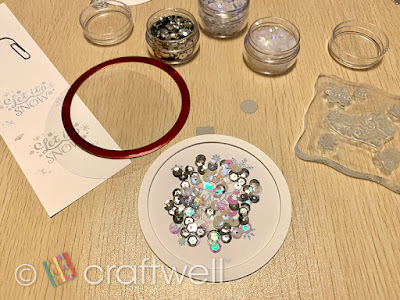
First, I chose one of the large round dies and cut-out a base layer. 
Then took both the previous large die and another round die that was 2 size smaller to cut about 6 layers with the white cardstock, and one layer with the metallic red cardstock. I die-cut a small square and circle with the grey cardstock.

Taking the base layer, I stamped Christmas words and additional decorations together. 

When gluing the layers on the base, on the 3rd layer glue the grey square at the top and then glue circle near the edge of the square. Then continue gluing the remaining layers except the red one.

I added the silver, clear and white sequins and kept them in the center.

Cut and glue a round circle from the acetate film then take the red cut-out layer and also glue on.

While the layers are drying, punch a hole at the small circle then place ribbon through hole and tie a bow.

And there you have a Christmas Ornament thats also a shaker.


Hope you enjoyed my project! 

From Katie


October 20, 2021

Birthday Shaker Card

 Hi everyone! 👋

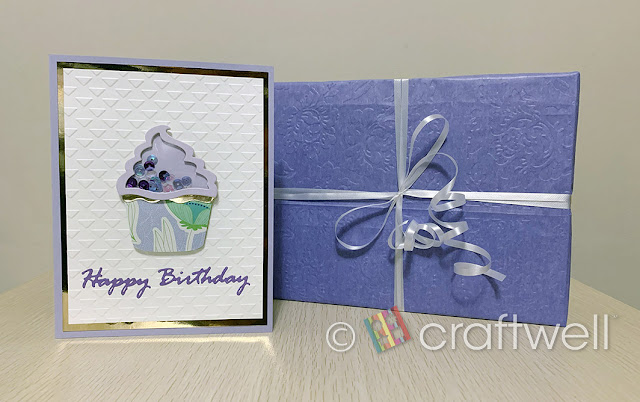
Katie here! It's been a while since my last post so I bring you my first try at making a shaker card and it was for my goddaughter's 1st birthday.


Materials

Craftwell eBosser

Craftwell Embossing Folders: Love Triangles and Cabbage Rose

Cupcake Shaker Kit from Amazon

Hygloss' Acetate Sheets from Amazon

Spellbinders Shapeabilities Words Cutting Dies: Happy Birthday Die

Assorted Colors of Sequins from Amazon

Variety of cardstock

Recollections Foam Adhesive Squares from Michaels


I honestly had no idea how to make one so I went on YouTube for guidance. 

For the cupcake shaker, there's different ways you can achieve this part and I chose to make multiple layers from cardstock for the top of the cupcake. I think it took about 6 or 7 layers. Glued all the layers together except for one, poured in 3 different colors of the sequin then glued a cut piece of the acetate sheet and the last layer. Once the top was assembled and dried, I glued the rest of the pieces for the cupcake. 

The card, I kept it simple with 3 different colors and embossed one with Craftwell's Love Triangles folder. Die cut the word Happy Birthday from Spellbinders die set. 

There you have it! The end result shown in the photo above. 

I added another surprise by embossing tissue paper with Craftwell's Cabbage Rose folder and wrapped the gift in it.


I hope everyone enjoyed my post and will give it a try if you've never made one!

Until next time! From Katie 😉😄


August 13, 2019

Inspiring Altered Canvas


Greetings crafty dolls and guys from Desiree' of Her Own Fairytale with you!
Happy to be back and sharing my latest project with you all!
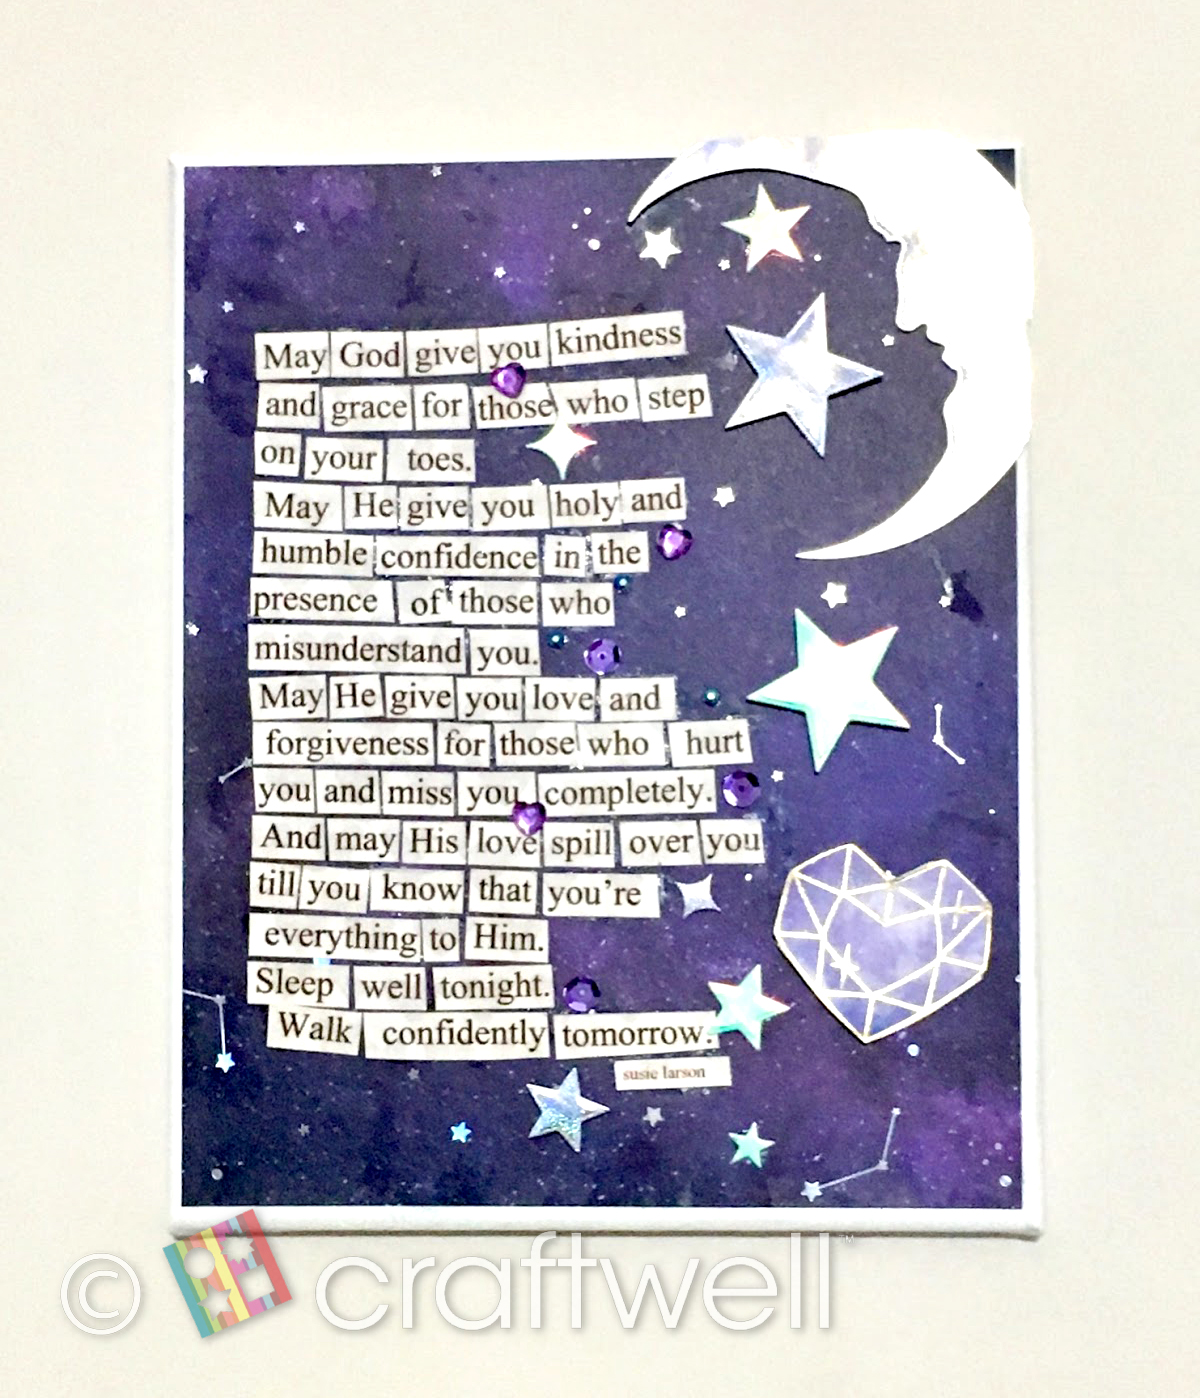
An altered canvas inspired by a Quote? A poem? A prayer?
All of the above! All I can say is that it's beautiful and came from an author name Susie Larson. As I recently hit one rough spot in life after another, these words inspired me AND reminded me I AM LOVED.

I started off this project with choosing a paper from the Black Rainbow stack from Michael's and it's an 8x10 canvas. It has all this pretty design and was in my craft stash.


I first flipped my paper over, traced around my canvas and cut it out using my paper trimmer. This will make the decopodging easier.


I put down a coat of white gesso on the canvas and let it dry.
Then I painted the canvas with a coat of white acrylic paint and also let it dry.
After giving them enough time to dry, I adhere my paper to my canvas and again let it dry again with all the decopodging.


I printed out the quote I wanted to use then cut it to bits and glued it down to my canvas. I did this by hand for the most part, clearly. Hehe! #HandmadeNotHallmark am I right?


It was then time to have the Snap machine get to Work!
I die cut some sparkles, a moon and I actually fussy cut out a heart from some other paper collection... from the stash of course.


After the dies are cut, they had to be arranged and adhered, right?
So that is what your girl Did! I used some holographic paper scraps, and even recycled some packaging paper by cutting some of the stars out of it. It was so pretty and hate to waste. Oh, I also had to add some beaded hearts and some sequins!


And this was the final product! I hope you LIKE and get INSPIRED! Most of all I hope you remember IF you are going through a rough time, these beautiful words can remind you too that YOU ARE LOVED! Please come back to visit this blog, be inspired by our other members design templates!

Sending you crafty love always!
      ❤

September 3, 2015

Mixed Media and Bella Blvd.

eBrush Design Team: Mitsyana Wright Week 10 Cycle 2


Hey there Crafty Friends!! Today I got a little something different... I love mixed media!! I love the way you can take different medium and mesh it to create something simply beautiful or something over the hill extraordinary!! 

And today I'm expanding my Mixed Media Journey with Bella Blvd.!! Sponsors of Team eBrush for the month of September!!

Supplies Used
Tim Holtz Stencils- Measured, Splatters
Spellbinders Grand Nestabilities- Grand Labels One
Sharpie Markers- Blue and Navy Blue
Blue Painters Tape
Modeling Paste
Sequins (Virginia Turtle)
Diamond Glaze (Judikins)


I started off by ebrushing my Passcode paper by Bella Blvd. with a bright blue Sharpie marker.


Then I simply ebrushed a dark/navy blue ring in the center of that.


Then I added  my blue scalloped border from Bella Blvd's Treasures and Texts stickers. 

I wanted to add some texture to my layout. So I taped my layout to my work surface to help prevent warping and bowing.

Then I added modeling paste with a palette knife and my Splattered and Measured Tim Holtz stencils.


And while that was drying...

I die cut my my Bella Blvd Dotty paper with the largest die from my Spellbinders Grand Labels One set using my Cut'n'Boss.


Then I ran the die cut piece through my Xyron Creative Station for durability and adhered it to the base of my layout. Next I took my 4"x6" photo and matted it onto a 4.25"x 6.24" piece of Bella Blvd. Newsflash paper. Then ran my matted photo once again through my Creative Station.


Once my photo was adhered to my layout I embellished it using more stickers from the Bella Blvd. Treasure and Texts sheet. With my parvy circle punches I cut various circle in different sizes to add to my layout.  I tied everything in by scattering and adhering Guacamole Doodads across the page. I also added words from the Orange Little Bits stickers to my biggest circle.

I thought using the words "goofy boy moments" went perfectly with this picture of my son with his tongue hanging out.

Lastly I used my dimensional glue to adhere sprinkles of sequins onto my layout.

And here is my finished layout... 


I hope you all enjoyed my project today!!

Until next time...
HAPPY CRAFTING!!
~ Mitsy


To see more of my crafty projects visit my personal blog at:


www.upontippytoes.com 
'
 
Copyright © 2014 Craftwell Blog. Designed by OddThemes - Published By Gooyaabi Templates