
DO NOT MISS
>>Follow our Facebook page for updates! >>Join our Craftwell Design Team: Apply Now!
Showing posts with label scrapbook layouts. Show all posts

February 16, 2016

Dreaming with Craftwell


Cut 'n' Boss Design Team: Suzanna Lee Cycle 12

Hi there Craftwell fans! Suzanna here today popping into share with you another layout. Today's layout features dies from the Craftwell/Teresa Collins Noteworthy pocket collection. I love that I was able to cut all four of these dies at the same time with one pass through my Cut'N Boss. And not manual cranking necessary! Just insert the sandwich into the machine, sit back and relax and let the machine do the hard work for you!


It's not often that one is afforded the opportunity to capture pictures of older kids napping. I was "lucky" to find my youngest on the couch one of our recent snow days. Unfortunately the reason I had this opportunity is she had walked into a door... No concussion but a mighty big headache instead! Needless to say, the frame with the words "dream" were appropriate for these pictures!


I took full advantage of the "time", "place" and "date" dies to be able to document the specifics that added those little details to my story. They make a nice footer along the bottom of the page. Use the usual sandwich for dies and the Cut'N Boss that we've been showing for over a year now. When in doubt, you can always consult the "Platform Combination" manual that can be found online HERE. Not only does this give you the die cut combinations for multiple others as well. Handy tid bit of info to bookmark!


Wanting to incorporate a little added color into the layout, I hand watercolored this awesome background from Bella Blvd with my Peerless watercolors.


I hope you have been enjoying all the projects we have shared lately. Be sure to check out this month's sales from Craftwell. We have tried to incorporate these products into our projects so you have a sense of how to use these wonderful dies and embossing folders in the Cut'N Boss.
Thanks for stopping in today!


Supplies
Craftwell/Tersea Collins Cut'N Boss
Craftwell/Teresa Collins Noteworthy Pocket Dies
Cardstock - Core'dinations
Patterened paper, stickers, acetate, diecuts - Bella Blvd
Watercolors - Peerless

February 9, 2016

Debossed Love-ly Layout

Cut 'n' Boss Design Team: Suzanna Lee Cycle 12


Hi there Craftwell fans! Suzanna here today to share with you a love-ly layout I created using my Craftwell Cut'N Boss and some Craftwell/Teresa Collins goodies!


My son and I went to the Cupid's Ball for 6th grade Cotillion last year and had a lovely time. We were invited to be greeter's in the receiving line for the affair which meant that he and 3 other young people were the "leaders" of the line into the first dance. This picture is of him and 3 other kids.


Debossed white cardstock creates a crisp white background that really showcases the darker picture. The pops of color here and there amongst the debossing are hand colored hearts with Peerless watercolors. The sandwich to run your embossing folder through the Cut'N Boss is above.


I also used a die from the Noteworthy collection on this layout along the bottom for some embellishment. The multi purpose sayings on the dies make them so versatile for any theme layout, card or project you create.


In the above picture you can see one of the watercolored debossed hearts a little better.


Thanks for stopping in today! I hope you have a LOVE-ly day!


January 19, 2016

'If the Shirt Fits' Scrapbook Layout

Cut 'n' Boss Design Team: Suzanna Lee Cycle 12

My second project for the month of January for you! I went with my old standby this time. Needed it done quick and layouts are the quickest for me! I am one of several chaperones for a 10 and under group of 100 swimmers this weekend going down to NC for 3 nights and 3 days of swimming. Wish me luck!!


Hi there Craftwell fans! I'm back to my old bag of tricks with a good old fashioned layout this go around. While decorating my planner last week was fun, I really just need to get some of the millions of pictures I have scrapped and in the album. I worry more about forgetting the emotions of the moment and the journaling than anything else. So this week we have a picture of my son the snowman. He is a bean pole, a very tall bean pole. Finding clothing that fits his extremely slender and long body is next to impossible. This shirt came all the way from the UK!


The background paper (white) is embossed using my Craftwell Cut'N Boss and the Modern Stripe embossing folder. I love the subtle combination of the circles within the patterned paper with the stripe of the embossing folder.


The whole 8.5x11 sheet of paper fit perfectly in the embossing folder and I was able to trim it down some in order to have the blue frame behind it. It really needed that support color to pop the T-shirt in the picture.


You can see that subtle emboss better in the close up picture above.


My Cut'N Boss also came in super handy for cutting this snowflake border die cut used towards the bottom of the layout. I used the usual thin wafer die sandwich;
From Bottom to Top
D Plate
A Pate
Magnetic Plate
Metal Die
Paper
Metal Plate
A Plate

I got the perfect clean cut with the rounded edges that I love from a die cut! One of the many advantages of a die cut machine. Even better, I didn't have to crank the crank, just insert sandwich and the machine does the work for you!

Thanks for stopping in today!

Suzanna Lee


Supplies
Craftwell/TC Cut'N Boss
Craftwell/TC Modern Stripe embossing folder
Die: Wild Rose Studios
Patterned Paper: Doodlebug, Lawn Fawn
Glassine Bag: unknown
Journaling Card: ChicTag
Stickers: Teresa Collins, American Crafts, Pink Paislee, Freckled Fawn
Glitter paper: Core'dinations
Letter Stickers: American Crafts, Jillibean Soup

November 24, 2015

Happy Day Layout

Cut 'n' Boss Design Team: Suzanna Lee Cycle 12

Hi there Craftwell fans! Just two more days until Thanksgiving for those of you/us who celebrate! It's one of my favorite holidays but really, it's a day we ought to celebrate every day. Every day ought be a day of gratitude and gratefulness. We have so much to thankful for, especially in light of recent events. The layout I'm sharing with you today celebrates my everyday gratitude of my daughter, Mia.


I used my Craftwell/TC Cut'N Boss and a large embossing folder to created the embossed yellow banner that is horizontal on the page. I could have just used it plain but the embossing added some visual interest to the page.


I also used my Cut'N Boss to cut out the M using an alphabet die from Top Dog Die and the gold heart. I was able to run both dies through at the same time! I love not having to crank the handle and while Thickers and other letter stickers are great, the rounded edge of things die cut are so much more appealing to me! 


The sandwiches for both are "as usual" as I've stated over various blog posts. Even with the combination of different die companies, I was successfully able to run both dies through at the same time without any issue as they are both wafer thin dies.


I hope you and your friends and family have a wonderful Thaksgiving!
Thanks for stopping in today!

Suzanna


Supplies
Craftwell/TC Cut'N Boss
Craftwell/TC Embossing folder Sophisticated
Dies - Top Dog Dies, Memory Box
Project Life Card - Project Life
Patterned paper and stickers - My Minds Eye
Cardstock and vellum - Core'dinations
Ink - Avery Elle, Distress
Roller Date Stamp - Close To My Heart

October 27, 2015

Halloween eBrush Layout

Cut 'n' Boss Design Team: Suzanna Lee Cycle 12

Hi there Craftwell fans! Suzanna popping in today to share a Halloween layout that I created using the eBrush and CutNBoss. I'm new to the eBrush so I have some tips to share with you as I learn to use this really cool handy dandy crafting tool as well!


First things first, use your Silhouette and some Contact paper to cut out a stencil. I wanted a large stencil so using my a larger electronic cutting machine enabled me to get that effect.


I carefully peeled of the backing of the Contact paper and applied my homemade mask or stencil to the white cardstock. There are a few puckers here and there as putting such a large stencil with such detail is no easy task. I'm not worried about it as you won't see those mistakes once the stencil has been pulled up.

Next, you will need your eBrush, Tombow markers, a large flat paint brush and a water mister of some sort.


Use various color Tombow markers to apply color over the stencil/mask. I used two shades of grey, purple and orange. The purple and orange were applied here and there, not through out as the grey's were. When you have your markers in the adapter for the eBrush, make sure you had the tip ALL the way in, I frequently found that I wasn't getting sufficient color application as my markers weren't deep into the well of the adapter.

Once you have all the color you want, mist with the water and paint over with a moist paint brush. As you can see from the left/right comparison above, this creates a less mottled and more blended look. You cannot get this same effect with Spectrum Noir markers as they are alcohol based while Tombow is a water based marker.


Pretty nifty Halloween background, don't you think? I then layered Crate Paper "After Dark" collection papers and stickers to create the remainder of the layout. My journaling is on a tag which I cut out with my Cut'N Boss and a die.


I just love Halloween, it's my favorite holiday. No pressure, just fun. Just as crafting should be; no pressure, just fun. And both the eBrush and Cut'N Boss sure make it so easy and fun!

Thanks for stopping in today!

Supplies
Craftwell eBrush
Tombow markers
Silhouette Cameo
Miss Kate Cuttables cut file
Paper, stickers - Crate Paper
Rub Ons - Tim Holtz
Twine - The Twinery


October 1, 2015

Remember this!

eBrush Design Team: Mitsyana Wright Week 12 Cycle 2

Hey Crafty Friends... It's my turn up for Team eBrush. These next two weeks we will be featuring awesome papers from Teresa Collins!! Yay!!

These papers are so super fab that they make your projects shine... literally!! I'm digging all the gold foil throughout her lines. And as a bonus many of her lines coordinate very well with each other!


Supplies Used
Teresa Collins Pocket Dies- Butterfly, Phrases, Honeycomb (Memory Collection), Flowers and leaf (Girls Best Friend & Thankful sets)- Craftwell
Teresa Collins papers- (Project Pink- Cards, Lattice, Gold), (Collectors Edition- Gilded, Geometric)
Stemmed leaf  (Small Ivy die - Die-Namites)
Sharpie Markers (Green, lime green, orange, brown)
Spectrum Noir Markers (IB2, CR2, CR5)
Gesso (Liquitex)
Modeling paste
Stencil (DCWV)
Polka Dots background stamp (Hero Arts)
Hot Glue gun and sticks
Assorted paper flowers (Prima Marketing)
Assorted ribbon & Tulle (Offray)
Assorted Buttons (Buttons Galore)
Diamond Glaze (Judikins)
2Way Glue Pen (EK Success)
Cutter Bee Scissors (EK Success)
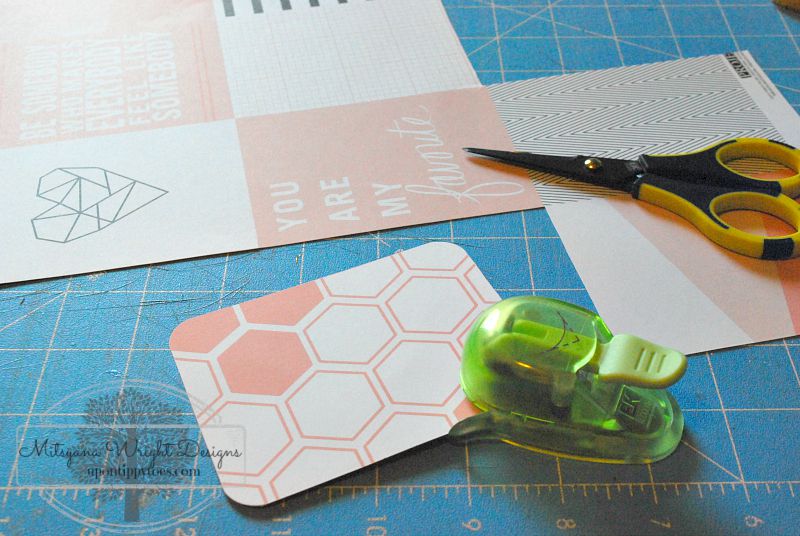
Corner punch (EK Success)

I started by cutting out several the little golden square out of my Teresa Collins Lattice paper. I loved the look to this foil... it's has a nice shine without being overpowering.

Then I slid them into my Xyron "X" to turn them into instant stickers.

Then I just peeled them and arranged them randomly onto my sheet of Teresa Collins Gilded paper.

 I used my die cut machine and cut out 1 large leaf, 2 stemmed leaves,  2 honeycombs, and 1 of each phrase.

I ebrushed all my die cut pieces and paper flowers.


I cut out this awesome honeycomb panel from my Teresa Collins Cards sheet. Then rounded the corners.


I used my glue pan to adhere my different phrases onto a sheet of  Teresa Collins Gold paper... it has a lovely water brushed look on the backside of the gold!


Next I ran all my ribbon, die cuts, panel, and picture through my Xyron Creative Station!! Extra large platform is great for not just the BIG jobs but the many Small ones as well... so much better than having do them one at a time!!

Then I gessoed this adorable wood veneer bird cage I found at Michael's. Then I ebrushed it in Spectrum Noir IB2.

I also used more gesso to add details onto my butterfly wings.While that was drying...

I arranged and attached all my newly adhesive'd pieces. I hot glued buttons onto my flowers and used Diamond Glaze to attach them to my layout. And I made sure to use my glue pen to do the delicate honeycombs.

I cut out some Teresa collins Gilded paper to make my white and gold foiled roses. I used the flower die from the Teresa Collins Memory Collection for the flower and cut a total of 8 of the small flowers (4 for each rose). 

I love mixed media but hate the time it takes for most pastes and paints to dry. With the ebrush I can do mixed media with little to NO drying time!! The bird cage was ebrushed with my Spectrum Noir IB2 marker and dried INSTANTLY! I even ebrushed after I had attached all my elements onto my layout... around my main focal area  and pretty much everywhere I had a bit of honeycomb.

And here is my finished layout. 
Now I have a dainty page to match my precious baby girl (Who's not a little baby anymore)! 


Hope you liked my project for today!!

Until next time...
HAPPY CRAFTING!!
~ Mitsy

For more pictures & details of this and other of my crafty projects please visit my personal blog at:

www.upontippytoes.com

September 24, 2015

'Sparkle' Scrapbook Layout

Cut 'n' Boss Design Team: Alexia Misso Cycle 11

Alexia is all about the sparkle! And with today's gorgeous layout, I think she really achieved that! See her project below!

Hello all! Today I'm here to share a layout I created with Teresa Collins new paper collection and Craftwell embossing folder and dies! Have you checked out her new collection? You have to because they are all so beautiful, and shiny!! 

I love this sun burst with gold foil, it's gorgeous. Plus, if you are a gold person, this is definitely something you don't want to miss.


I embossed a piece of gold foil card stock with the snapshot embossing folder, it turned out so well. I also die cut some Teresa Collins' metal dies using Cut 'n' Boss.  


Here are some close-ups for the layout. I just love the card stock stickers from TC's paper collection, good for everyday paper crafting and to capture your everyday life story. 


This SPARKLE word is also from TC's metal die collection, isn't just cute?!


I hope you like the layout I share with you today! Have a wonderful day!

 - Alexia

Products Used:


'
 
Copyright © 2014 Craftwell Blog. Designed by OddThemes - Published By Gooyaabi Templates