DO NOT MISS
>>Follow our Facebook page for updates! >>Join our Craftwell Design Team: Apply Now!
Showing posts with label handmade cards. Show all posts

March 14, 2019

Lucky! Artist Trading Card & Greeting Card!


Hello again! It's your girl Desiree', back on the Craftwell blog, and I am sharing two projects with y'all today!
That must make this your LUCKY day! LOL Just kidding!
So on to the details...

I first picked out my papers and such, I ended up choosing to use only 2 dies, but I stretched those out to make 2 projects! I used the Craftwell Lucky tag die and a little heart one by Craftwell too!
The papers by The Paper Studio, were recently bought at Hobby Lobby and were on sale! The glitter paper was on clearance even! All the other things were in my stash.


I cut out my dies with my Snap machine of course! Keeping in mind I wanted to use the positive and negative parts of my cuts.
I then started to piece together some embellishments using the die cuts.
I cut four hearts and made a four leaf clover for the ATC from the glitter paper. I also used a tiny doily with the Lucky tag and a sticker to make a cluster embellishment for my other project. I kind of love the way they turned out. I decoupaged my patterned paper onto my ATC card BEFORE I adhered any of my other elements to it.
I also used some washi tape behind the word lucky, so it would pop a bit more.


I kept the paper strip I cut my hearts out from and used it as a border on the top of this card. Added more washi for poppage and some shamrock bling too.
As I said before I cut the shamrock paper to cover my ATC, then decoupaged it, and sanded the edges to make them nice and clean. I also cut a strip to accent my card.
Then I cut a thinner strip of that glitter paper, had to! Because GLITTER! LOL Seriously though.
After stacking things and adhering them I was almost done. Just had to add some ribbon, seam binding, and a felt bow to my tag, a little Tim Holtz, small talk too and BOOM! They were all complete! 


As always thank you for coming by, please come again!
 I hope you liked what I shared and found some inspiration! In advance let me wish you all the most blessed St. Patty's day EVER! 


July 3, 2018

Girly Happy Birthday Card


Hiya! Desiree' here to share my latest project for the Craftwell blog! 💗 I of course hit my craft stash AGAIN and decided to put some of my beloved horde to good use.

Tools and such used:
Craftwell Snap die cutting and embossing machine
Craftwell eBrush
From the Teresa Collins collection, by Craftwell, the Preppy Hounds Tooth, A6 embossing folder.
Tim Holtz Stamping Platform
Tim Holtz sentiment stamp {sorry does not have a title?}
The WRMK, Tag Punch Board
Heart die by Craftwell
Frame die and heart confetti die,
{from the stash stored on a magnet storage sheet and have lost the packaging for them, sorry.}
The papers used are from the DCWV Confetti stack, the Country Road stack by the Paper Studio.
Pink 65 lb. card stock,  vellum from my scraps, and the card stock stickers are a real throw back by
Melissa Frances, from the C'est La Vie, collection!

Whew! Now on to the project details! 
The first step was to figure out what I was going to use. As always. 😉 I decided I needed a tag, so I made one using the tag punch board. Next it was embossing time! 
My darling Snap machine made it delightfully easy to get a great impression!
I decided not to emboss the bottom of the tag. I wanted to leave room for the super-cute scalloped edge sticker I was going to use.


Die cutting needed to be done next. I cut the frame die out for the sentiment inside of the card. 
I wanted the sentiment to pop! So I used the eBrush and my two fave pink Sharpies to add some 
color around the edges of the die cut. Love that gradient effect so much!


My card base is 5.50x4.25 inches, I cut my patterned paper for the card front to 5x4 inches. I distressed the edges, adhered some of the dies cuts and popped it up on some pop dots for dimension.
I cut *Happy Birthday* from one of the confetti stack papers, cut another strip from the gold polka dot paper in the stack. Cut out a dove-tail shape at the bottom of them both. I stacked them together and added one of the pretty card stock stickers. I staggered them and then adhered them all together. I took a  bow I had made a while ago and decided to place them on my little embossed tag. 
I think it turned out to be such a cute embellishment! 


I wanted a clean line inside of the frame for the sentiment. I decided to cut out a rectangle to place inside the frame. After that I stamped the *I love you* sentiment onto the white rectangle. I glued some little clusters around the sentiment. I also like to write a personal message in every card I give to a loved one. So I placed the sentiment up on the top of panel of the card, when it is opened. That way there is plenty of space to let a special person know how much they mean to me! Once everything was dry, it was time to completely assemble my card!


Here it is. All assembled, so girly, and so pink! A bit vintage-esque. I LOVE how this turned out! I sincerely hope you do too! 


Feel free to leave me a comment, I love getting those! I hope that you were inspired by today's project, always do. 
I also hope you will come visit again soon! Until my next post sending you warm wishes and crafty love always!
                                  
💖 - Desiree'


August 13, 2015

Tropical Toucan Card

Ebrush Design Team: Mitsyana Wright Week 9 Cycle 2


Hey Crafty Friends...
We are coming to the end of our Sponsorship with KaDoodle Bug Designs!! It's been so much fun showcasing these amazing file and how the eBrush can make them come to life.  Don't forget to comment at the end of this post, follow the Craftwell blog, and "Like" KaDoodle Bug Designs on Facebook for your chance to win a $25 gift certificate!!

Supplies Used For This Project
Sharpie Markers - green, orange, brown, gray, black, yellow, orange, aqua
eclips w/ ecal Software (Sizzix)
Tattered Leaves die (Sizzix)
Grand Nestabilities- Labels One (Spellbinders)
beYOU stamp set (Virginia Turtle)
3D Dots (EK Success)
2way glue pen (EK Success)
VersaFine ink pad- Onyx Black (Tsukineko)
PITT Artist pen (Faber-Castell)
Paper Flowers (Prima Marketing)
Self Adhesive Rhinestones (Recollections)
Patterned paper (unknown brand)
Cardstock- white, craft, black, gray
Chipboard
Scissors

For my card I started off by Cutting my "branch" from my Tattered leaves die. I cut out 2 of these, 1 in a light green cardstock and the other in chipboard.


Then with my ebrush machine I airbrushed my leaves using my green, orange, and brown Sharpies.


I knew I wanted my card to be a shaped card so I cut the base and nested panels from my Label one dies. Then set aside.

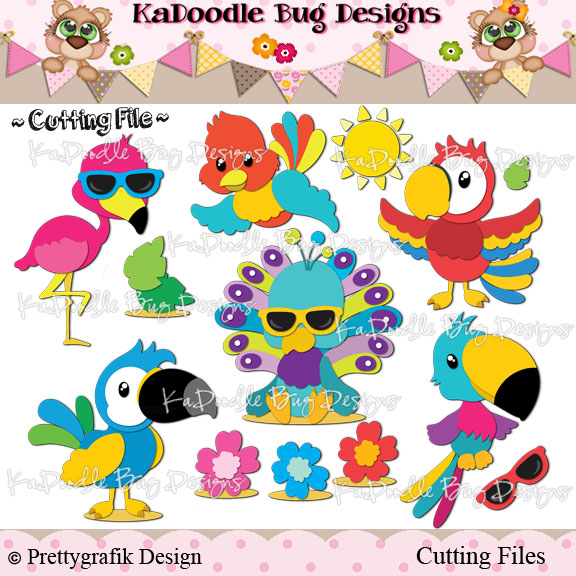
For my I knew I wanted a little bird to be perched atop my branch. KaDoodle Bug Designs has lots of adorable bird files but this one caught my eye and I instantly fell in love. I think it's because of my island upbringing... go figure that I would be drawn too something more tropical.

Tropical Birds

This one is called Tropical Birds... LOVE IT!!!!


In the clipart included with the file this toucan is multi-colored... I didn't want to have to cut several different colors of paper... it wasn't the look I was going for. I wanted a more traditionally colored toucan. And, besides, I was feeling a bit lazy... but ssshhhh, you didn't hear me say that! So I only cut my toucan in black, black, and gray cardstock. Then I just ebrushed the pieces that needed color, like my beak and feet.


Then I glued the pieces together using a 2way glue pen.


I used foam adhesive dots to give my toucan more dimension. I place my leaves into the appropriate spot, as to look as if he is perched on the branch. Then I adhered the foam dots around it. 


Now time to assemble my card... I used my Xyron Mega Runner to adhere my panes to my card base.


Then I stamped my  "be happy be bright be you" sentiment using my VersaFine ink pad in Onyx Black. 

Then adhered my branch to my card base using more 2way glue. After setting my toucan down I finished off my card by adding flowers with rhinestone centers to my branch.

And here is my finished card...


Hope you enjoyed today's project!! 

Thank you KaDoodle Bugs Designs for being our sponsor for the month of August!! I had a blast!!

~ Mitsy

For more paper pieced projects and ebrushing inspiration see my personal blog at:

August 6, 2015

You mean the world to me

Ebrush Design Team: Mitsyana Wright Week 8 Cycle 2


GIVEAWAY ALERT! $25.00 Gift Certificate for Kadoodle Bug Designs!  Make sure to comment on this post , ALSO  like FB pages : Craftwell and Kadoodle Bug Designs


Hi Crafty Friends... I am so excited about this weeks sponsorship for team ebrush!! Why? Because it involves two of my favorite crafting pastimes... eBrushimg and Paper Piecing!! And I am head over heals in love with with all the digital files from our August sponsor, KaDoodle Bug Designs!!

Supplies Used
eBrush (Craftwell)
Cutie KaToodles Earth Squirrel (KaDoodle Bug Designs)
Sizzix eclips and ecal software
Owl Nerds stamp set (Pink and Main)
Book Shaped Nesting Dies (Darice)
Mega Runner(Xyron)
Sharpie Markers (light green, green, orange, brown, light blue, blue, dark blue)
Spectrum Noir Marker GB1
Cardstock(light blue, light green, craft, black, white)
Foam adhesive squares
2 way Glue (EK Success)
white opaque marker -snow (Recollections)
PITT Artist Pen XS, M
Chalklets chalk (EK Success)
VersaFine Onyx Black Ink Pad (Tsukineko)
Paper Trimmer
Scissors

I used my Sizzix eclips machine and ecal software to cut out my file. I used the default sizes and just separated the shapes by color to make cutting faster and easier.

I started off by ebrushing  my globe land pieces in light green, green, and brown sharpies.

for the main planet piece I ebruhed it in light blue, blue, and dark blue.

Then I glued my land pieces on my planet using a glue pen.


I also ebrushed my irises in light green, green, and a small bit of brown.
For the highlights of the eyes I made little circles on the blacks of the eyes using a white opaque marker. I line the eyes with an fine tip black pen. I love Faber-Castell's PITT Artist Pens for this. They dry permanent so even if I go oever them with another color it will not bleed or smear.

For the body of the squirrel I cut it out of craft paper and ebrushed it with my brown sharpie and then lightly went over the edges with orange.

One thing I super love about the KADoodle Bug files is that most of them come with a shadow to glue the pieces onto. This helps to guide you on what pieces go where and how far apart they should go. I glue all my pieces down with a glue pen and start with the ears first.  


I ebrushed the inner ears, muzzle, tummy and foot bottoms using Spectrum Noir in GB1.


I added foam adhesive to the back of my piece to give it more dimension.


I used my Darice scalloped die andcut polka dot patterned paper and  a 2"x 4" strip of patterned paper to make a card front. I adhered my pieces to my card using my Xyron Mega Runner.


I stamped out my sentiment and used my scissors to cut out each word separately and ashered to my card. 

At the last moment I decided I wanted a a bow on my card. So I used some brown and white bakers twine and wrapped it a few times around my card front panels. I made a quintuple loop bow and glued it down with diamond glaze and topped it with a flower button.

And here is my finished card... 


I hope you enjoyed my paper piecing... I really do love making them! I always find joy just staring at the finished product! I hope you did too!!

Happy Crafting!!

~ Mitsy
Too see more ebrushing or paper pieced projects please visit personal blog at:

February 26, 2015

Zoom-Zoom scooter card

Ebrush Design Team: Mitsyana Wright Week 10 Cycle 1

Mitsy's project makes my heart sing!!! I am loving the cute scooter and the motion she accomplishes with the adorable stencil! Zoom on down and read her post!

Hello Crafty Friends... Mitsy here with more inspirational goodness!! I created this adorable card using stamps from our wonderful sponsor, Pink & Main!! And pairing it with the versatility of my awesome eBrush!!


Supplies Needed
an eBrush (of course)

         
Pink and Main's Chevys and On the Go stamp sets

Additional Supplies
White, Pink, Lavender Cardstock
Tsukineko's Momento Ink Pad (Tuxedo Black)
Spectrum Noir Markers (CT2, GB5, IG1, IG3, IG4, HB2, HB3, PP1,PP2)
Acrylic Block
Blue Painter's Tape
Martha Stewart Border Punch (Ribbon Loop)
Foam Adhesive
Double-sided Adhesive

I started off by using my chevrons from Pink and Main's Chevys set, lining them up on an acrylic block and stamping it onto plain white cardstock with my Momento Tuxedo Black ink... this is important... because I'm going to be using alcohol ink based markers I don't want my stamped image to run or bleed.

The Chevys set includes patterned inserts for each chevron and because they are clear stamps, alignment is a breeze!

Then, I used one of my sentiment stamps, included in the  set, as a border stamp.

And here is where my eBrushing comes in...

Exposing just the chevrons, I taped of the surrounding areas. I used Spectrum Noirs in PP1 and PP2. Remember I used plain white cardstock for the base and if I were to just color the chevrons they would have bled through the lines. By eBrushing it, it dries on contact. The results... the color blending of alcohol markers with out the dry time or the extra cost of buying the more expensive specialty paper.

I then made a border edge using my MS Ribbon Loop Punch out of lavender cardstock. I eBrushed the edges for depth. I don't know about you , but have you ever tried inking delicate edged paper? Not only can you NOT get into all those teeny tiny crevices but if you do attempt it you end up mangling the pieces and maybe even ripping them off ( like I do) and end up trashing it and wasting your paper. Not fun at all... makes me pretty upset actually.

But with the eBrush I have no problem with those "itty-bitties" and even inverted corners are a breeze!!


Finally, I stamped this cute little scooter form the On the Go set and colored in using my Spectrum Noirs in (CT2, GB5, IG1, IG3, IG4, HB2, and HB3). With this image I didn't have to worry if my color went outside of the lines because I was going to cut it out any way.

Here is the finished card!

And I made my sentiment on the inside match the front of the card just bey adding more eBrushed borders!! How stinkin' cute is that?!!

Hope you all enjoyed my project for today! Come back and visit us soon!

~ DT Mitsy


'
 
Copyright © 2014 Craftwell Blog. Designed by OddThemes - Published By Gooyaabi Templates