DO NOT MISS
>>Follow our Facebook page for updates! >>Join our Craftwell Design Team: Apply Now!
Showing posts with label dixie belle chalk paint. Show all posts

December 21, 2016

DIY Chandelier Makeover

Dixie Belle Paint Company and eBrush by Craftwell USA
Hello! today I would like to show you my garage sale makeover. I found this brass chandelier that desperately needed a makeover.
Today's supplies include: 
White Gesso 
Sanding paper
Patterned paper over old cones

I cleaned my brass piece with a damp cloth and let dry.  I used my eBrush with siphon today by mixing Dixie Belle Paint (Sea Glass) with water. More paint than water ratio. I sprayed in layers my goal was not to cover the entire surface. I wanted to see a bit of the brass. I also used gesso in spots for a shabby look. 
Then I took my sand paper to spots to expose more brass bits. 
Next I took some patterned paper and wrapped it around the tube/cylinders that house the electrical for the light bulbs. 

I love the result!
This project was a little tricky to photograph but in real life this little chandelier is so cute!
Thank you to our sponsor this month Dixie Bell Paints for providing us with some fabulous paint check them out!
As well you can find our eBrush by Craftwell USA Here..
I hope you have enjoyed my tutorial and to everyone I wish a Merry Christmas!

Warmly

Peggy Oliver
Blog: http://mystampingobsession.blogspot.com

December 20, 2016

Pretty Painted Animal Eyes by Heather Wilson

In this project, I'll teach you how to paint clear cabochons or resin to make eyes with Dixie Belle chalk paints. Also, I'll show you a neat way to use the Ebrush without loading it with markers or paint!

Materials:


Dixie Belle Chalk Paints
Ebrush
Fine tipped paintbrush
Clear cabochons or eye molds made from resin
Clear acrylic sealer

Start by dipping your brush in black paint and getting a big clump on the tip. Dab it into the center of the back of the cabochon to make the iris.


 I decided to make one of my eyes look reptilian by dragging a toothpick from the black dab of paint into a thin line. Reptiles have very interesting eyes, I recommend you look some up.
 After the iris has dried, choose the colors of Dixie Belle chalk paint you want for your eyes. Start with the lightest color and when adding each color, lightly dab your brush in water. You want just enough water to thin it enough to where the colors will run into each other. If you get it too wet, wipe off gently with a paper towel and start over.

Tip: Outlining the edge with the darkest color will make the eyes really pop!
 Now comes the most fun part! While the paint is still wet, take your Ebrush and put it on the highest setting. Then, with the air from your Ebrush, your colors will mix and swirl together into a more natural looking pattern.
 Let the paint sit for 5-10 minutes to dry on it's own a little, then finish with a hairdryer. Make sure it's completely dry before painting an acrylic sealant over the painted part.
The finished eye!
For the blue and purple eyes, I speckled some white around the iris with a toothpick and let dry before using the same painting technique with the reptile's eye.

Now you can use your one-of-a-kind eyes for dolls, sculptures, and jewelry!


December 19, 2016

Quick Christmas Card

I know that many of you remember our eBosser. The first electronic - crankless die cutter..I loved and still love mine. Did you know that there some that are available. They are refurbished but still a great deal! You can find them here!

Now for a quick project I used a Darice embossing folder and some wonderful pearl paper. I quickly set up my  plates and fed my eBosser.


Dixie Belle Chalk Paint can also be applied by hand and used as a wash. I used it to add homemade flavor to my card.


Dixie Belle Chalk Paints are super creaming and I love using them. I also love my eBosser. I have my plates ready!


What a beautiful emboss!


Ready for the paint and then off to send my greetings to my friends!

By the way Happy Holidays to all!!!!


December 14, 2016

Christmas Snow Globe Card


Hello and Good Day! Today I am showing my siphoned eBrush Snow globe Card using Dixie Belle Mineral Chalk Paint.  

I used my eBrush with siphon today by mixing Dixie Belle Paint (Sea Glass) with water. More paint than water ratio. I pinned my  globe onto a board standing up against the wall. Then I sprayed in layers allowing not only my paper to recover but prevent streaks from dripping down the paper. I am using 120 lb white cardstock.
I used some gesso to create white snow by dotting my globe with the tip of my metal pokey thing (shown in picture above).. lol  Then it was  time for a little reflection mark on the top I used a PITT white pen to make two little marks to imply a reflection or highlight.  I assembled my card using double sided tape and here are my results. 

Thank you to our sponsor today Dixie Belle you can find their fine paints here: http://dixiebellepaint.com/

Get your eBrush by Craftwell USA and accessories here: Craftwell USA

Happy Holidays and thank you for joining us!

Warmly
Peggy Oliver
My Blog: http://www.mystampingobsession.blogspot.com

December 13, 2016

Frosting Glass by Heather Wilson

Beautiful Frosting Technique using Dixie Belle Chalk Paints


This is a glass painting technique you can use for things like candle holders, glass ornaments, picture frames, and more!
Materials:
Ebrush and siphon adapter kit
Dixie Belle Chalk paints
Silver Acrylic Paint
Fine tipped paintbrush
Clear acrylic sealer

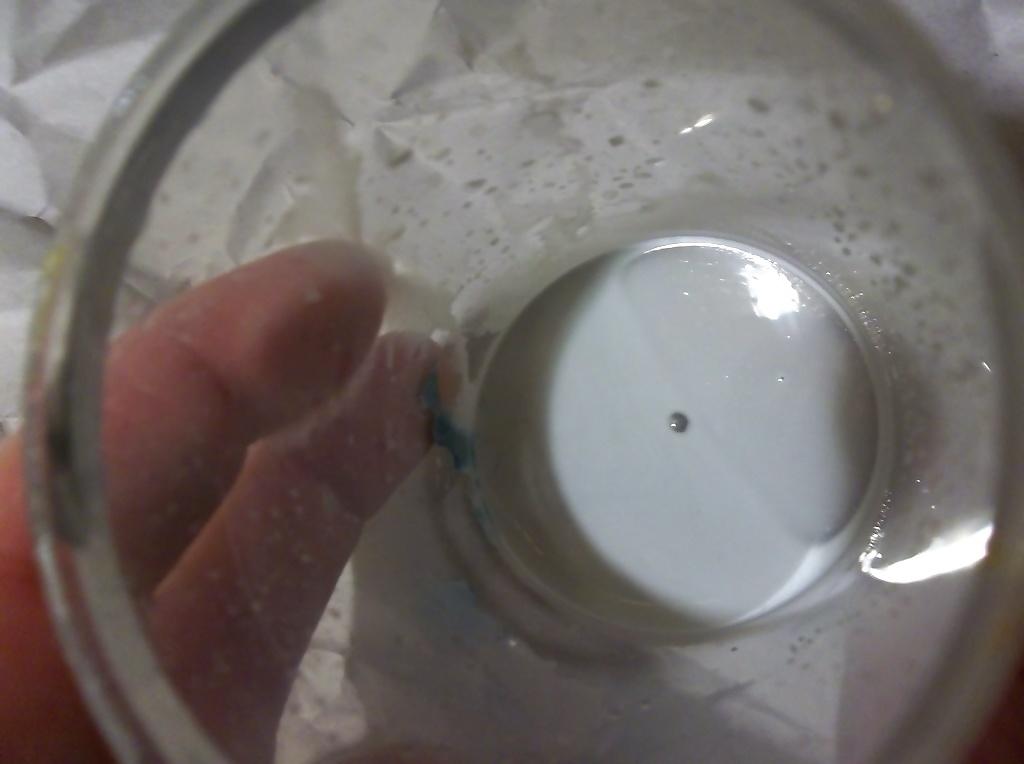
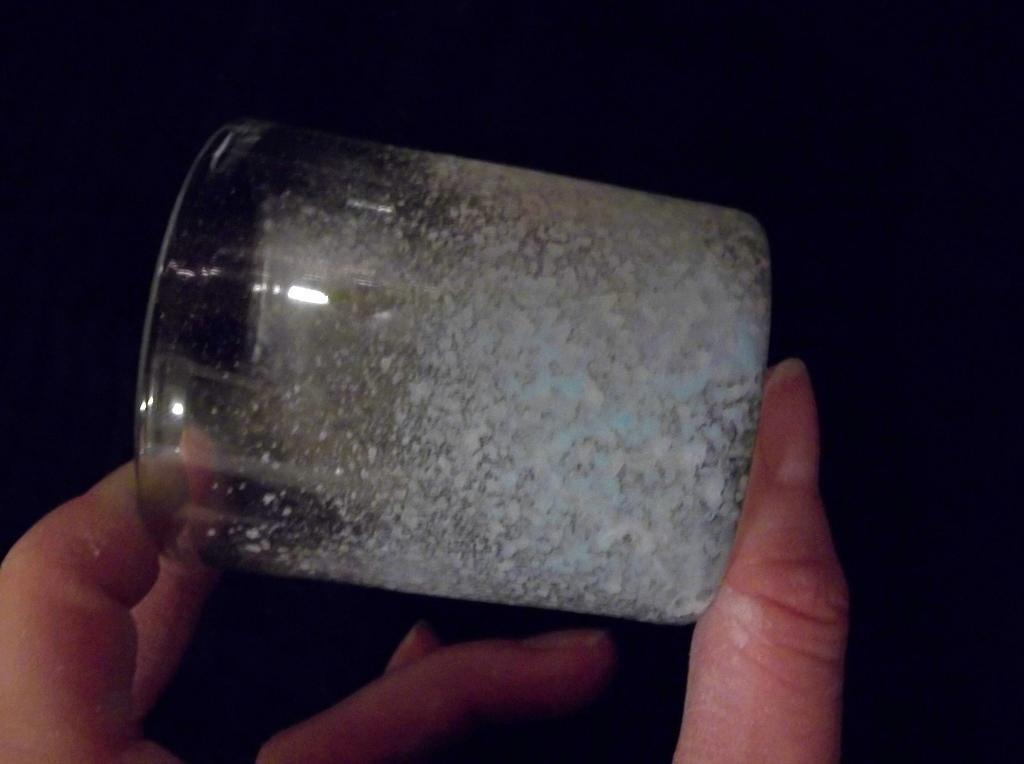
First, you will mix your colors. Start by mixing your Fluff Dixie Belle Chalk Paint with a dab of silver paint, then add a little water and mix. Pour this in one of the glass bottles in your siphon adapter kit.


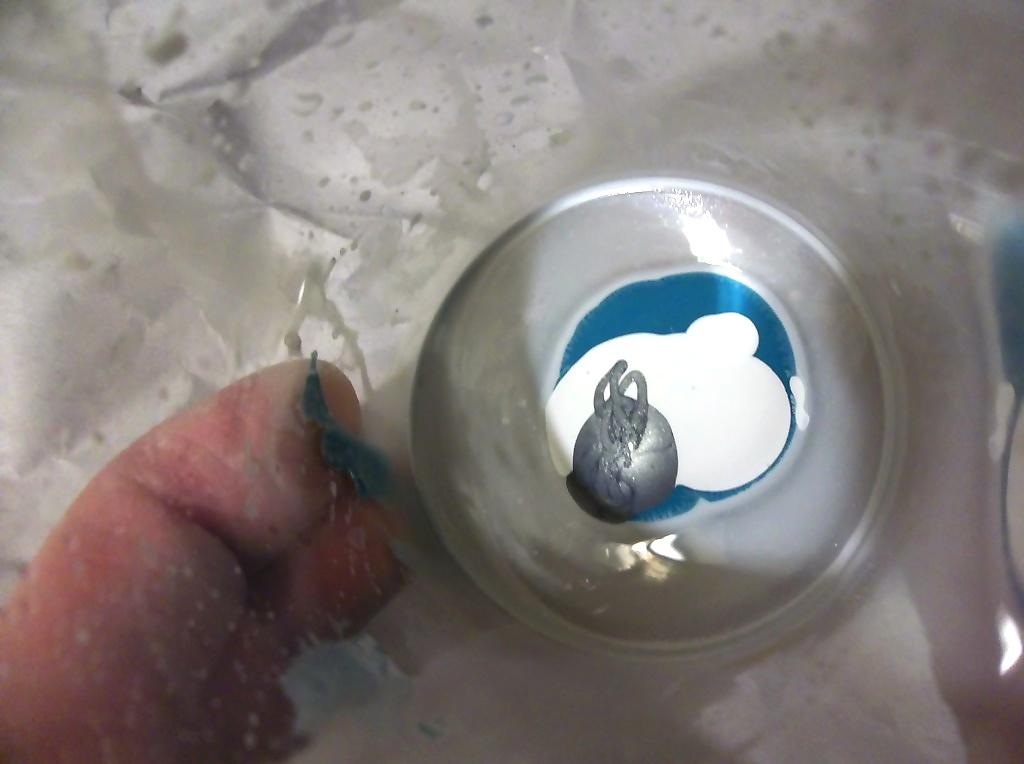
Next, pour in an equal amount of Dixie Belle Ocean and Fluff with a dab of silver acrylic paint. Thin with water and put in another bottle.


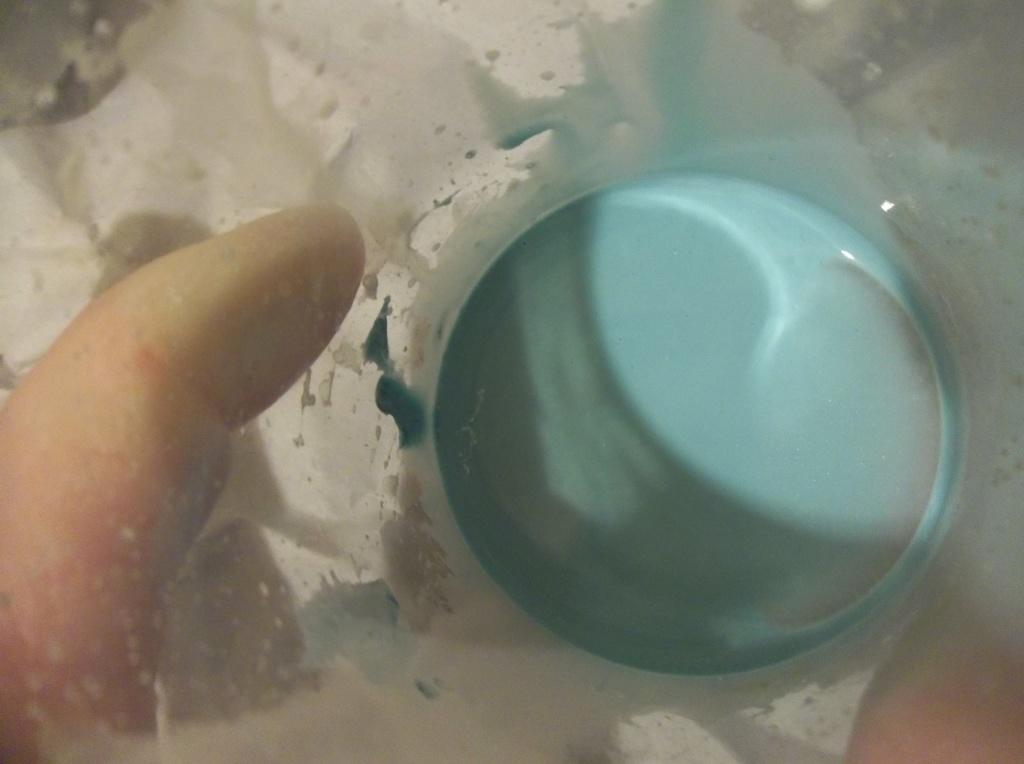
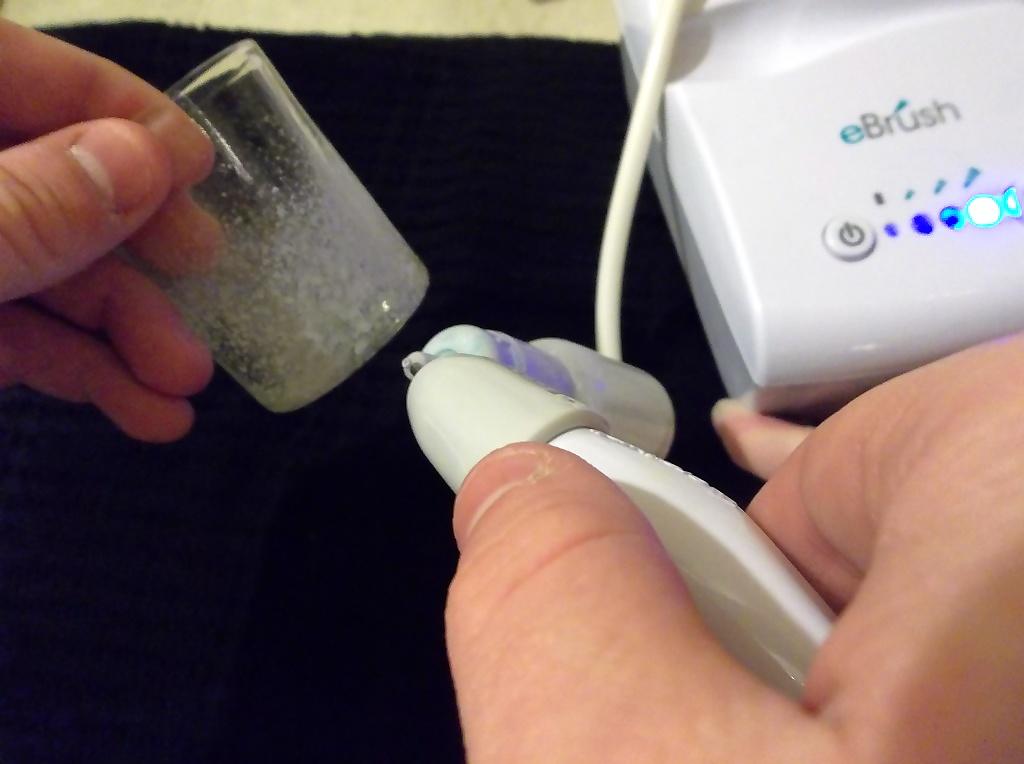
Now set up your eBrush and siphon parts as instructed in your kit. Start by lightly eBrushing the white paint onto the glass. Leave some parts of the glass unpainted.


Now attach your bottle of blue paint to the eBrush, and spray some blue in the middle of the whitest parts on the bottle. Make sure to leave the edges white.


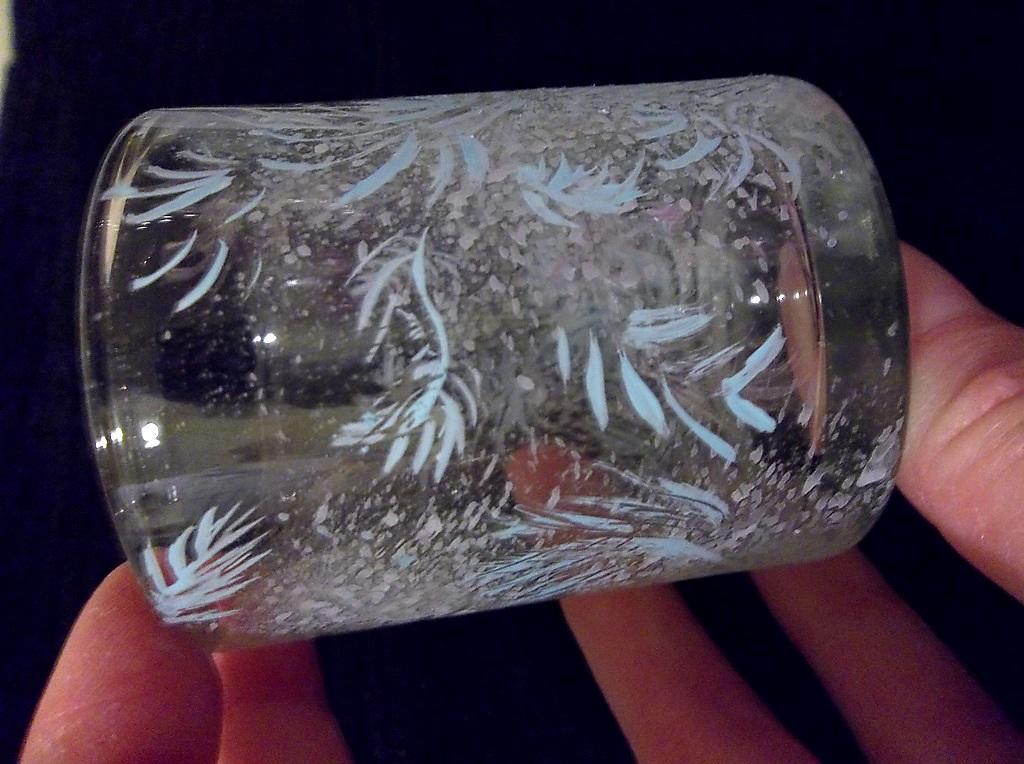
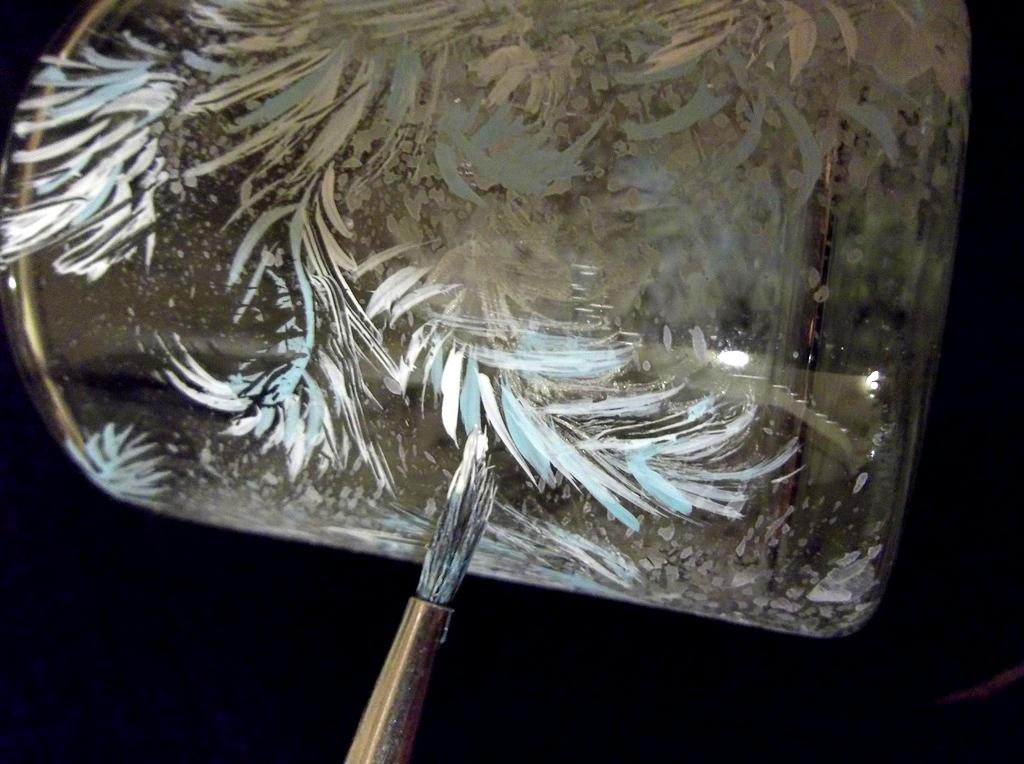
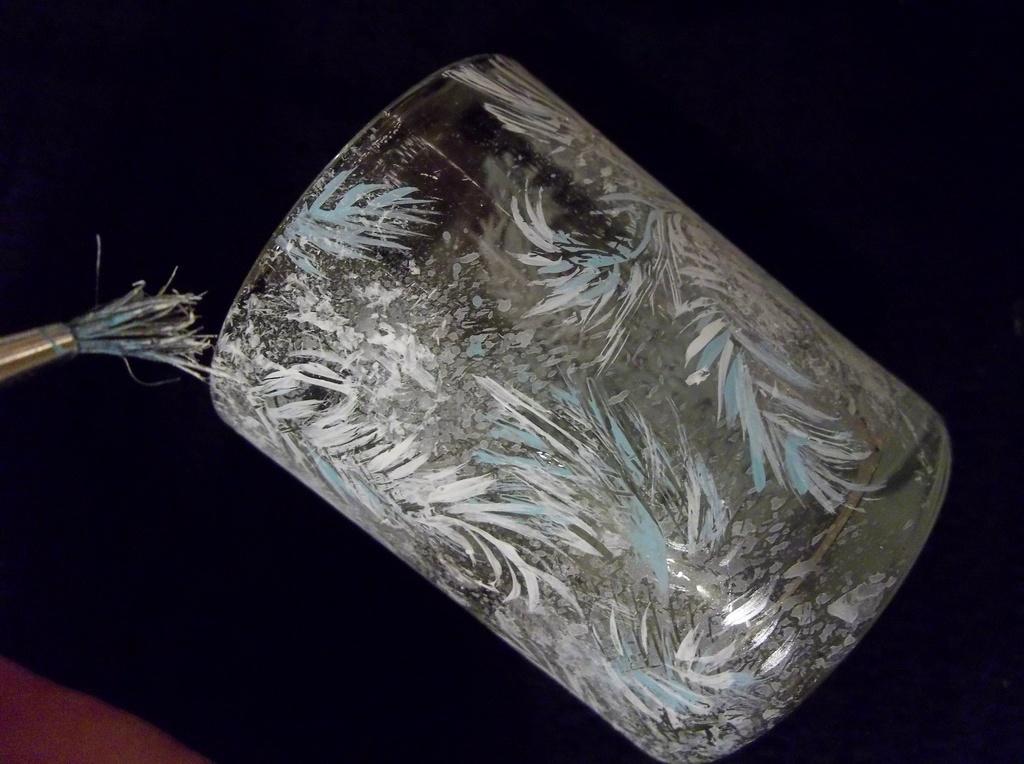
While the paint is still damp, take a fine tooth comb and scratch feathery patterns on the paint. You will need some pictures of frost patterns to use as a reference.


After the background paint has dried, take a fine tipped brush and stroke icy patterns onto the glass with light blue paint, but use the blue sparingly! Put most of these patterns where it has been painted with the eBrush, but let just a few extend over the unpainted parts.


Now paint white strokes next to the blue strokes. Like with the blue, make these patterns where it has been painted with the eBrush, but let some extend over the unpainted parts. Be more generous with the white. If some of your brushstrokes are too wide, take the comb and brush over them to break them up.

Some of the background paint will need highlighting in places where you began your feathery brushstrokes. Lightly dip your brush in white paint and stipple it onto the glass.


After the paint has dried for several hours, follow the instructions on your can of clear sealant and spray over the glass. Once that dries, you can put a candle or light inside it and display your work on a table or shelf!
'
 
Copyright © 2014 Craftwell Blog. Designed by OddThemes - Published By Gooyaabi Templates