DO NOT MISS
>>Follow our Facebook page for updates! >>Join our Craftwell Design Team: Apply Now!
Showing posts with label die cutting. Show all posts

March 24, 2021

Lace & Daffodils

 Hello everyone!! This is Berina here today, with a beautiful Spring card with daffodils and lace. 


I stamped the image from the Heartfelt Creations stamp set called Daffy Daffodils, colored it with copics and cut it out. I die cut the lace die from Altenew on the front panel of an A2 card base. I used the same die to cut a lace out of yellow card stock. I used it to mat the image panel. I also die cut the "Hello" using the Altenew Fancy Hello die on a black shimmer card stock and added it on to the card. I stamped the sentiment from Altenew Statement Flowers stamp set, cut it out and added it to the card. I added a few Nuvo drops in black color to accent it.


For the inside, I decided to add a piece of lace as well, to complement the card front. I die cut the same lace die in yellow card stock and added it on the inside.


I used the SNAP machine to die cut all the dies and I must tell you - I was able to die cut the intricate lace die in 1 pass. How amazing is that!! What do you think of this card? Please do let me know in the comments. Thank you for stopping by. Have a great day.

- Berina
December 22, 2020

DIY Holiday Tags

Hi everyone! Been while and I wanted to share my project.

Katie here with a fun and simple DIY Holiday Tags that anyone can do.

Who needs to buy tags when you can just make your own, right?


Here's what I used to make my tags:

- Craftwell's eBosser

- Recollections Christmas Tags stamp & die set from Michaels

- Hampton Art Mama Elephant Reindeer stamp & die set from Michaels

- ColorBox black stamp dye

- Color pencils

- Recollections Traditional Foil cardstock from Michaels

- Glitter cardstock

- Plain white cardstock

- Kraft paper

- Twine

- Foam adhesive squares


Reindeer Tags:

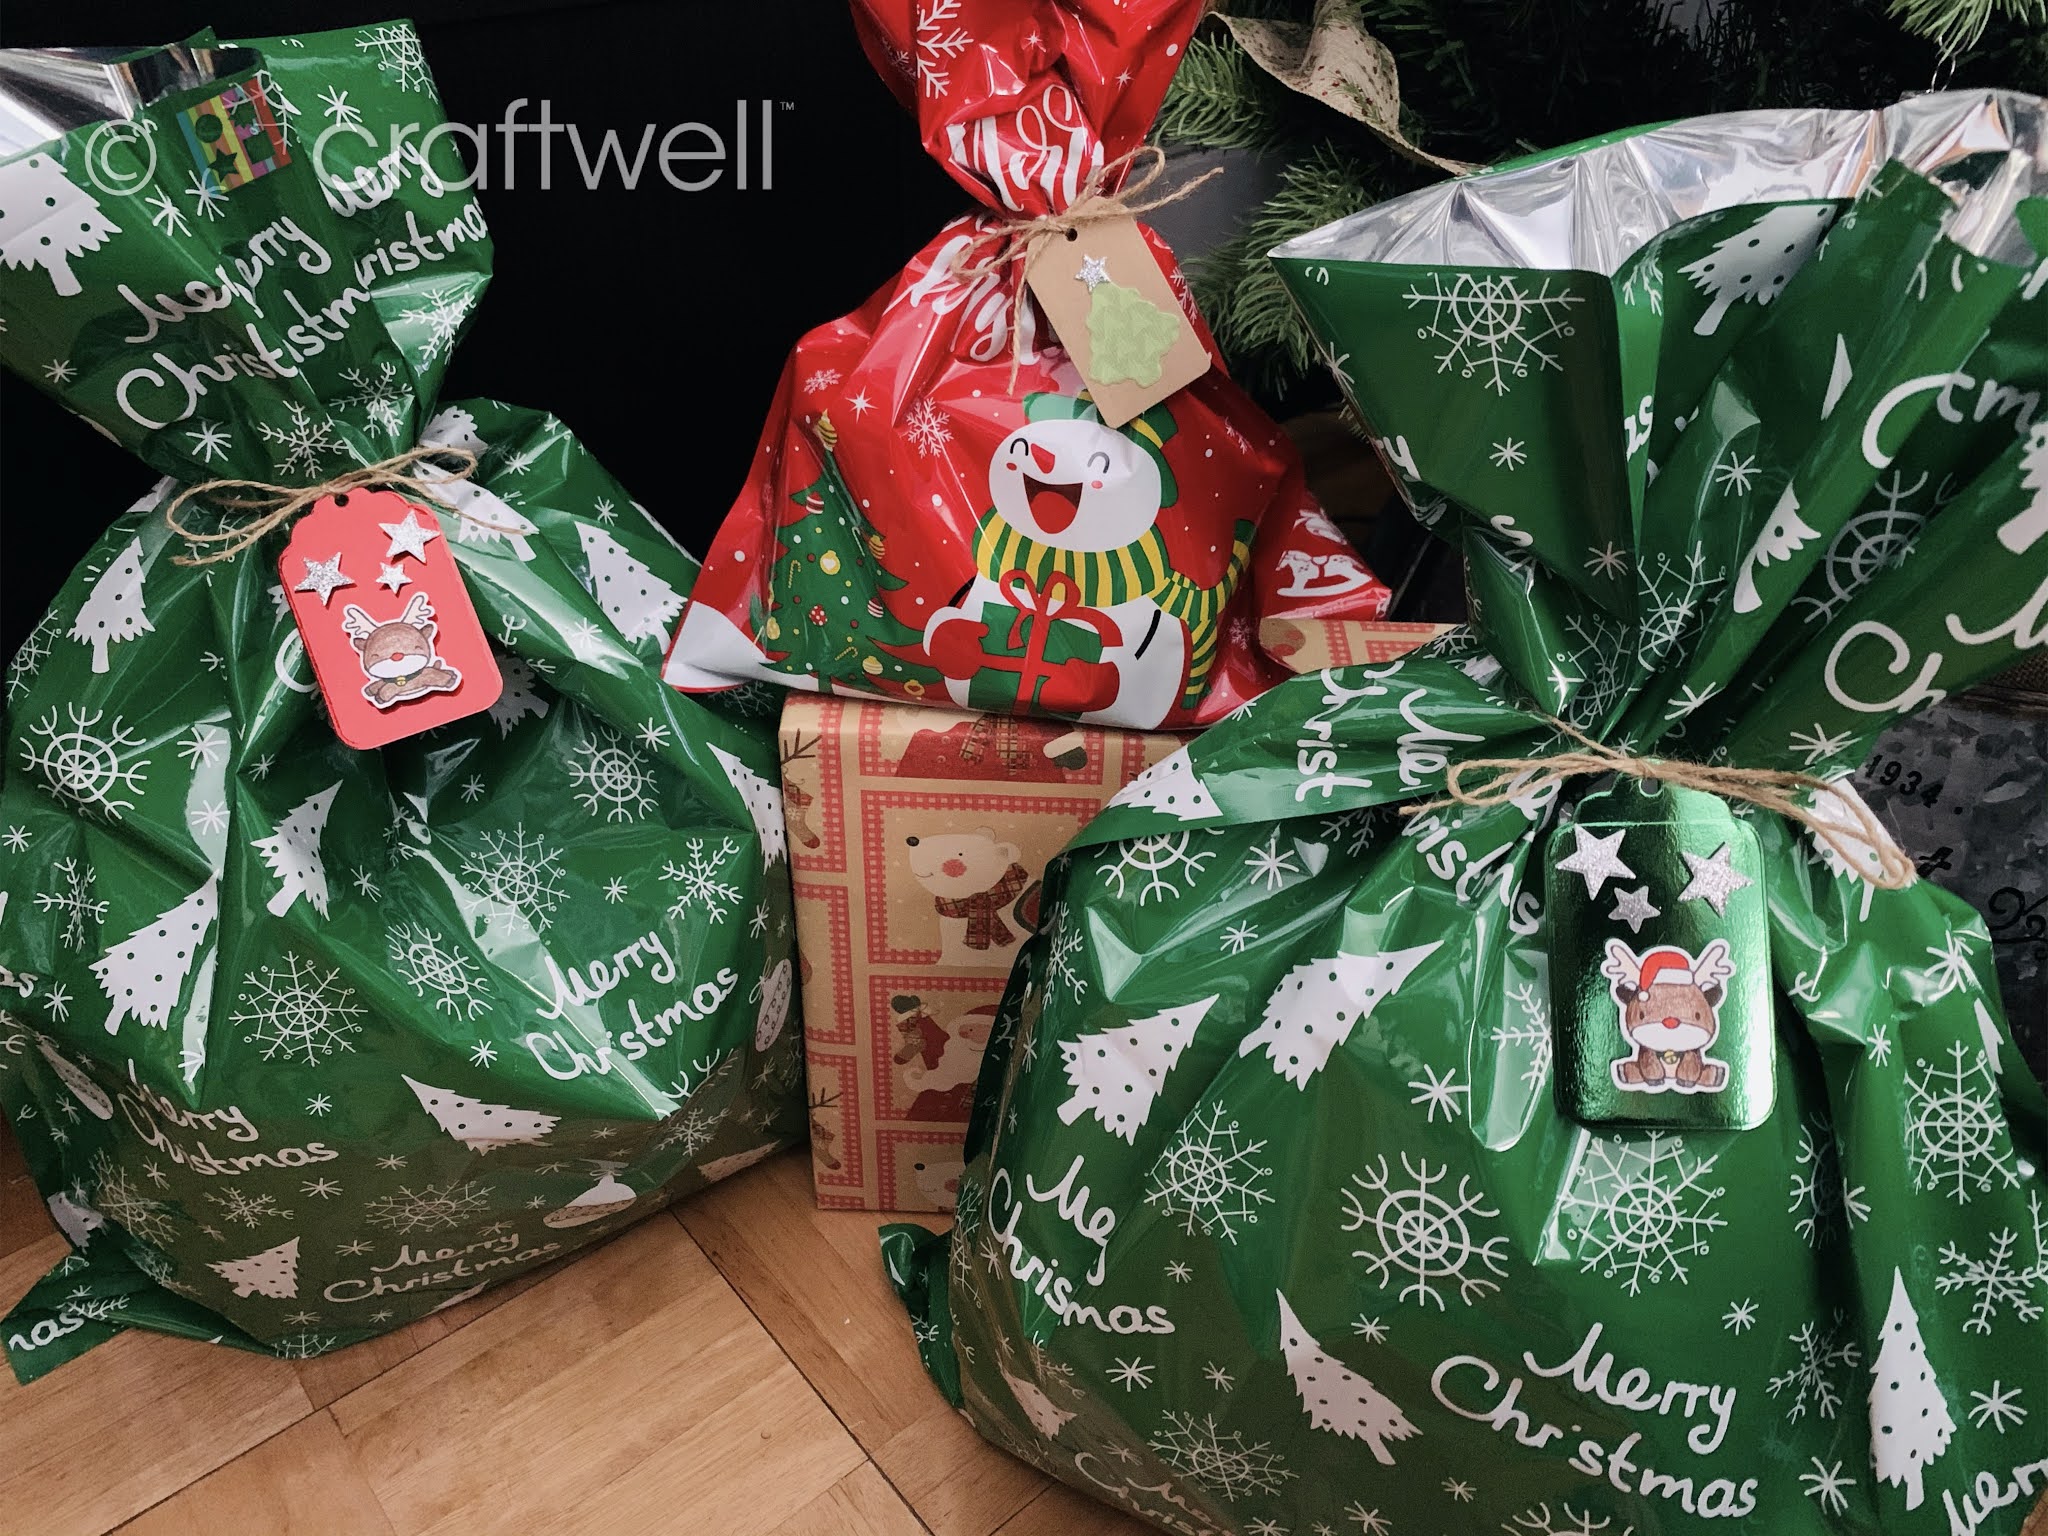
I started off by stamping the reindeers in black dye onto the plain cardstock then cutting them out from the stamp & die set from Recollections and colored them. Taking the tag die, I cut into one of each of the red & green foil cardstock. I also die cut some stars with the glitter paper. With all the pieces all cut-out and colored in, I used the foam adhesive squares behind each and placed them however I wanted on the tags. Attach each tag onto the gifts with twine and your gifts are ready! Don't worry, on the back there's space for messages.


Finished tag with the red foil cardstock


I also made the Christmas tree tag and it was about the same process, but used some leftover pattern paper for the tree and kraft paper for the tag itself.

I hope you all liked my project and it might not be that fancy, but could be great for those who are beginners. Feel free to left comments and feedback.

Until next time! Happy Holidays! Stay safe and warm.

- Katie


July 7, 2020

DT: Wonderful Card by a Junior Crafter


Dear Scrappers,

This is Veronica, from Vicky's Scrapping Passion sharing my post for Craftwell:
For this post, my daughter helped me make a card for a friend's birthday. My daughter just became 11yo and is a great crafter. She likes to craft with me, but as much on her own ;-(

She used some DCWV Unicorns and Rainbows paper, the "wonderful" tag die from Craftwell, some tape runner, some ribbon, and some Recollection stamps using her PowderPuff chalk inks:


The back of her card:


 The inside of the card:


 Here, I will let her pictures tell the story:


She came up with her card design and decided that it needed something else inside, so she stamped a peacock image using two PowderPuff inks at the same time:


She then wrote her sentiment and signed her card.

She was super quick and efficient using the SNAP diecutting machine. I will be introducing more paper crafting during the summer and will share with you her progress.

I will post in the following weeks the card I made.


I hope you enjoyed my daughter's creation and please make sure to visit my blog for more inspiration and to follow me.

Happy July and stay safe from this pandemic.

June 3, 2020

DT: All You Need is Love and a Family Dog Minialbum


Dear Scrappers,

This is Veronica, from Vicky's Scrapping Passion sharing my post for Craftwell:
For this post I wanted to make a mini-album featuring some of the dogs from my parents. I thought this might be a great Father's Day gift for my father:

Here a closer look to the cover:
I described the products used and steps here:


Here are the inside pages:

1-4:

5-8:

and here is the back cover:

I hope you enjoyed my mini-album and please make sure to visit my blog for more inspiration and to follow me.

Happy June and stay safe from this pandemic.


May 18, 2020

Coral Flowers

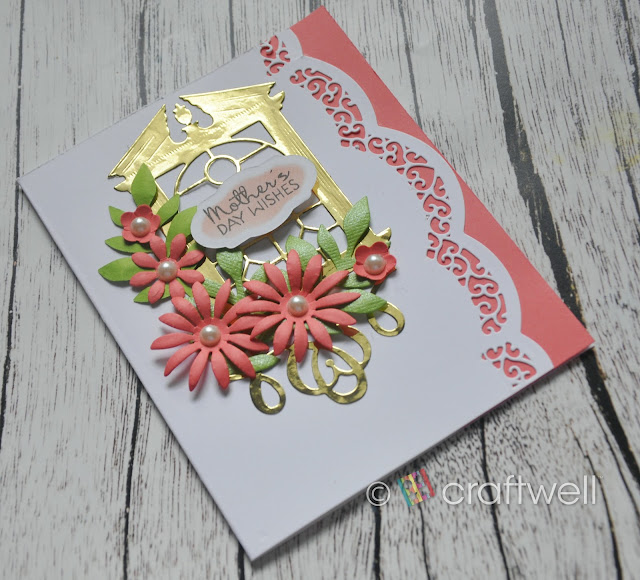
Hello everyone!! This is Berina here on the blog today, sharing this Mother's Day card with flowers that I made for my Mom. I got to spend Mother's Day with my Mom after a few years :)


I took an A2 card base and die cut the edge with 2 dies from Spellbinders Scalloped Borders 3 die set. I used the same dies to die cut the edge on a panel of Coral cardstock and adhered it on the inside of the card. I used the Spellbinders Stained Glass die on gold mirror cardstock to cut out the center piece and adhered it on to the card base. Then I die cut some flowers and leaves using the Karen Burniston Flower Pot pop-up dies. I shaped the flowers with the tools and added a half pearl in the center. I arranged the flowers and leaves and adhered them on to the card. I die cut the swirl from the Graceful Corners die set from Amazing Paper Grace & Spellbinders on the same gold card stock, cut a tiny bit on both ends and adhered it below the flowers. For the sentiment panel, I die cut the label die from Inspired by Stamping on white card stock and while the die cut was still in the die, I inked it lightly with Brutus Monroe Stargazer ink. I stamped the sentiment from one of the Verve Stamps stamp set and added it on to the card. Here's a look at the inside of the card:


How do you like this card today? Please do let me know. Thank you for stopping by. Have a great day!!

-Berina

May 4, 2020

DT: Fiesta Tissue Flowers


Dear Scrappers,

This is Veronica, from Vicky's Scrapping Passion sharing my post for Craftwell:
For this post it might be late, but I wanted to make a wreath for Fiesta (April is Fiesta month in San Antonio, TX), but I ended up spicing up my door previous Easter decor with tissue paper flowers:


These flowers were super easy to make and are a kids friendly craft:


I used these nesting dies and my SNAP:


I might add some colorful paper rosettes to the corners of the doors, but I'm pretty happy with the result so far. Next year, I might do the wreath though.

Please make sure to visit my blog for more inspiration and to follow me.

Happy April & May and stay safe from this pandemic.


January 14, 2020

Wedding Congratulations

Hello everyone!! This is Berina here today, with a Congratulations card I made for a friend's wedding this weekend.


I started with a 5" x 7" ivory card base. I die cut the Double Heart Gatefold die on brown card stock twice. I then die cut a heart out of the same brown card stock and used it as a base for the wreath. I die cut the leaves using the dies from the Karen Burniston - Pop-up Flower pot die and the flowers from the Sizzix Small Tattered Florals die. I adhered the leaves and flowers and a few pearls along the edge of the heart die cut. I arranged everything on the ivory card base and adhered them. For the sentiment, I heat embossed the sentiment from the Brutus Monroe - Sharon's Script stamp set with Gilded Embossing powder on ivory card stock and adhered it down after curving it a little.

How do you like my card today? Please do let me know in the comments below. 
If you need any other wedding ideas, check out www.daslia.com/wedding-favour-ideas and get inspired.
Thank you for stopping by. Have a great day!!

-Berina

December 17, 2019

Christmas Window

Hello everyone! This is Berina here today, with a Christmas card.


I started by cutting the window using the Spelbinders die from an A2 card base and a piece of Brown Butter card stock. I stamped the brown butter card stock with the Barn Wall stamp with Brutus Monroe Macchiato ink. I inked the die cut piece of window with the same ink too. I adhered acetate on the window and using a knife, cut out the panels on the acetate so that the window can still open and close. I sandwiched this acetate piece with the window, between the A2 card base and the brown butter panel. I die cut the candles on the window using the die from Divinity Designs. I heat embossed the sentiment from the Divinity Designs - stamp set with Gilded Embossing powder. I die cut the Christmas Tree (which is on the inside of the card) using the Spellbinders die on Brutus Monroe Glitterstock.


I'm loving using these dies on my Cut N Boss - it's really quick and easy. How do you like this card today? Please do let me know in the comments. Thank you for stopping by. Have a great day!!

-Berina

'
 
Copyright © 2014 Craftwell Blog. Designed by OddThemes - Published By Gooyaabi Templates