DO NOT MISS
>>Follow our Facebook page for updates! >>Join our Craftwell Design Team: Apply Now!
Showing posts with label cupcake. Show all posts

October 20, 2021

Birthday Shaker Card

 Hi everyone! πŸ‘‹

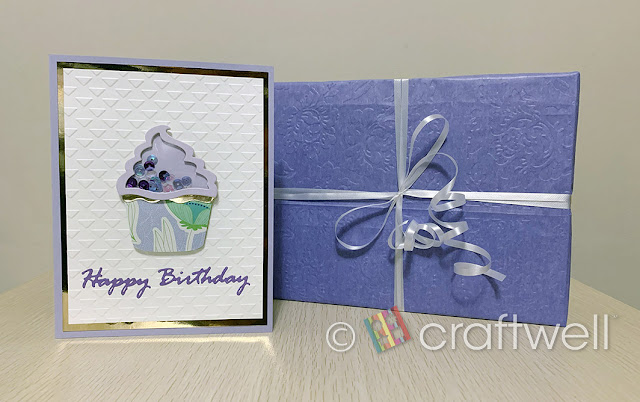
Katie here! It's been a while since my last post so I bring you my first try at making a shaker card and it was for my goddaughter's 1st birthday.
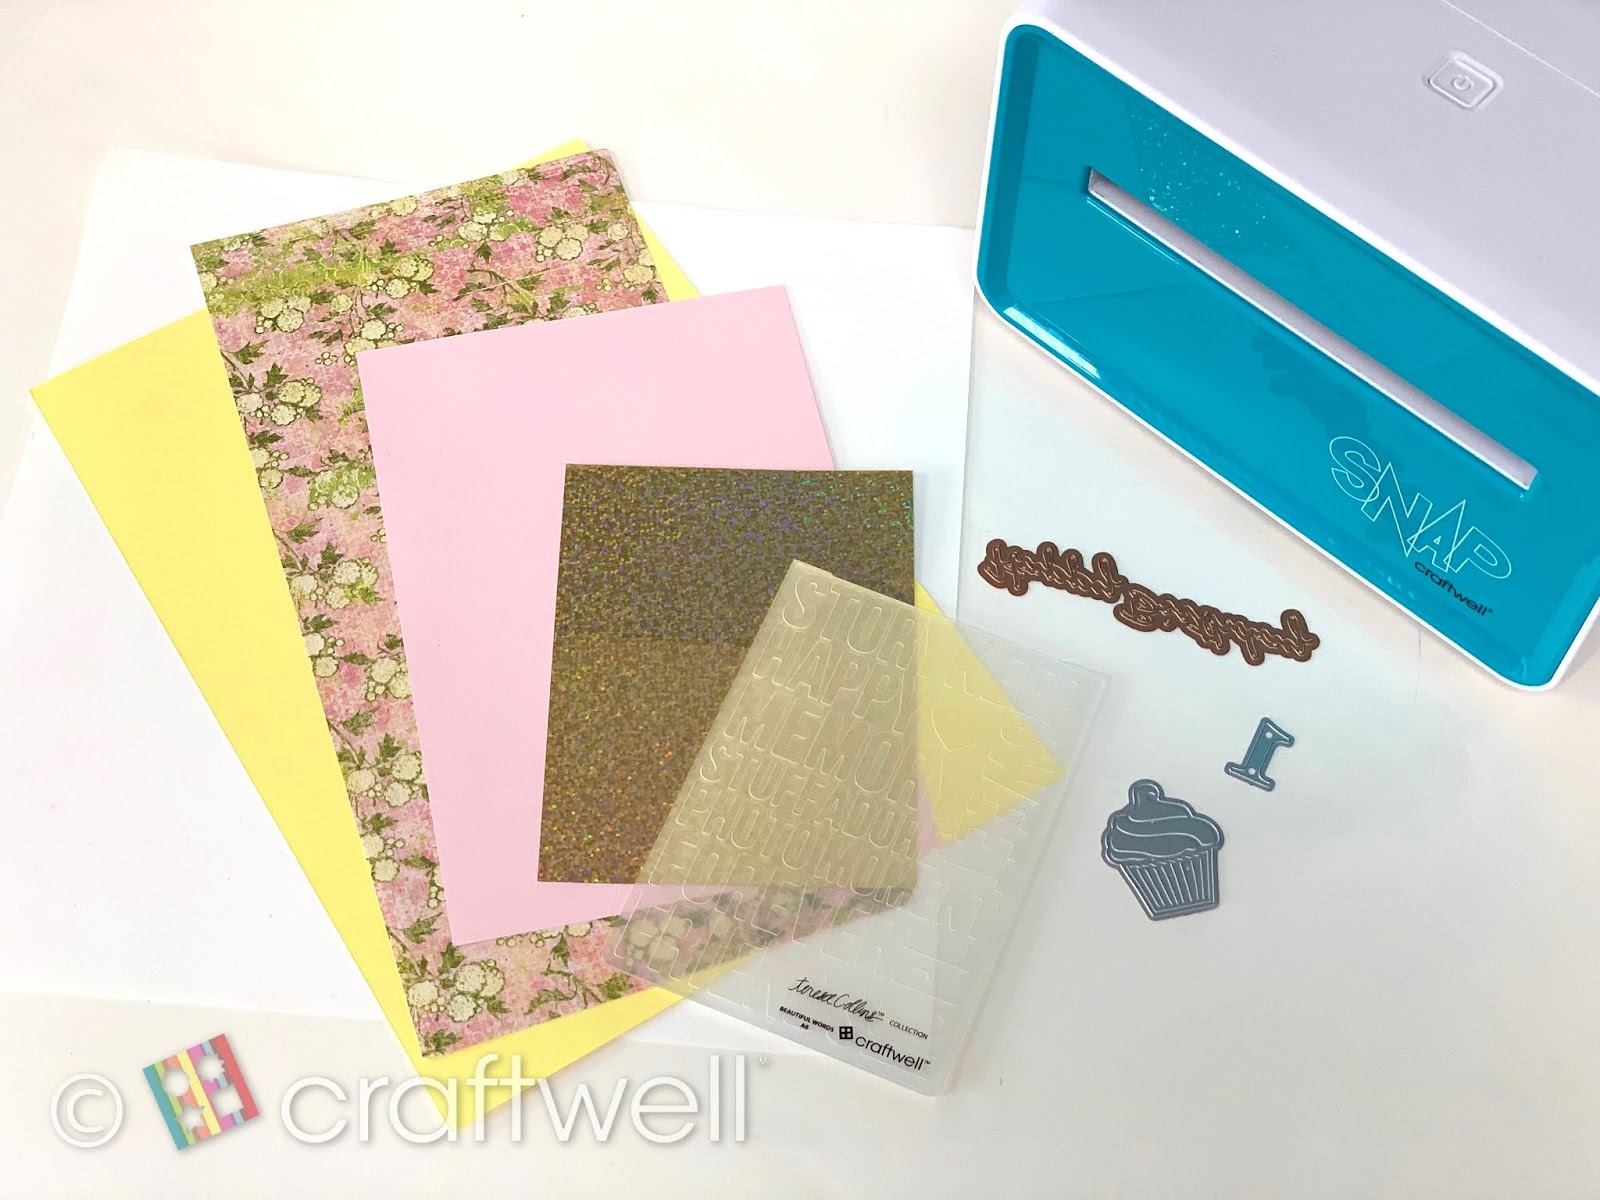


Materials

Craftwell eBosser

Craftwell Embossing Folders: Love Triangles and Cabbage Rose

Cupcake Shaker Kit from Amazon

Hygloss' Acetate Sheets from Amazon

Spellbinders Shapeabilities Words Cutting Dies: Happy Birthday Die

Assorted Colors of Sequins from Amazon

Variety of cardstock

Recollections Foam Adhesive Squares from Michaels


I honestly had no idea how to make one so I went on YouTube for guidance. 

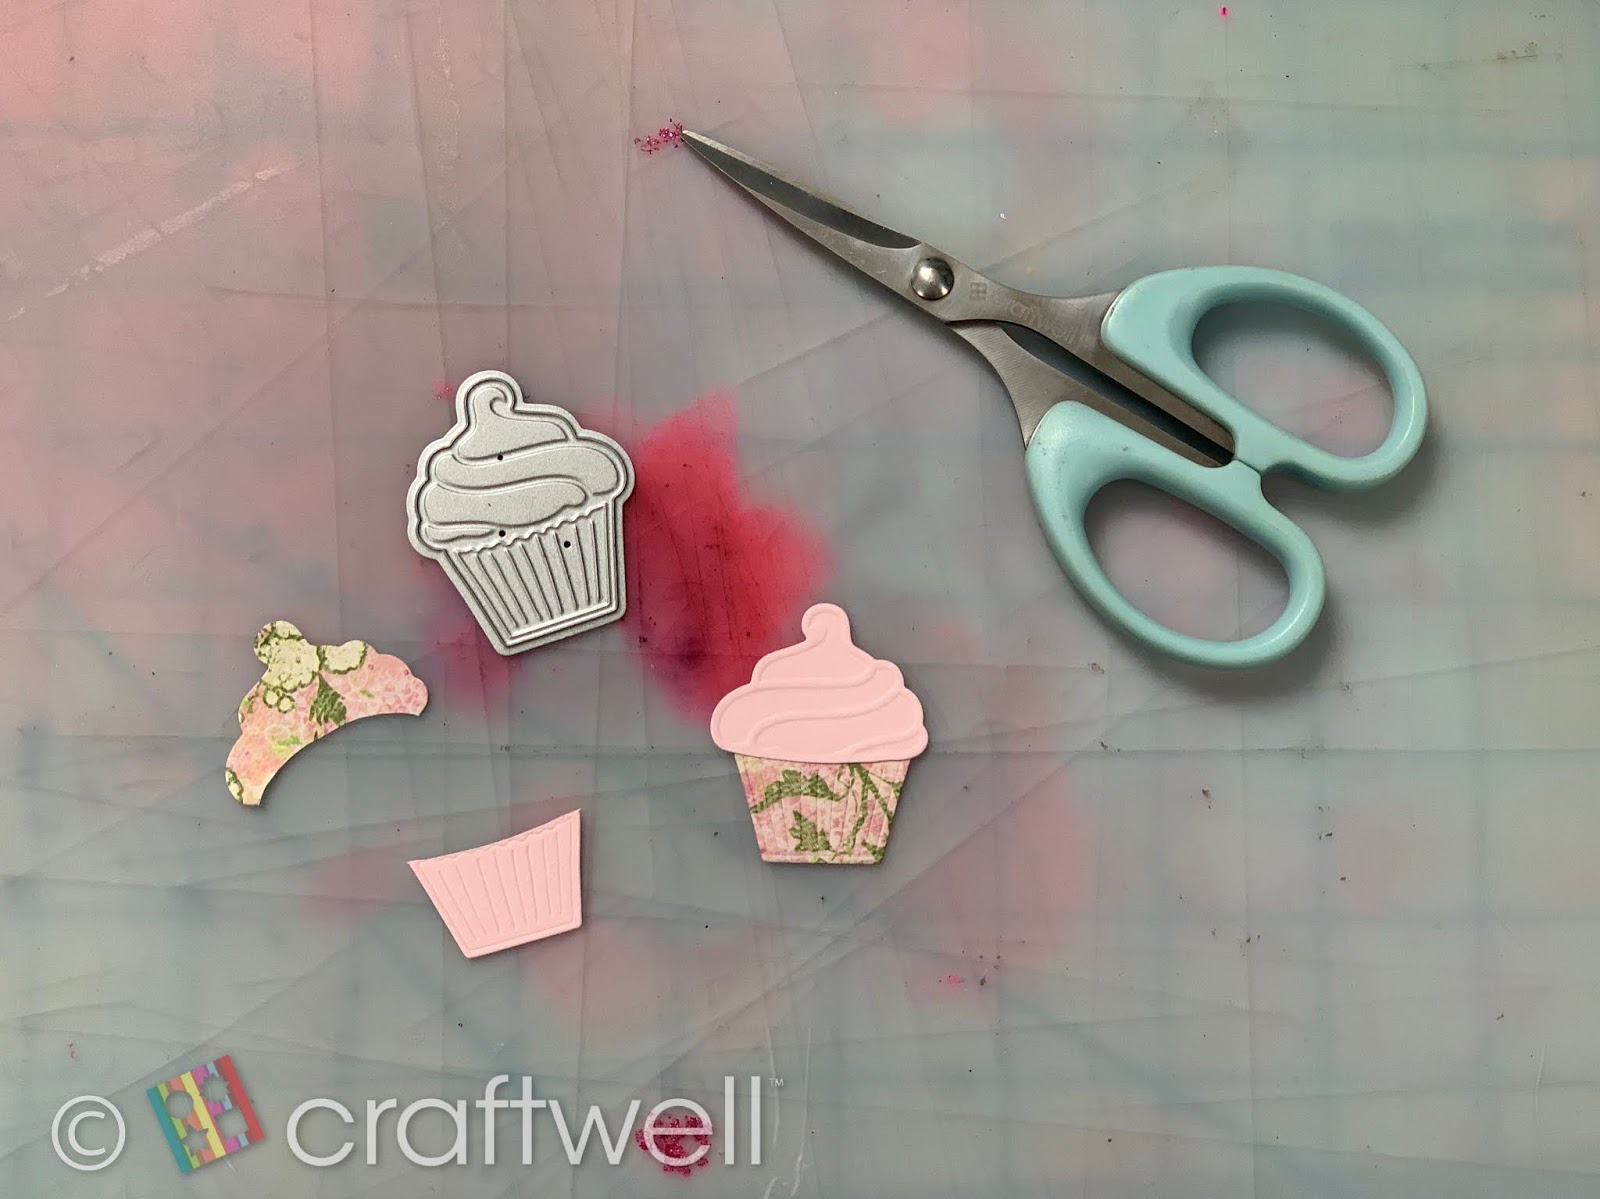
For the cupcake shaker, there's different ways you can achieve this part and I chose to make multiple layers from cardstock for the top of the cupcake. I think it took about 6 or 7 layers. Glued all the layers together except for one, poured in 3 different colors of the sequin then glued a cut piece of the acetate sheet and the last layer. Once the top was assembled and dried, I glued the rest of the pieces for the cupcake. 

The card, I kept it simple with 3 different colors and embossed one with Craftwell's Love Triangles folder. Die cut the word Happy Birthday from Spellbinders die set. 

There you have it! The end result shown in the photo above. 

I added another surprise by embossing tissue paper with Craftwell's Cabbage Rose folder and wrapped the gift in it.


I hope everyone enjoyed my post and will give it a try if you've never made one!

Until next time! From Katie πŸ˜‰πŸ˜„


December 9, 2019

Cupcake Bouquet - Celebration time

Hello everyone! This is Lavanya with a trending edible bouquet πŸ’for the holiday celebration season.πŸŽ„⛄πŸŽ…πŸ¦Œ

I started with baking cupcakes of vanilla flavor with spongy texture and topped those little cupcakes with tulips flowers of buttercream frosting.

Then airbrushed those beautiful tulips with Craftwell eBrush using siphon kit. Each bouquet are transformed into colorful flowers with the magic of the eBrush. It's completely a mess free task and grease free hands when the eBrush is on hand.

Airbrushed Bouquet cake
Flowers fragrance are always special but these special flowers smells vanilla..

Merry Christmas


"Where flowers πŸ’ bloom so does the hope"
Wish you everyone Merry Christmas and Happy New year.πŸŽ„⛄πŸŽ…

With love,
Lavanya
La Cakes

May 31, 2019

Happy 1st Birthday Card

Hi everyone!
My name is Katie and I'm new to Craftwell's Design Team.
For my first post, I made a 1st birthday card using the SNAP machine and here's how it came to be.

Materials: 

SNAP machine
Leftover paper from white, yellow, flower pattern, light pink and glossy glitter. 
A6 Beautiful Words embossing folder by Craftwell
Cupcake and number by Recollections
Happy Birthday Die by Spellbinder
Clear Glue by Aleene's
3D Foam Squares
Tweezers
Scissors from Craftwell's tool kit

First, we want to start by making the background to the card and cutting it close to the A6 dimensions. I ran the embossing folder through the SNAP and you have your embossed paper.

Next, we cut into the flower pattern and light pink paper with the cupcake die.
And do the same with the glossy glittery paper use the number 1 die.

Here comes the fun part! Time to assemble the cupcake, which is really easy and quick. 
So I wanted the frosting to be pink and cut above where the cupcake wrapping would be. I did the same with the other cut out, but did the opposite and cut top where the frosting would be. Make sure you leave a little room so you have space to glue the frosting to it.

I took the embossed yellow paper and glued it to a white folded paper. You can cut it to whatever size you desire, but I just cut it about half a quarter inch more and glue them together. 
Next, I stuck a 3D foam square behind the cupcake and centered it in the middle. You will notice I place the number 1 last because I couldn't decide if I wanted it floating above or place it into the cupcake. In the end, I just glued at the top of the cupcake and I think it looks pretty good there :)

So... I went a little extra and designed the inside. 
Added another layer of yellow paper and a message inside of the card. I used whatever leftover paper I still had and cut out the words "Happy Birthday". And again, you all can design the inside however you want and have fun with it!

The end result of the front and the inside.

I hope everyone enjoyed this tutorial and got inspired for your next card! :)

'
 
Copyright © 2014 Craftwell Blog. Designed by OddThemes - Published By Gooyaabi Templates