DO NOT MISS
>>Follow our Facebook page for updates! >>Join our Craftwell Design Team: Apply Now!
Showing posts with label bookmark. Show all posts

October 26, 2021

Bookmarks For Kids

 Hello everyone!! This is Berina here today, with a beautiful bookmark for kids.
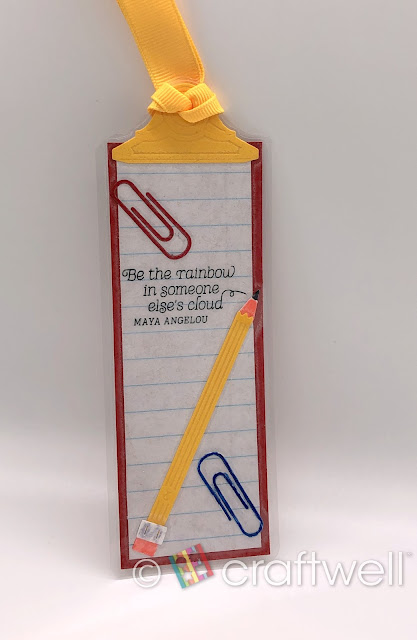
I wanted to make something special for my daughter's class when they were doing virtual classes last year. We decided to make bookmarks for each one of them. I used this die set from Spellbinders, which had the clipboard, paper clips and pencil dies. I made a slim clipboard with the die and added a ruled paper on top of it. I then die cut the paper clips in a few different colors and adhered them on top. The pencil had a few different parts, most of which I die cut in white card stock and my daughter colored them with markers. After adhering all the pieces and stamping some quotes, I put it in laminating sheets and passed it through my laminator. Then I cut out the laminated bookmark, punched out a hole on top and added a yellow ribbon. That's it. We made around 25 bookmarks. It was so easy to make once we got the process down.

What's your favorite thing to mass produce? Do let me know in the comments. Thanks for stopping by today. Hope you have a great day.

- Berina

January 22, 2021

DT: Medical Personal Appreciation Bookmarks


 Dear Scrappers,


This is Veronica, from Vicky's Scrapping Passion sharing my post for Craftwell:
For this post, I made a bunch of bookmarks to thank the nurses and medical personnel, who helped me with the health screenings at school.


Here are some closer pictures to show the different bookmarks I made:


Materials:


I used my SNAP to cut the cute little frontline heroes, I stamped before. I used leftover card stocks in white, black and blue to cutout the mats and the bookmarks bases. I stamped the sentiments on the mats, the heroes or cute designs I punched out colorful mats. Later, I added some colors with gel glitter pens. I assembled the bookmarks, fussy cutting the cute little patient bears, and added some twine at the end:


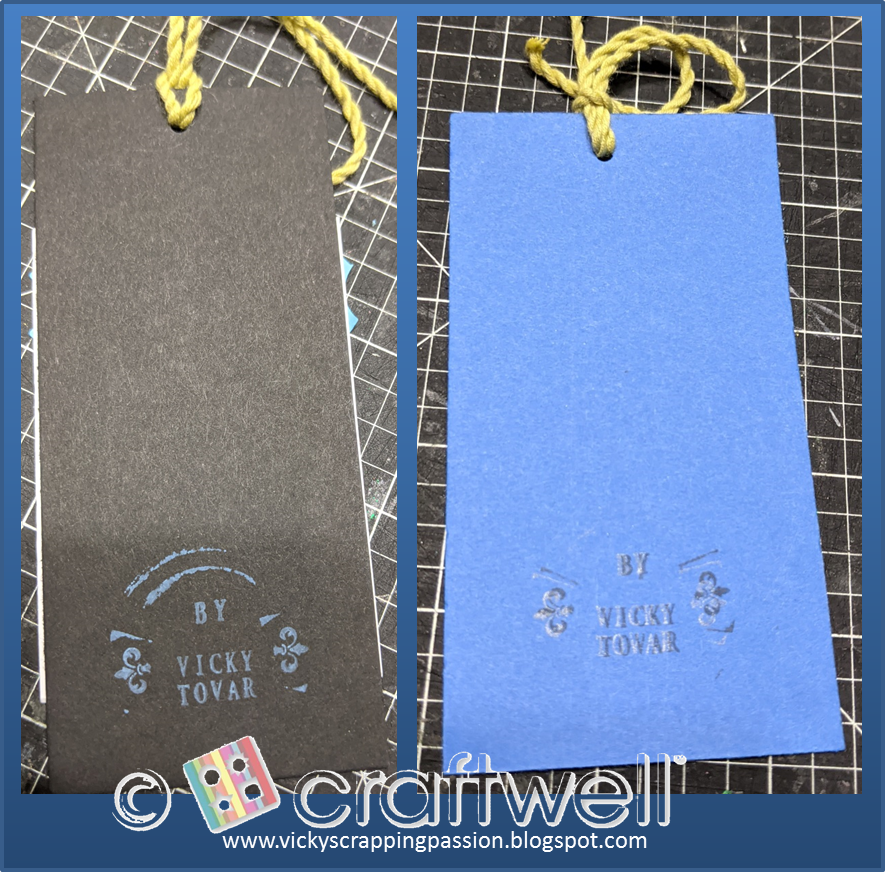
I stamped my name using Distress Oxides by TH in the back:


Here is how I displayed the bookmarks for the medical personnel:


I hope you enjoyed my quick and easy project and please make sure to visit my blog for more inspiration and to follow me.

Enjoy the cooler days,

and stay safe from this pandemic.

September 5, 2019

DT: Gift Tags/Bookmarks for the teachers


Dear Scrappers,

This is Veronica, from Vicky's Scrapping Passion sharing my post for Craftwell:
I made some gift tags for the chocolates, I gifted to my kids teachers and wanted to share them with you:


These gift tags are very sturdy and could be use as bookmarks too. I used "Thanks" sentiment stamp from Sizzix, its complimenting circle die, and some religious sentiments dies and doilies from BoBunny for the  bookmark. I also used some Clear Scraps acrylic angel shapes, I had previously alcohol inked for some of the tags/ bookmarks, and decorated them similarly to the circle tags. For some of the tags, I also used shipboard stickers from BoBunny (see the "dream big" tag).


I used my CutNBoss for cutting out the circle tags, sentiments and dollies. I also used some leftover gold foiled printed papers and gold cardstock to cut out the circle tags, the doilies and the sentiments.

Here you can see the angel tags in better detail:


I hope you enjoyed these super easy to make tags/bookmarks and visit my blog for further ideas:

August 1, 2019

DT Post: Bookmarks/ Tags


Dear Scrappers,

This is Veronica, from Vicky's Scrapping Passion sharing my post for Craftwell:
For this post, I decided to make some religious Bookmarks/ Tags for the end of school teacher’s gifts:


I used a stamp from Prima Marketing for Mary's image and some religious sentiments stamps for the back of the bookmark. Here are the rest of supplies I used:


I used my SNAP for cutting out the tags and the main bookmark using a die set from Paper Wishes club. 


I like to add dangles to my bookmarks and these shippies from Kaiser Crafts with religious sentiments were perfect...


After I added all layers and some stickles, I laminated each bookmark and cut it to size.


I added a ribbon with the dangle and used them as tags for these beautiful orchids I found for the main teachers.

I hope you enjoyed this picture loaded post and visit my blog for further ideas:


February 27, 2019

DT-St. Valentine Goodies

Dear Scrappers,

This is Veronica, from Vicky's Scrapping Passion sharing my post for Craftwell:
We are back and ready to entertain you with new ideas and our favorite tricks.  
For this month's post, I made the goodie bags for my children' teachers and aids.


I used some Sizzix dies for the bookmarks and die cut several combinations using the SNAP machine:


I added a bookmark to each of the goodie bags:


In total I made 60 goodie bags, which made it a breeze by using the SNAP.


Steps:

1. I laminated one side of different printed cardstock from CTMH.


Here you can see one side is glossy (laminated) and the other is matte, ideal for stamping with regular inks: 


2. I was able to die cut the bookmarks in my car during my lunch breaks by using the SNAP, which can be recharged and the battery is super long lasting:


The SNAP made die cutting the laminated cardstock a breeze. The only drawback was that the one side only lamination makes the bookmark curl a little, Which can be corrected by putting the bookmark inside heavy books ;-)


3. Then, I stamped the back of the bookmarks using stamps from CTMH and inks from FSJ:


I also stamped my children names (CTMH, personalized stamp)


I also stamped plain dollar store goodie bags:


I hope you enjoyed this very simple and super easy to make gift for the teachers and visit my blog for further ideas:


June 21, 2018

DT: Teacher Appreciation Bookmarks Paper Clips

Hi,

This is Veronica from vicky's scrapping passion, sharing with you my next post for Craftwell. 
I made some bookmarks for my children teachers (my post for April) and decided to make some paper clips to go with some cookies that my friend Nancy (Nancy Fancy Cookies) made for me using the same stamp/dies:

I also gave some of the other bookmarks with these cute cookies:


and added the Teresa Collins sentiment die cuts to the back:


The paper clips were easy to convert in bookmarks by adding a piece of folded and glue together cardstock to some extra big regular paperclips I bought at Target:


I added some die cuts to the front and the sentiment and children names stamps to the back:


Craftwell Tools

Snap

Teresa Collins dies: Tags & Taps

Teresa Collins dies: Sentiment


Other Companies:

Black Archival ink, CTMH and Ranger distress oxide ink pads
Diverse bright cardstock
X sticker maker
HeroArts stamp and dies.
Liquid Gloss, Ranger


I hope you enjoyed my paper clips bookmarks. And follow my blog as well: vicky's scrapping passion.


Many blessings


Vicky Tovar


May 24, 2018

Embossed Mixed Media Bookmarks

Hello there, friends! Linsey here today sharing my latest Craftwell project--some handmade bookmarks that are super simple and fun to create! These bookmarks are great for book, journal and planner lovers alike! They take very little time to make and are beginner level, which makes them a great craft project for kids too! Take a look....
I used my trusty SNAP Machine along with Teresa Collins 2 pack A6 Embossing Folders, Beautiful Words and Stars and Twill Herringbone to emboss plain white cardstock. Next, I put down a layer of clear gesso on each bookmark and let dry completely. Finally, the fun part....coloring them up! I tried something a bit different and used some Faber-Castell Design Memory Craft Gelatos to add color to each bookmark. There are lots of other color mediums you can choose to use--try inks, sprays, paints--your imagination is the limit!
I like how they all turned out totally different and unique to one another! The embossed texture adds the perfect amount of interest without a lot of bulk. A bulky bookmark is no Bueno! ;)
You can finish with painting a layer of Mod Podge or other protective sealant over the colored bookmarks to ensure no color smearing and a longer life span. These bookmarks add a pop of color and an element of fun to your daily life. I sure hope you've been inspired to create something pretty today! Thanks so much for stopping by an letting me share my project with you! Until next time, happy crafting!

April 19, 2018

Fiesta-Themed Corner Bookmarks

Hi,

This is Veronica from vicky's scrapping passion, sharing with you my next post for Craftwell. 

For this post, I decided to use some previous die cuts and make some bookmarks for my childten teachers with a Fiesta Theme... here in San Antonio, April is Fiesta time.


In short: I cut squares of cardstock 4x4 in and scored a dot in the middle on 3 sides. Then scored diagonal between two sides and the other corner. I bent the scored corners toward the center to get a triangle sized pocket. Then, I cut a 2 3/4" x 2 3/4" square of another bright color and glued it in top of pocket. I made several bookmarks exchanging the color randomly. 

I stamped and die cut the Chihuahuas from Hero Arts and color then using Jane Davenport inks. 

I also cut many tabs using the Teresa Collins dies, Craftwell. Then, I stamped some sentiments on those tags and some negative cuts from a different project. 

To embellish the bookmarks, I cut some banner borders (Hero Arts) and corners (Craftwell) from glitter papers.

Some of the tags:


In this last bookmark, you can see how nice the sentiment fits in this cute tags die cuts. Also the versatility of the corner diecut is just amazing. 


Craftwell Tools
Cut N' Boss
Teresa Collins dies: Tags & Taps

Other Companies:
Ctmh archival ink and Ranger distress oxide ink pads
3d zots 
Liquid Gloss, Ranger
Glitter paper, printed
Colorful cardstock (any brand)


I hope you enjoyed my bookmarks and that the teachers will too. And follow my blog as well: vicky's scrapping passion.


Many blessings


Vicky Tovar


'
 
Copyright © 2014 Craftwell Blog. Designed by OddThemes - Published By Gooyaabi Templates