DO NOT MISS
>>Follow our Facebook page for updates! >>Join our Craftwell Design Team: Apply Now!
Showing posts with label Thanksgiving. Show all posts

November 12, 2021

Grateful

 Hi Everyone!

Katie here with a Thanksgiving inspiring card. 

I haven't found an opportunity to use my Spellbinder Wreath die set and since Thanksgiving to closing in soon, Thanksgiving card it is!


MATERIALS:

Craftwell Cut'n'Boss

Craftwell Woodgrain Cottage Embossing Folder

Craftwell's Pocket Dies Thankful Holiday set (used the stem with leaves die)

Spellbinders Shapeabilities Wreath Die Set of 5 (used the large wreath & stem with leaves dies)

Thanks stamp set from Amazon (used the Grateful stamp)

We R Precision Press Advanced

Variety of cardstock

ColorBox - Wicked Black

Aleene's Clear Gel - Tacky Glue

X-Acto knife

Adhesive foam squares

Twine


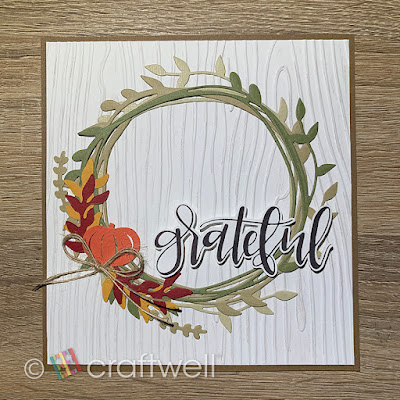
For the base card, I embossed white cardstock with Craftwell's Woodgrain Cottage folder and took it farther with a brown color pencil to somewhat have that woodgrain look.

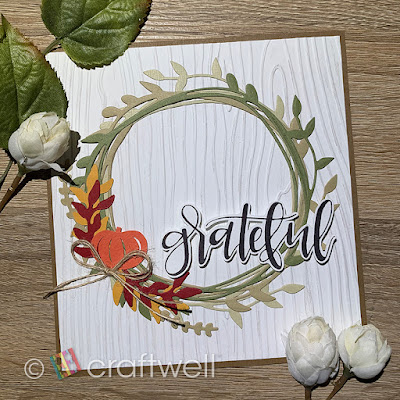
Next, I die cut 3 colors for the large wreath and arranged them in different position on the card. Did the same for the stem with leaves dies and arrange as desired. So I didn't have a pumpkin die and ended up cutting one out with a pair of scissors and X-Acto knife. If you decide to do this, please be careful and watch your fingers! Once all pieces are glued on, tie a bow with the twine and glue on as well. As for the sentiment on the front, I chose to use Grateful stamp with black ink on white cardstock and cut-out an outline of the word. Place the adhesive foam square behind the word and placed it as shown.

The finished card is shown below. 

I hope you all enjoyed my project and got inspired. Until next time!

- Katie 


November 18, 2016

Freebie Friday is a cool technique

I love Craftwell Embossing folders. You can use the to emboss as they were made to do but also to decorate fabric. This technique should work with any standard embossing folder however.


I used some textile paint, chalk paint that is recommended for fabric works great. A brayer to roll the paint over the fabric and folder.


Roll the brayer till it loads with paint.


Roll the paint filled brayer over the fabric with the folder underneath.


The design is now rolled on to your fabric ready to use. I am going to post my finished project next week.

Give this a try it is so much fun.


November 14, 2016

Pinecone Memories! Debi

I love pinecones! I love memories that I have as a child especially during the holiday season. We were of humble means and love to decorate with what was available. Pinecones were plentiful and made for some great crafting opportunities! So here with the inspiration of Craftwell's eBrush and tool kit are my Thanksgiving Dinner Place Holders. I will use these on my tablescape to add that home warmness I need so much!


Supplies:
Sharpie Adaptor
Metallic Sharpie Marker-Silver, Gold, And Bronze
Floral Wire
Scrap Cardstock


I love the eBrush and all I can do with it! I sprayed the cones with the metallic markers. I used silver first as a base. It quickly covered those pine petals.


I used my Craftwell tool kit to measure and cut my floral wire. It is very soft and doesn't damage the scissors that I used to cut it with. I also measured my cone so that I could have consistency in my 
table arrangement.


After my painting was done I then took some floral wire and wrapped it around each cone. The wire slides inside the petals. The stand it creates is so nice.


Now the little cards on top are just for fun for now. I will break out my calligraphy pens and make them come to life. I love setting my table with place cards.


Here is my finished product. Super easy and looks great too! Have a wonderful holiday!


Happy Thanksgiving!


November 11, 2016

Freebie Friday! Dinner Table Goodies!

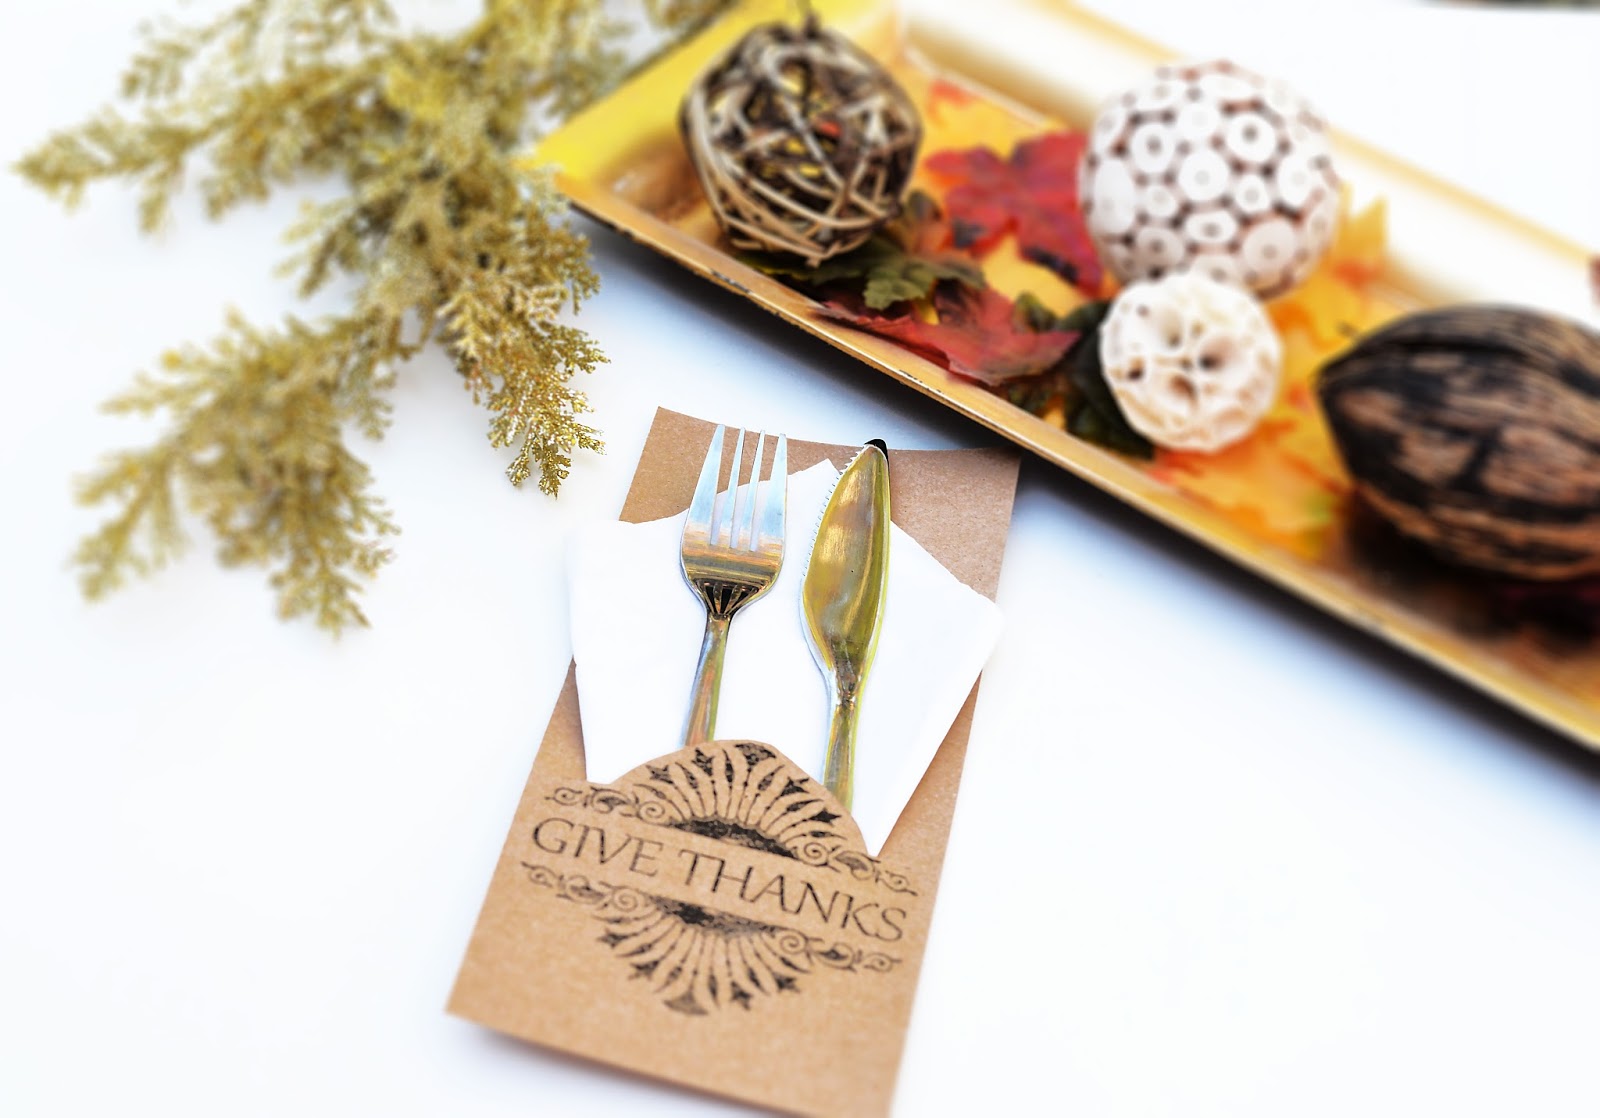
Thanksgiving is right around the corner, and this free printable will spruce up your dinner table with very little effort.  Make a big impact in little time!!

Simply download the free printable here.

Once downloaded, the file is already sized for a standard 8.5" x 11" Letter Size printer page.  I used brown kraft paper to add a shabby chic look.

After it has printed, simply trim into three separate panels.


Use an Xacto blade to cut along the top of the design as shown in green on the picture below. Do NOT cut all the way to the edges.  You want to make a pocket.


Once cut, simply insert a napkin and silverware.  Your table will be darling!


November 2, 2016

Pumpkin Thanks by Jan Hunter

2016-10-16 08.54.15 copy

We've put all the jack o lanterns, mummies, ghosts and trappings of Halloween away -- Turning the calendar to November still brings lots of fond memories of crisp leaves, pumpkins, apple cider and most importantly, family gatherings.  Pumpkin puree for pies, bread, cookies and soups and roasted seeds for late afternoon and evening snacking. Our focus word for November this year is Gratitude.  This year, I wanted to share something a little different than what what we have done in the past.  
2016-10-16 08.54.45 copy


A fun project for a simple gift to special friends is this 3-d paper pumpkin.  I love how it turned out with dry embossing and additional addition of color using the eBrush and siphon adapter.  
You'll need:
Paper (AC paper - textured burnt orange, textured dark brown and smooth white)
Electronic die cutting machine and software
SVG file (SVGCuts' Pick a Pumpkin SVG Kit)
Cut-n-boss, embossing folder and appropriate plate for the folder you're using
eBrush and siphon kit
Marker and adpator (Tombow)
Createx Airbrush Paint (orange, green)
adhesive
Hot glue gun and glue stick

Using the electronic cutting machine, cut the paper using the orange for the pumpkin and the panels, white paper for the leaf, flower and centers, brown for the stems.  Set the white paper pieces aside for right now.
2016-10-06 12.53.24 copy


Emboss the orange panels for the pumpkin in the folder you desire.  Let the Cut-n-Boss do the work.  Remove from the folder.
2016-10-06 18.31.55 copy

Using the eBrush and the siphon, spray the edges of each panel lightly with orange.  The Createx paint is pretty close in color to the AC paper. 
2016-10-06 18.39.31 copy
Change the color on the siphon (You  may also want to clean the straw so you have no orange bleed through with your green)  Using the green paint, spray on the fold lines of the pumpkin base. 
2016-10-06 18.05.07 copy
This adds just a bit more depth to the pumpkin, you could choose brown or create a burnt orange that was a little deeper -- even a red.  Most importantly, have fun. 

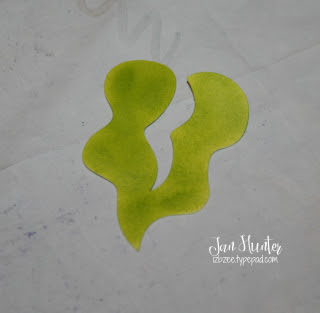
Once you have the pumpkin and panels sprayed (and cleaned your siphon), switch to the marker adaptor.  I used a couple of yellow markers, a deep brown and a dark yellow green to color the remaining white pieces for the flower and leaf.  Here's the leaf --

2016-10-06 18.09.32 copy


Glue the pumpkin, leaf and flower together as directed in this video.  
Display or gift as you desire.  As part of our gifting this year, we're including a personalize thought and card of gratitude for each person receiving one of these from our "Pumpkin Patch."
2016-10-16 08.54.30 copy
Hope you're enjoying the week of blogging by Craftwell's Creative Design Team!  There's plenty more to see this month!  You won't want to miss a single day.  For more eBrush and Cut-n-Boss projects, please drop by my blog. 


Jan  :o)
Nurture your creative heart today!

October 31, 2016

Grateful Motherhood by Sukie Dhillon


Hello!  This is Sukie and today I have a project to share focusing on "mom life".   I think it is extremely important to focus on the positive in my life.  Being a working mom with tons of daily obligations, I like to take the time to focus on the best part of my day.  One of the ways to do this is to keep a gratitude journal and with Thanksgiving right around the corner I thought it was the perfect time to create one.
My project started with a simple journal I had in my stash and I selected some fall papers from the DCWV Autumn Leaves stack for the cover.  I used my electronic cutting machine to cut out some leaves, the "grateful" title and a scalloped circle.  The Teresa Collins Herringbone embossing folder was used to emboss the scalloped circle for some added texture.  A strip of coordinating washi tape and some tulle were the perfect embellishments for the cover.
Once the cover was finished, I decided to cut a few decorative elements to add to some of the pages. The die cut pieces are from the Teresa Collins Thankful Pocket Dies, they were absolutely perfect for my journal.

All of the die cuts were transformed with my eBrush which adds so much depth and dimension.  The eBrushed leaves are so colorful and unique based upon the color of the Sharpie pens used on each leaf.  I added a few leaves to the inside of my journal too.  I plan to use the tag as a bookmark so I embellished it with a matching paper clip, button and some Totally Navy Trendy Twine.
The die cuts were adhered to a few pages leaving most of them free for journaling. I think this will be a fun way not only to document the positive in my life but also to have the family contribute during the Thanksgiving holiday.  The journal can be a great tool for memory keeping and even adding pictures.  The little kids in the family can even draw pictures. The finished journal would make such a great gift for the grandparents.
Thanks so much for stopping by!  Have a wonderful day!

November 18, 2015

Pumpkin Silverware Pocket Place Card

Cut 'n' Boss Design Team: Pam Bray Cycle 12


Hi!!! Pam today on the Craftwell Blog sharing with you a fun Pumpkin Silverware Pocket Place Card. It will be a nice way to keep your silverware and napkin together plus everyone will be able to see where to sit at the Thanksgiving Table.  The best part is you will be able to use your Craftwell Cut N' Boss and eBrush to create them!!!


 Begin by cutting out one pumpkin and stem using the Cut N' Boss, two A plates, and die with white card stock and just the pumpkin with pattern paper.  


 Repeat by running the die cut pumpkin and stem back through the Cut N' Boss using Craftwell Woodgrain Embossing Folder using the two A plates and platform.


 Using Craftwell eBrush and Copic Markers, spray the stem by first applying the orange, then the green and add a bit of brown. 


 Change the adapter tip to the eBrush.
Spray using Spectrum Markers. 
Repeat by adding a bit of the orange Copic Marker over the top. 


 Adhere the colored pumpkin to the top of pattern paper pumpkin to form a pocket. 
Ink edges with brown ink. 


 Add stem to top of pumpkin.
Fussy cut flag and leaf from pattern paper. 
Add to to of pumpkin pocket along with brown twine bow.


 Die cut a label out and write your guest name on it using a black pen. 


Now you are ready to add a special touch to your Thanksgiving Table. 


 I want to also share with you these fun label dies. 
(I used one on the Pumpkin Pocket Silverware Place Card)
Begin by covering you card base with pattern paper. 
Add rust, yellow, brown, and pattern paper mats to the front of card. 


 Cut the labels using the wafer label dies, card stock and pattern paper using the two A, B, metal shim, platform and Cut N' Boss. 
(I am always excited when I can cut so many multiples out at once with the dies, aren't you)


 Layer the labels together and place on your prepared card front with pop dots. 


 Add a fun twine bow, flower and berries to front.

 
 I hope you have enjoyed my Pumpkin Silverware Pocket Place Card and Give Thanks Card and try making some this holiday season. 
Make sure to check out the Craftwell Blog for other amazing project and inspirations. 

Hugs Pam

Supplies:
Craftwell Cut N Boss
Craftwell eBrush
Craftwell Wood Grain Embossing Folder
Sizzix Pumpkin Die
Sizzix Ornamental Labels
Copic Markers: YR14, G99. E37
Spectrum Aqua Amber, Marigold, Sunflower, Terracotta 
PhotoPlay Autumn Day
Brown Twine
Scallop Border 
Chestnut Roan Ink


November 20, 2014

Fall themed favors

Ebrush Design Team: Mitsyana Wright Week 3 Cycle 1

OH!!!! I want a favor so much! Fall in love with these great favor box by Mitsyana Wright!! Love them!

Hello Crafty Friends... Today's project are fall themed favors.

These make great little treats for coworkers or to give to your child(ren)'s classmates for school. They also look great at thank you gifts to family and friends for those "oh, so important" holiday parties!


Supplies Needed
eBrush and SN adapter
Spectrum Noir Markers (DG3, DG4, GB10, TN80
Maple Leaf die & embossing folder (Cuttlebug)
Turkey Day stamp set (Pink and Main)
Versafine ink pad (onyx black)
Cardstock (olive green and orange)
Sheet of cork (DCWV)
Twine


With you personal die cut machine cut your leaves out of green and orange cardstock. Then with the coordinating embossing folder, emboss the leaf details.


With your eBrush machine (with SN adapter head) and Spectrum Noir Markers, shade your leaves starting with your lightest green (DG3), then darker one (DG4). Do this by first ebrushing the outline of the leaf then add more depth by following the veins. Repeat using your browns... Lightest (GB10) then darkest (TN8). 


 Stamp the Give Thanks sentiment from the Turkey Day stamp set by Pink and Main,  onto a sheet of cork. I used cork from DCWV's cork stack. Punch hole on left hand side and tie one of each color leaf and tag together with twine. Attach to tin with glue dots.

Fill tin with your favorite candy. Since it's fall, I filled mine with candy corns. Not my personal favorite but my husband and kids love them. These were pumpkin spice flavored. Sounds yummy but I'll just take their word for it!

... Not a big candy corn fan (like me), try filling your favors with mints or M&M's... mmmm, chocolaaaate!!


And there you have it, super simple yet elegant fall favors.

Hope you have an awesome holiday season!

~DT Mitsy

To see more of my projects visit my blog at:
upontippytoes.blogspot.com
 join the Facebook Group devoted  to the eBrush .
Team Craftwell.
'
 
Copyright © 2014 Craftwell Blog. Designed by OddThemes - Published By Gooyaabi Templates