DO NOT MISS
>>Follow our Facebook page for updates! >>Join our Craftwell Design Team: Apply Now!
Showing posts with label Cut n' Boss. Show all posts

May 24, 2022

Meadow Flowers

Hello everyone! This is Berina here today, with a copic colored floral card with a 3D embossed background.


From my recent purchase at Technique Tuesday, I got this Meadow Flowers stamp set. I loved coloring it with Copics. For the background, I embossed a piece of coral card stock with Altenew Geo Diamonds 3D Embossing Folder, after spraying water on it. I used my Craftwell Cut N Boss for embossing. I get perfect results with 3D embossing folders all the time. I die cut the image with one of the old Divinity Design dies and adhered it on to the embossed panel.

How do you like my card today? Please do let me know in the comments. Thanks for stopping by. Have a great day!

- Berina

May 28, 2019

DT: Hearts Wood Phone Stand


Dear Scrappers,

This is Veronica, from Vicky's Scrapping Passion sharing my post for Craftwell:
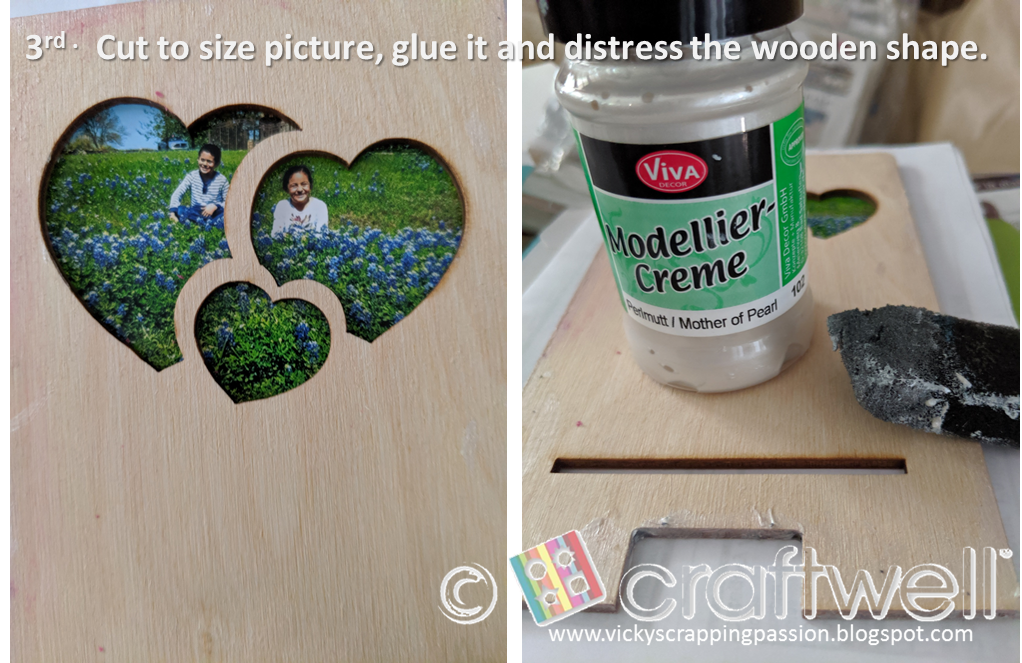
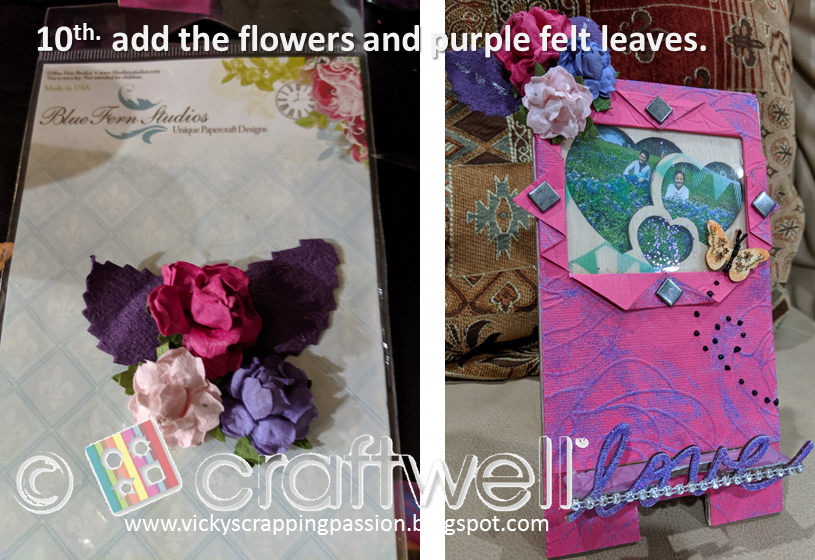
Since I saw this heart wooden stand from Clear Scraps, I thought about my Mom. Thus, I decided to decorate one for her for this Mother's day.

In short:


Different views: 


In hope you enjoyed this picture loaded post  and visit my blog for further ideas:


April 19, 2018

Fiesta-Themed Corner Bookmarks

Hi,

This is Veronica from vicky's scrapping passion, sharing with you my next post for Craftwell. 

For this post, I decided to use some previous die cuts and make some bookmarks for my childten teachers with a Fiesta Theme... here in San Antonio, April is Fiesta time.


In short: I cut squares of cardstock 4x4 in and scored a dot in the middle on 3 sides. Then scored diagonal between two sides and the other corner. I bent the scored corners toward the center to get a triangle sized pocket. Then, I cut a 2 3/4" x 2 3/4" square of another bright color and glued it in top of pocket. I made several bookmarks exchanging the color randomly. 

I stamped and die cut the Chihuahuas from Hero Arts and color then using Jane Davenport inks. 

I also cut many tabs using the Teresa Collins dies, Craftwell. Then, I stamped some sentiments on those tags and some negative cuts from a different project. 

To embellish the bookmarks, I cut some banner borders (Hero Arts) and corners (Craftwell) from glitter papers.

Some of the tags:


In this last bookmark, you can see how nice the sentiment fits in this cute tags die cuts. Also the versatility of the corner diecut is just amazing. 


Craftwell Tools: 
Cut N' Boss
Teresa Collins dies: Tags & Taps

Other Companies:
Ctmh archival ink and Ranger distress oxide ink pads
3d zots 
Liquid Gloss, Ranger
Glitter paper, printed
Colorful cardstock (any brand)


I hope you enjoyed my bookmarks and that the teachers will too. And follow my blog as well: vicky's scrapping passion.


Many blessings


Vicky Tovar


March 20, 2018

Love You Altered Embroidery Hoop Layout


Welcome to the Craftwell Blog, Desiree' here!Today I'm sharing an altered embroidery hoop I titled  "Love You", and it features the Bella Rose embossing folder by Craftwell  it's just beautiful!

The impression is SO on point! Plus I am just a sucker for Rose everything! 💕 I also used many things from my craft horde. You know, those pretty things that you try not to use! The kind I get guilt pangs for using! It's not only me? Right?! Well I used some of THOSE things!

Supplies:
Craftwell eBrush
Craftwell Cut N' Boss
Craftwell Bella Rose embossing folder
9 1/2 wooden embroidery hoop
Gold Sharpie
Deep Blue Sharpie
Hot glue gun
White gesso
White acrylic paint
Patterned papers
White vellum paper
Wooden butterflies
Sequined trim
Lace ribbons
Flower cabochons
Paper flowers
Double sided tape
Glue sticks


The first step in making this altered embroidery hoop, was choosing the papers, trims, embellishments, and the picture I was going to use. The next step was to emboss my vellum.
I decided to use the Bella Rose embossing folder because to me it's just gorgeous!


After it was embossed beautifully, I knew I needed to cut my papers to fit the hoop's circular
shape. I trace around the outside of the hoop on both my vellum and patterned papers.
Then I decided to get out my beloved eBrush, and ebrushed around the circle before cutting
them out by hand.


Next I separated the 2 parts of the hoop. I covered them in gesso and let them dry.
Then I painted both parts white and let them dry. Once all that was done I took my
embossed vellum and adhered it to my patterned paper. I wanted to mute the paper a bit.
That is why I chose to put embossed vellum over the patterned paper. I wanted the pic to pop!
I took my papers that had been cut into a circle to fit the embroidery hoop and hot glued it to
the back of the hoop. I hot glued my sequined trim around the front of the hoop, and adhered
flat-backed pearls around the inside edge of the hoop. I used my electronic cutting machine to
cut out a mat for my picture, and cut out some paper bows too. I did some more eBrushing to
the edges of the bows and mat using my deep blue Sharpie.
I matted my picture, decided where I liked all my elements then glued them into place. I cut
some of my ribbons and trims, so that they could hang down from the hoop. I then placed some cabochons and butterflies to the bottom of  a few of the strands. The following pictures are the end result.


I love altering embroidery hoops! If you have not made one yet, I encourage you to give it a try!
They are affordable and I warn you addictive to make, and so much fun! It is my hope that you liked what you have seen and that some how you were also inspired!

                             Have a blessed day!   - Desiree'


August 28, 2017

Limited Edition Cut n' Boss Now Available!

Limited Edition Cut n' Boss Now Available


The Limited Edition Cut n' Boss is now available, exclusively at Create and Craft UK!  This beauty boasts metallic rose accents and an incredible bundle at a great value through August 29th. Yes, that is tomorrow, so hurry!

Here is what you need to know:

Only On Create and Craft UK Click Here
Launching at £199.99 with free Tattered Lace Dies (£52.97 value!)
Special Bundle Ends August 29, 2017 at 7:59am


May 12, 2016

Graduation Invitation by Yolie Burke

It's graduation season.  Hello, this is Yolie sharing the graduation invitations I made for my niece's party.

They were quick and easy to make.  I took a free pocket file and cut it on my electronic machine.  I then used the Cut N Boss to emboss the pocket with a music note embossing folder.


Here is one of the 15 invitations I made.  The embossing is simply beautiful.


Thanks for visiting and enjoy your week.

April 13, 2016

Clean and Simple Card Collection by Pam Bray

 Hi it is Pam today on the Craftwell Blog
I am sharing with you a Clean and Simple collection of cards using 
One Stamp...One Style. 
 Cut 4 pieces of pink Cor'dinations paper. 
Emboss using Honeycomb Embossing Folder along with two A plates and D plate. 
 Sand lightly with sanding block. 
 Using one stamp set with just sentiments. 
Stamp and emboss 4 cards using black embossing powder and VersaMark. 
 Cut 4 pieces of Teresa Collins Summer Stories Paper.
Die cut using mixed media die along with two A plates, B plate, metal shim and D platform.
 Die cut 4 of the scribble circles from die cut set with black card stock. 
 Adhere embossed paper to black card stock mat.
Adhere to card front. 
Adhere die cut pattern paper to black card stock mat. 
Adhere to card front. 
 Apply adhesive to scribble die cuts.
(I used the Xyron Creative Station.)
 Place prepared scribbles to top of card front. 
 Die cut 8 butterflies from the Memories Pocket Die Set using 2 A plates, B plate, metal shim and D platform. 
 Adhere one butterfly to top of each of the 4 card fronts. 
 Adhere next four butterflies to each of the card front at just the body.
Bend wings up. 
Emboss 4 small leaves using embossing powder.
Adhere prepared leaves to center of each of the butterflies. 
 Here is a closer look at the Happy Birthday and Thank You Cards.....
 And of the Hello Friend and Thinking of You Card. 
I hope I have encouraged you to create a collection of Clean and Simple Card using the One Stamp...One Style using your Craftwell dies and embossing folders. 
Hugs Pam
 
Supplies:
Craftwell Cut N Boss
Craftwell Honeycomb Embossing Folder
Craftwell Memories Pocket Die Set
Teresa Collins Summer Stories
Cor'dinations Pink Paper 
Stampendous Happy Messages
Sizzix Mixed Media Dies
Sizzix Scribbles and Splats Dies
Emerald Creek Embossing Powder
Stampendous Black Embossing Powder
Stampendous Boss Glass
VersaMark
Clear Gemstones
4 Cream Card Bases



April 3, 2016

Craft Corner DIY Video Episode 13

Craft Corner DIY Video Episode 13


Emily Rudolph and puppy sidekick Gotham bring you some easy DIY projects using your eBrush and Cut n' Boss.


'
 
Copyright © 2014 Craftwell Blog. Designed by OddThemes - Published By Gooyaabi Templates