DO NOT MISS
>>Follow our Facebook page for updates! >>Join our Craftwell Design Team: Apply Now!
Showing posts with label Craftwell eBrush. Show all posts

April 7, 2023

3D Flower Bouquet

Hi All!! 

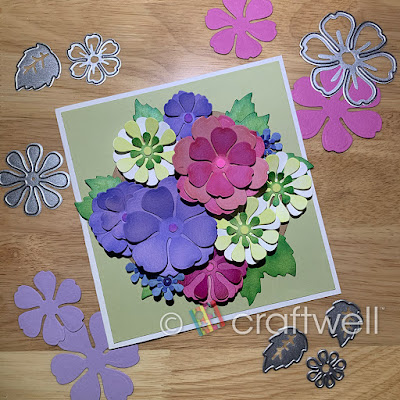
Katie here with my 3D flower bouquet card and can be used for any occasion.


Materials

Craftwell eBosser

Craftwell eBrush Airbrush System

Sharpie markers

Flower die set from Amazon

Nail Art pieces (used the circles)

Cardstocks

Glue gun

Elmer's glue stick


The flowers and colors got inspired by spring flowers I had found on a google search when I needed some ideas. You can do the same.

First, I used the eBosser to cut out all the different flower shapes with different cardstocks that I picked out.

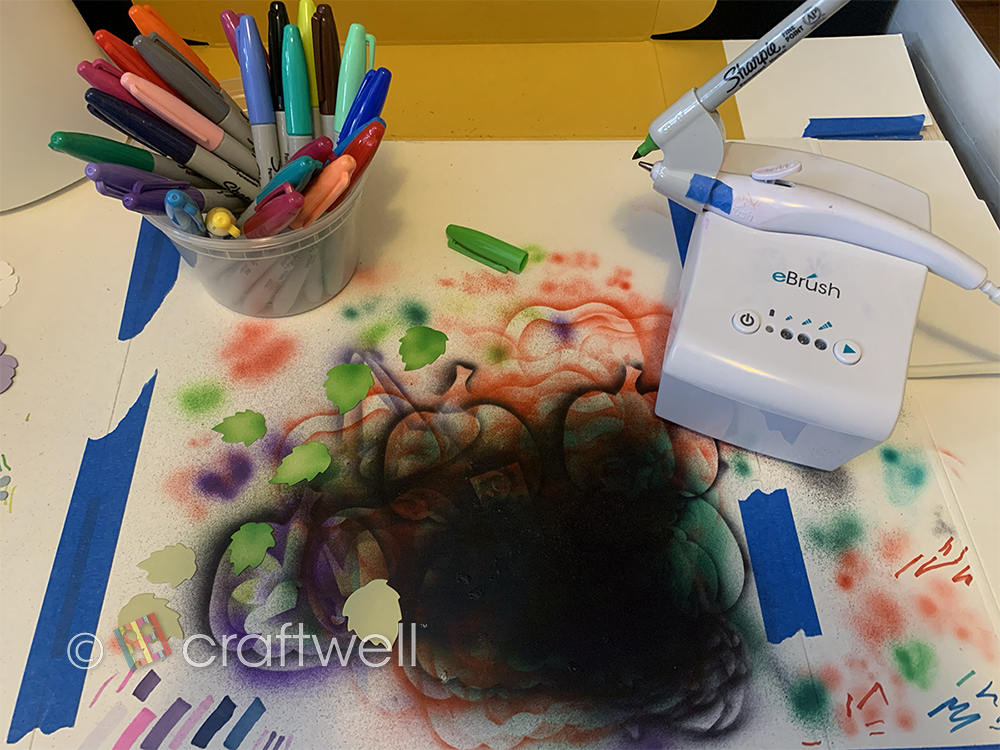
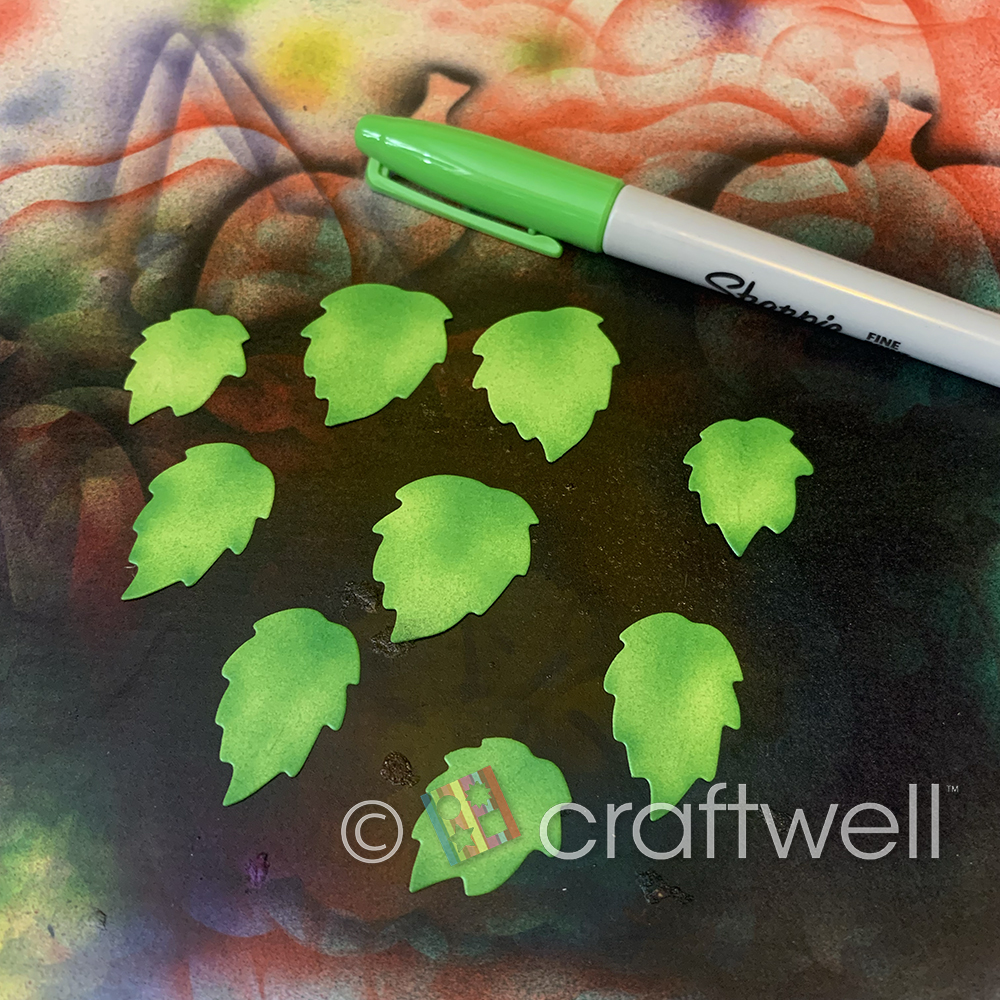
Used the eBrush and Sharpies to color the flowers and leafs.


I had fun playing with the position of the flowers and placing them as desired. 
When placing the flowers near each other, I wanted to have them overlapping each other and made little cardstock cylinder pieces to give some flowers different heights. 
You'll be able to see what I mean in the photos below:


What do you think? 
This card can be used for Birthdays, Anniversary and even Mother's Day.
I hope you all liked my project and got inspired. Until next time!

- Katie


April 15, 2022

Airbrush Tote Bag

 Hi everyone!

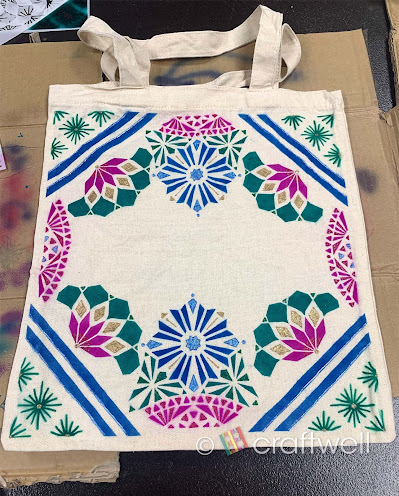
Katie here with another project using the eBrush Airbrush System and anyone can do.

I'm those type of people who brings a reusable tote bag with me everywhere and I thought it would be find to customize my own. This is a fun project for all ages.


Materials:

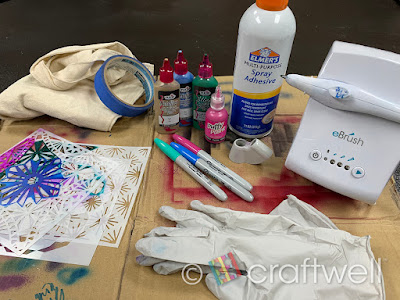
Craftwell eBrush Airbrush System

Sharpie Markers

Blank Canvas Tote Bag (I got mine from a 99 cent store)

Variety of stencils from Amazon

Tulip Dimensional Fabric Paint - Metallic Blue, Metallic Gold & Slick Leaf Green

Puffy Paint - Red Violet

Scotch 3M Painters Tape

Elmer's Multi-Purpose Spray Adhesive

Gloves

Cardboard pieces


First thing, I chose 3 different stencil designs I can play around with and work well together. Also chose 3 different marker colors and 4 fabric paints that compliment each other.

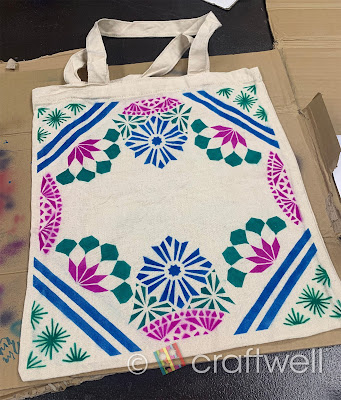
Take a piece of cardboard, placed it inside the tote bag so the colors don't bleed through and gives me a somewhat flat surface to work on. Taking the scotch painters tape, I line a border and other places I don't want to get airbrushed. *Make sure tape is close to the tote because any open gaps will not give you clean lines. 

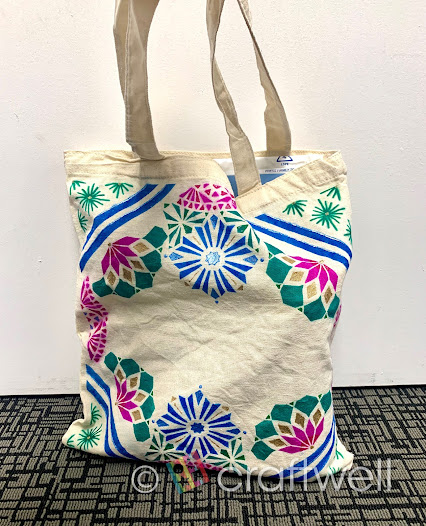
Taking my first stencil, I used the painters tape to hide some of the details I don't want to airbrush onto the bag. I used the spray adhesive to help keep the stencil in place which worked better than taping it to the bag because when I taped down the stencil, it wasn't able to hold down the intricate details and you won't get clean lines. I only realized this after it happened to me and you might be able to see it on the tote bag. Trial and errors. *Make sure to read the instructions on the spray adhesive can before using.


With each stencil, I alternated with each marker and had fun with each placement. When that was done, I did the same with the fabric paint. Make sure to let it dry or it will smudge and again I did learn the hard way 😅


Hope you all enjoyed my project. Until next time!!

Katie


July 16, 2021

Unicorn Cake

 Hello everyone!

This week bringing you another unicorn cake with airbrushed horn using siphon kit and Craftwell eBrush.

I began with baking a mango cake and frosted with buttercream. Used rainbow colored buttercream to pipe rosettes on top. Then made horn, ears and eyelashes using fondant and let it dry for 24hrs. 

For golden color for the horn, have filled siphon kit with gold airbrush colors and airbrushed the magical horn with Craftwell eBrush and let it dry before putting on the cake.

Attaching the picture for reference. 


Thank you everyone for having a look at my work!!

Have a wonderful week .

With love,

Lavanya Ravindran,


September 17, 2020

Airbrushed Firetruck Cake

Hello friends! Today I'm here with simple Firetruck Cake designed using Craftwell eBrush with siphon kit.

I baked a eggless vanilla cake of 6 inch and layered with fresh strawberry compote. Frosted using whipped cream of white.


The client is very keen on specific blue which can't be achieved with mixing food colors in whipped cream. So I used my Craftwell eBrush to achieve the desired color. The below picture shows the airbrush effect on cake.


Here is the final look of the firetruck cake.


Thanks everyone for stopping by!

With love,

Lavanya Ravindran,

La Cakes


August 11, 2020

Airbrushed Coffee Mug Cake

Hello everyone! Today, I've got a 3D cake design which I used the Craftwell eBrush.

I began with baking chocolate cake, stacked cake of 4 layers and carved them to achieve a coffee mug shape. Once I got the desired shape, frosted the mug carefully using whipped cream.

For the handle, I used fondant with wire support to hold the handle shape. You will see the mug shape cake below:

Then I used my Craftwell eBrush & siphon kit to color the mug cake in a brown shade. It's so simple and easy with the eBrush is in hand to achieve the design.
Though the shape is not perfect, I'm still happy with my result. I hope you all were inspired and make your version ;)
Thanks everyone for stopping by!!

With love,
Lavanya Ravindran,
La Cakes

June 26, 2020

A Happy Moment (upcycled wood block)


Hello all you Makers! Desiree, here again to share my latest Craftwell make!
This one is very special to me, as the picture which is the star of this project has some of my most precious loved ones in it! They are my precious mom, Lana, my Aunt Linda, and my Aunt Sherry, who sadly gained her angel wings last November.
Anyways, onto the pics of the project and the other details! Just had to share a bit about my loved ones first!

After being inspired by the pic of my mom and aunts, I knew that I wanted to make something featuring it! It must be girly AND it MUST express happiness! I decided to upcycle a recent good will find. A 4in. x 4 in. wood block. I painted it white and after drying, I cover it with some FolkArt Extreme Glitter paint. After the layer was dried I used some Prima Effect Paste in Unicorn from Art Extravagance. Once that dried I sealed it with a clear aerosol sealer. I also used some Precision Craft Glue from Bearly Art!


I had to feature my cute SNAP Machine and the dies she would be cutting for me. Right?! I decided to use the Craftwell Happy die, which has been in my stash in forever and it's a go-to for sure! I also used a die by Anna Griffin, that I found on-line recently and waited to get! It is one of her pretty pocket dies, and I love it! For this project though, once it was cut out I had to mid the die cut a bit. I was happy with the end result.


I used my eBrush by Craftwell, of course! To do some shading to my die cuts. I did some distressing to my background paper, "happy" element, and to the bow.
For the happy banner element, I traced and hand cut an inset background piece from a scrap of paper.


I pieced together and adhered my distressed background piece, and my pocked piece that I modded.
I realized my little distressed bow needed an accent piece, so I got out these adorable dot embellishments I have had FOREVER. Found them in my stash, I remember buying them from Michael's YEARS ago!! Heheheh. I love them! 


I was wanting more for this project! To the stash I went! I found these old school K & Company daisies, and these adorable blinged out hearts that I got from hobby lobby a while back.
These made my heart so happy! I did not use that pink dot however. On the bow was just enough of
those I thought.


Here is the final product. I kind of love the end result! I more than love this precious picture, and the moment of happiness that was caught! I am so very blessed to have such wonderful women in my family! I am so blessed! I hope you find yourself blessed! I also hope you have been inspired!


Please remember to come back, check out what me and my fellow design team members are up to! I hope you have an amazing day!!

           ðŸ’– - Desiree'
'
 
Copyright © 2014 Craftwell Blog. Designed by OddThemes - Published By Gooyaabi Templates