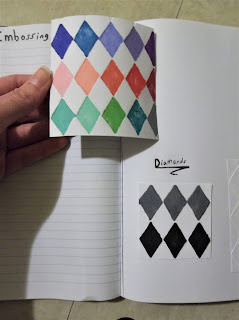
This is a little guide book I put together as a reference for my crafting tools. In this, you can put in samples of each cut-out and texture that can be made with the Cut n' Boss, color references when you need to find just the right shade with the eBrush, and more! Instead of taking time away from crafting to test your materials, this book will have everything you need to use as a reference right now!
Materials:
A notebook
Decorative paper
eBrush
Cut n' Boss
die cuts and embossing folders
Sharpies
Gluestick
Hot Glue
Double sided tape
The journal I picked has blank pages on the right, and note taking pages on the left, which was perfect for what I wanted! However, I didn't like the cover, so I picked out some decorative paper and traced around the book for a fancier look. Cut 2 separate pieces for the front and back.

Make creases where the folds should be. The folds for the edges is similar to wrapping a present.
Cover the binding edge with a piece of ribbon wide enough to reach the edges of the paper. Hot glue sides of the ribbon to the edge of the decorative paper. Do not put glue directly down the center of the ribbon, otherwise the book won't open properly and the ribbon might come off.


Now you can practice and experiment with your Cut n' Boss! I started by coloring in different embossing patterns.
Attach the embossed paper with double stick tape.
Next I moved on to the die cuts, and used my eBrush to make them look pretty! For some of these I had to use a glue stick to attach to the paper.
While I had my eBrush out, I filled a page using all my different colored sharpies!
And there ya go! Don't forget to add to your book as you find new techniques.


Awesome, I have not used the machine myself but looks prettty neat. If you want you can also tell your visitors to check out http://www.freesvgimages.com if they want free svg files for their prints.
ReplyDelete