
Break out your eBrush! This is a perfect project to put that bad boy to use. Thank you, eHow for the inspiration!

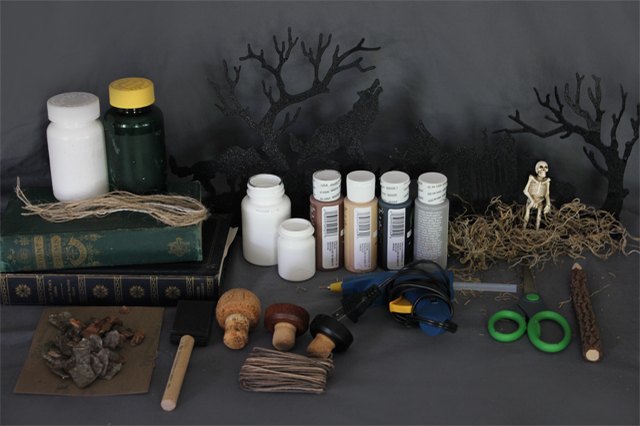
Things You'll Need
- Empty pill bottles, labels removed
- Sandpaper, 60 or 80 grit
- Hot glue gun
- Foam brush (or eBrush)
- Chalkboard paint, varying shades of black and brown
- Scissors
- Twine
- Spanish moss
- Tree bark (optional)
- Wine cork
Tip
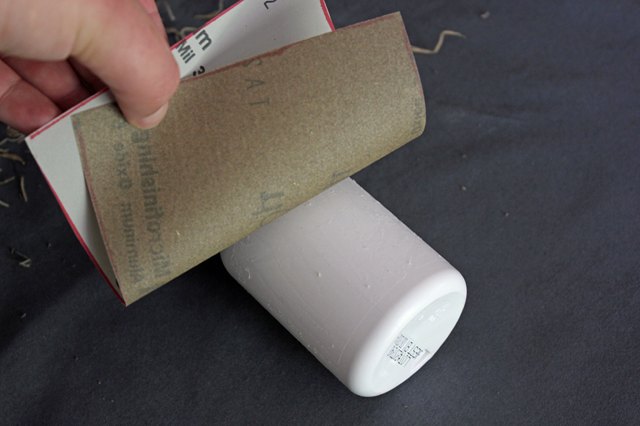
Step 1
Sand the pill bottles until the finish is no longer glossy. This creates a rough surface for the paint to adhere and adds a distressed, old texture to the finished bottles.
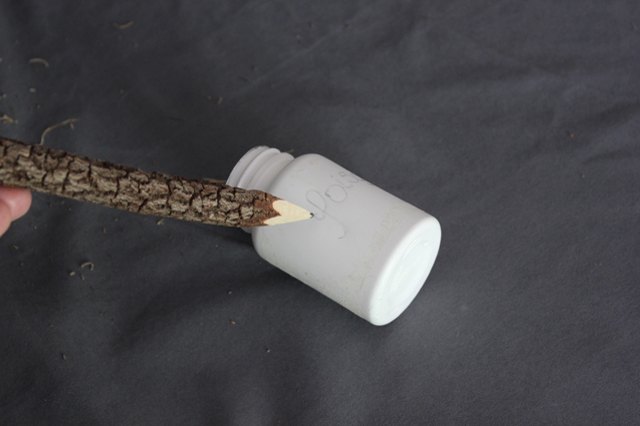
Step 2
Use a pencil to outline the name of your potion or ingredient on the surface of the pill bottle.
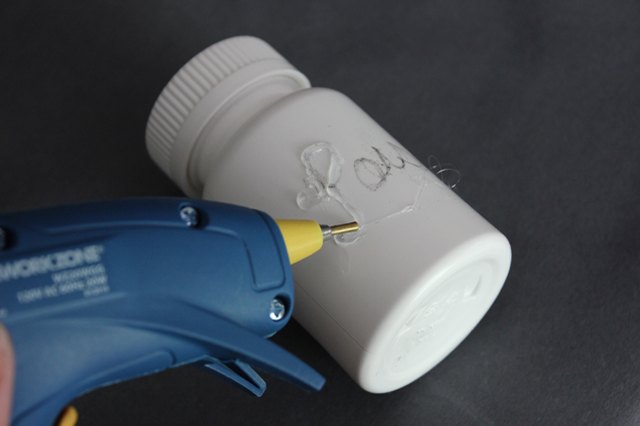
Step 3
Trace the pencil outline with the hot glue gun and allow the glue to dry completely.
Warning
Step 4
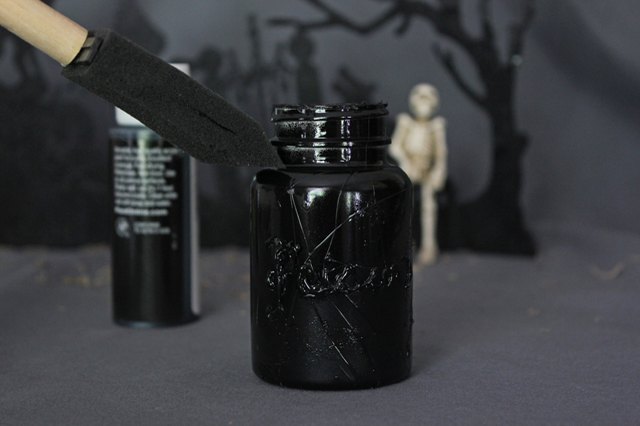
Use the foam brush or your eBrush and siphon to apply a coat of the base color to the bottle. Rather than using paint strokes to apply the paint, dab the foam brush on the bottle to create a textured finish. Allow the paint to dry completely, and apply a second coat of the base color.
Step 5
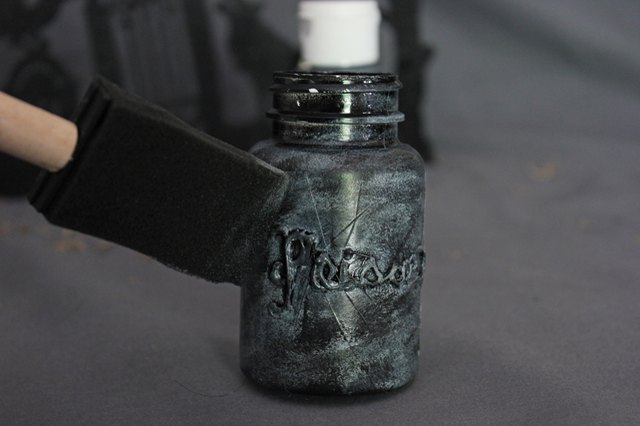
Apply a coat of contrasting color to the bottle with the foam brush or your eBrush and siphon. Use the same dabbing technique used with the base color to apply the contrasting paint color. Do not completely cover the bottle with the contrasting color. The base color should still be visible underneath the contrasting color.
Step 6
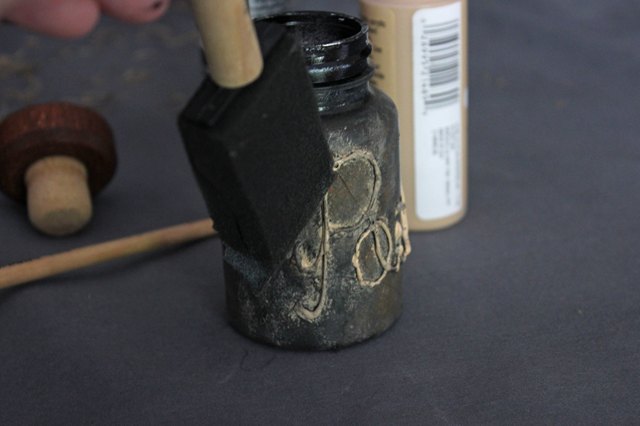
Use a third color to highlight the letters you traced. Use the tip of the foam brush to keep the paint mostly on the letters.
Step 7
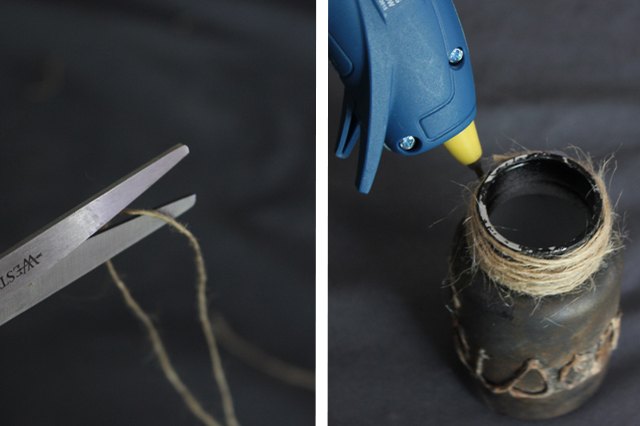
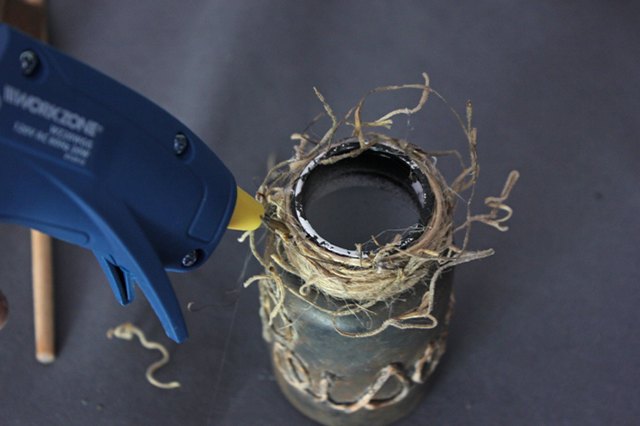
Cut a 2-foot piece of twine and wrap it around the top of the bottle. Use the hot glue gun to secure the twine in place.
Step 8
Loosely wrap Spanish moss around the twine and glue in place with the hot glue gun.
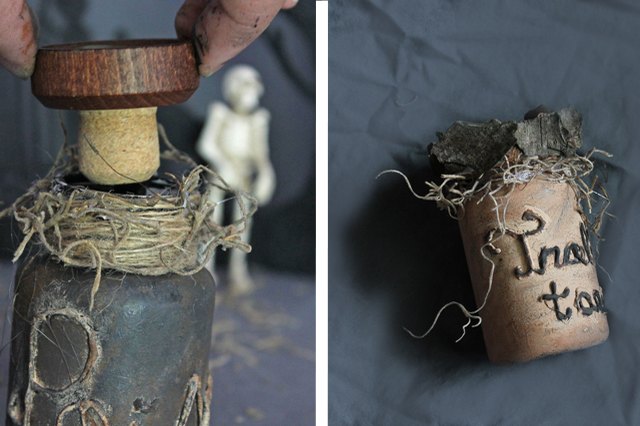
Step 9
Place a wine cork in the top of the bottle. If you want to use the original pill bottle top instead of a cork, glue some tree bark to the outside of the cap and place the cap back on the bottle.
Tip
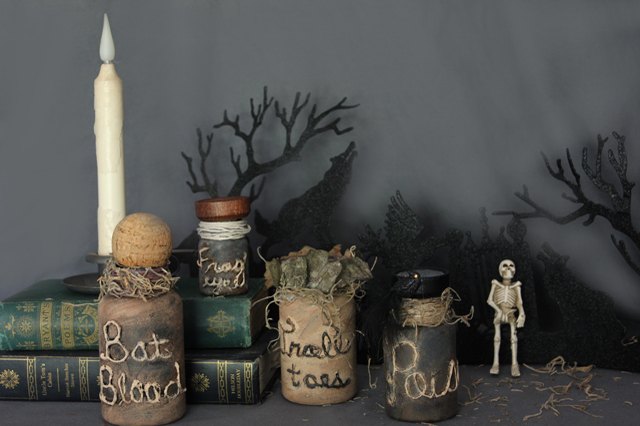
When complete, choose a spot to proudly display your new witch's potion jars.


Post a Comment