Happy Monday, Crafty Friends!!
I'm back starting off a new week with the Cut'n'boss Team. This week the team we will be featuring the Teresa Collins A6 Embossing Folders!! And for today's project I used the Teresa Collins Alpha Folder (from the Decor & Alpha Pack) to make this bright and cheerful tag.
I
Other Supplies Used
Cut'n'boss (Craftwell)
Assorted Teresa Collins Pocket Dies (Craftwell)
Autumn Leaves Mini Stack (DCWV)
Mega Runner (Xyron)
Distress Tool (Tonic)
Crop-a-dile (We R Memory Keepers)
Jumbo Java (Imagine Crafts)
Ink Sweeper (Imagine Crafts
Glue Pen (EK Success)
Glossy Accents (Ranger)
Paper Trimmer (Fiskars)
Scissors (EK Success)
Scuffers (Lasting Impressions)
First, I started by creating a tag. I used paper from the Autumn Leaves Mini Stack. I wanted to make it a relatively large take but didn't have a tag die big enough. I thought of an easy solution... create my own. I measured a piece of cardstock to 4"x6".
I snipped a corner of one side of the tag. Placed the cut off piece face down onto the opposite side. Then I used that piece as a guide and cut off the other corner. Doing this helps to make both sides even.
I used a distressing tool to rough up the edges.
Then, inked the distressed edges with Jumbo Java and an Ink Sweeper.
Then, in coordinating paper, I cut a piece of cardstock measuring 3"x 3-1/8"; and another measuring 4"x 4-1/8".
I embossed the 3"x 3-1/8" using the Teresa Collins Alpha Embossing Folder and ran it through my Cut'n'boss machine.
To emboss with the Cut'n'boss, I used the following platform combination:
From Bottom to Top
D PLATE
A PLATE
EMBOSSING FOLDER & PAPER
A PLATE
One my paper was embossed, I opened my folder and sanded the top layer off the raised impression to make the embossing stand out more. I leave my paper in place on the folder while doing this. This helps keep the raised image from being smashed down.
Then I used left over pieces of cardstock from my previous cuts to die cut leaves and flowers. The great thing about using my scraps is that the paper I used not only coordinates with each other but they also are double-sided. All I did was flip my paper over to give the appearance of different paper, without waste.
After die cutting my leaves and flowers I inked all the die-cuts with more Jumbo Java.
I stacked my flowers biggest to smallest. Then fastened them together with an eyelet.
I folded each flower petal in half and toward the center to make it more dimensional.
Using my Mega Runner, I matted my embossed cardstock onto the 4"x4-1/8" piece. Then attached that piece to the tag base.
I used a glue pen to attach my die-cut leaves.
Then, used glossy accents to attach my flower.
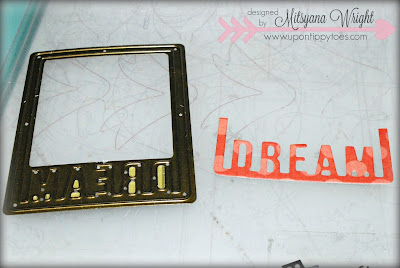
Next, I die cut just the word "DREAM" from the Teresa Collins Frame Die (Noteworthy Set) and trimmed off the ends of the word.
Then, adhered it to the tag in an arch.
Finally, I punched a whole in the tag, tied hemp twine into a multi-loop bow and fastened it.
And, here is my finished tag...
I hope you enjoyed my project for today!!
To see more inspirational projects visit my personal blog at:
Hope to see you next time!
~Mitsy


Post a Comment