Hello everyone! Barbara here today. This month, the Craftwell USA eBrush design team is stepping outside their comfort zone and making something new to their own individual style. I chose to make a couple of cards, clean and simple (CAS), and ever so easy. This was definitely not what I am used to making. So, here goes.
While that was drying, I started working on my background papers. I chose these two Teresa Collins embossing folders and ran them through my die cutting machine using glossy white card stock. The one on the left is the Swirltangle embossing folder, while the smaller one on the right is from Teresa's Timeless collection.
I trimmed a couple of sections from the Swirltangle embossing folder. My clay pieces are dry and ready for color, too.
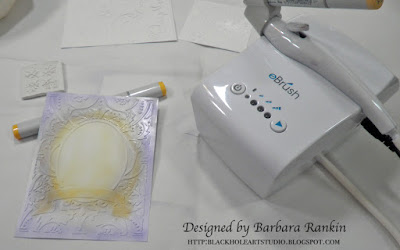
With the Timeless embossed piece, I first colored the background with Y32 and BV01. I kept the center light so my focal image would pop.
Next, I eBrushed the Eiffel Tower molded piece made from the Lumina clay with B24 Sky. I darkened some areas by simply keeping the eBrush color in one spot. You can get lots of definition using just one marker.
I layered a piece of yellow print paper , then my embossed background, then the Eiffel Tower piece. I used some matching blue chalk ink to stamp "Paris" over the banner.
Next, eBrush a light coat of YG06 over the background. I also edged it with brown distress ink.
eBrush YR24 Pale Sepia around the edge for a bit of aging.
Add brown distress ink pad direct to the Paperclay to hit only the high spots and edge the sides to bring out the rough texture. It makes it look like an ancient artifact.
Layer a piece of matching print paper, then adhere the embossed paper, then the stamped clay tile.
For my sentiment, I used another label piece from the Swirltangle embossing folder, colored it to match the previous embossed square, and added the "Go For It clear sticker.
Supplies used:
Craftwell USA eBrush
Teresa Collins embossing folder - Swirltangle
Teresa Collins embossing folder - Timeless
Glossy card stock
Molded embellishments
Lumina air dry clay
Creative Paperclay
Rubber stamps - tile, alphabet
Silicone mold - Eiffel Tower
Copic Markers: Y32 Cashmere, BV01 Viola, B24 Sky, B52 Soft Greenish Blue, YG06 Yellowish Green, R32 Peach
Ink Pads: brown distress, blue chalk
Clear word stickers
I love my eBrush!!!
Thanks for stopping by, and be sure to stop by the Craftwell blog for more inspiration from the team.
Have a wonderful and creative weekend!


Post a Comment