We've put all the jack o lanterns, mummies, ghosts and trappings of Halloween away -- Turning the calendar to November still brings lots of fond memories of crisp leaves, pumpkins, apple cider and most importantly, family gatherings. Pumpkin puree for pies, bread, cookies and soups and roasted seeds for late afternoon and evening snacking. Our focus word for November this year is Gratitude. This year, I wanted to share something a little different than what what we have done in the past.

A fun project for a simple gift to special friends is this 3-d paper pumpkin. I love how it turned out with dry embossing and additional addition of color using the eBrush and siphon adapter.
You'll need:
Paper (AC paper - textured burnt orange, textured dark brown and smooth white)
Electronic die cutting machine and software
SVG file (SVGCuts' Pick a Pumpkin SVG Kit)
Cut-n-boss, embossing folder and appropriate plate for the folder you're using
eBrush and siphon kit
Marker and adpator (Tombow)
Createx Airbrush Paint (orange, green)
adhesive
Hot glue gun and glue stick
Using the electronic cutting machine, cut the paper using the orange for the pumpkin and the panels, white paper for the leaf, flower and centers, brown for the stems. Set the white paper pieces aside for right now.

Emboss the orange panels for the pumpkin in the folder you desire. Let the Cut-n-Boss do the work. Remove from the folder.

Using the eBrush and the siphon, spray the edges of each panel lightly with orange. The Createx paint is pretty close in color to the AC paper.
Change the color on the siphon (You may also want to clean the straw so you have no orange bleed through with your green) Using the green paint, spray on the fold lines of the pumpkin base.
This adds just a bit more depth to the pumpkin, you could choose brown or create a burnt orange that was a little deeper -- even a red. Most importantly, have fun.
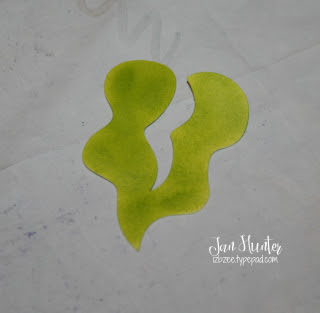
Once you have the pumpkin and panels sprayed (and cleaned your siphon), switch to the marker adaptor. I used a couple of yellow markers, a deep brown and a dark yellow green to color the remaining white pieces for the flower and leaf. Here's the leaf --

Glue the pumpkin, leaf and flower together as directed in this video.
Once you have the pumpkin and panels sprayed (and cleaned your siphon), switch to the marker adaptor. I used a couple of yellow markers, a deep brown and a dark yellow green to color the remaining white pieces for the flower and leaf. Here's the leaf --

Glue the pumpkin, leaf and flower together as directed in this video.
Display or gift as you desire. As part of our gifting this year, we're including a personalize thought and card of gratitude for each person receiving one of these from our "Pumpkin Patch."
Hope you're enjoying the week of blogging by Craftwell's Creative Design Team! There's plenty more to see this month! You won't want to miss a single day. For more eBrush and Cut-n-Boss projects, please drop by my blog.
Jan :o)
Nurture your creative heart today!


No comments:
Post a Comment