
Hi everyone!
Katie here with another project using the eBrush Airbrush System and anyone can do.
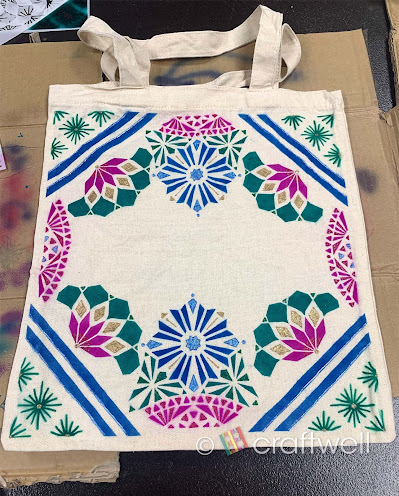
I'm those type of people who brings a reusable tote bag with me everywhere and I thought it would be find to customize my own. This is a fun project for all ages.
Materials:
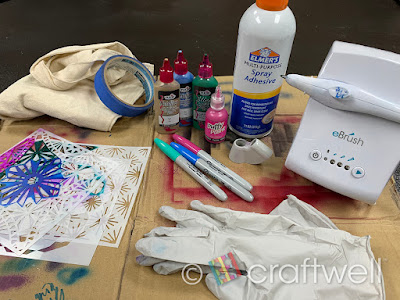
Craftwell eBrush Airbrush System
Sharpie Markers
Blank Canvas Tote Bag (I got mine from a 99 cent store)
Variety of stencils from Amazon
Tulip Dimensional Fabric Paint - Metallic Blue, Metallic Gold & Slick Leaf Green
Puffy Paint - Red Violet
Scotch 3M Painters Tape
Elmer's Multi-Purpose Spray Adhesive
Gloves
Cardboard pieces
First thing, I chose 3 different stencil designs I can play around with and work well together. Also chose 3 different marker colors and 4 fabric paints that compliment each other.
Take a piece of cardboard, placed it inside the tote bag so the colors don't bleed through and gives me a somewhat flat surface to work on. Taking the scotch painters tape, I line a border and other places I don't want to get airbrushed. *Make sure tape is close to the tote because any open gaps will not give you clean lines.
Taking my first stencil, I used the painters tape to hide some of the details I don't want to airbrush onto the bag. I used the spray adhesive to help keep the stencil in place which worked better than taping it to the bag because when I taped down the stencil, it wasn't able to hold down the intricate details and you won't get clean lines. I only realized this after it happened to me and you might be able to see it on the tote bag. Trial and errors. *Make sure to read the instructions on the spray adhesive can before using.
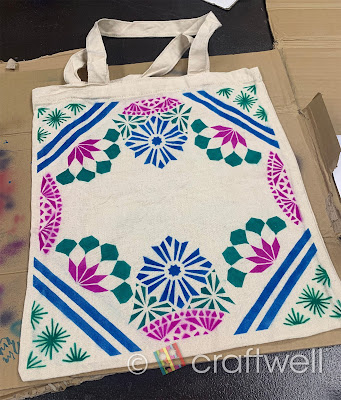
With each stencil, I alternated with each marker and had fun with each placement. When that was done, I did the same with the fabric paint. Make sure to let it dry or it will smudge and again I did learn the hard way 😅
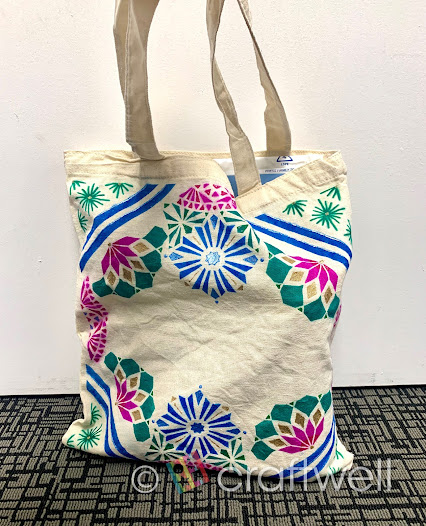
Hope you all enjoyed my project. Until next time!!
Katie
No comments:
Post a Comment