Hi!!! Pam here today sharing my "Celebrate" Wall Hanging using
Sabor Amor Pattern Paper and my Cut N Boss.
I began by running pattern paper through my Xyron Creative Station.
(If you don't have a machine forgo this step and just adhere to chipboard with your favorite adhesive.)
Place pattern paper in Craftwell Honeycomb Embossing Folder.
Emboss using the Cut N Boss, two "A" plates and "D" platform.
Adhere to piece of 8" x 8" chipboard.
Sand lightly with sanding block.
Die cut Lacy Doily die using Cut N Boss and two "A" plates along with pattern paper.
Cut edge off of doily.
Adhere doily and fussy cut borders to top of prepared chipboard.
Adhere pattern paper to top of mat board.
Die cut Frame #2 using two "A" plates and Cut N Boss.
Adhere to prepared chipboard.
Die cut "Celebrate" using the Alphanumerical Marquee Letters using the Cut N Boss, two "A" plates, "B" plate, shim and "D" platform.
Fussy cut banner out from pattern paper.
Adhere to front of prepared chipboard with pop dots.
Add die cut "Celebrate" letters to the banner.
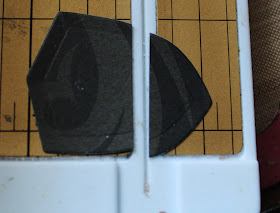
Die cut Shield Label using two "A" plates, "B" plate, shim and "D" platform using Cut N Boss and pattern paper.
Cut tip off of each shield.
Adhere to banner along with lavender twine.
Fussy cut "Mi Fiesta" from Sabor Amor Journal paper.
Adhere to front of prepared chipboard.
Fussy cut two Amor Love Birds from Sabor Amor pattern paper.
Layer together with pop dots.
Adhere to prepared chipboard.
Repeat with the pinata images.
Add enamel dot to border.
Finish Celebrate Wall Hanger with bow made from lavender twine.
I hope I have inspired you to make some pretty celebration decorations for your next party.
Make sure to check out the Sabor Paper Store HERE and Craftwell Products HERE!!!
Hugs Pam
Supplies:
8" x 8" chipboard


No comments:
Post a Comment